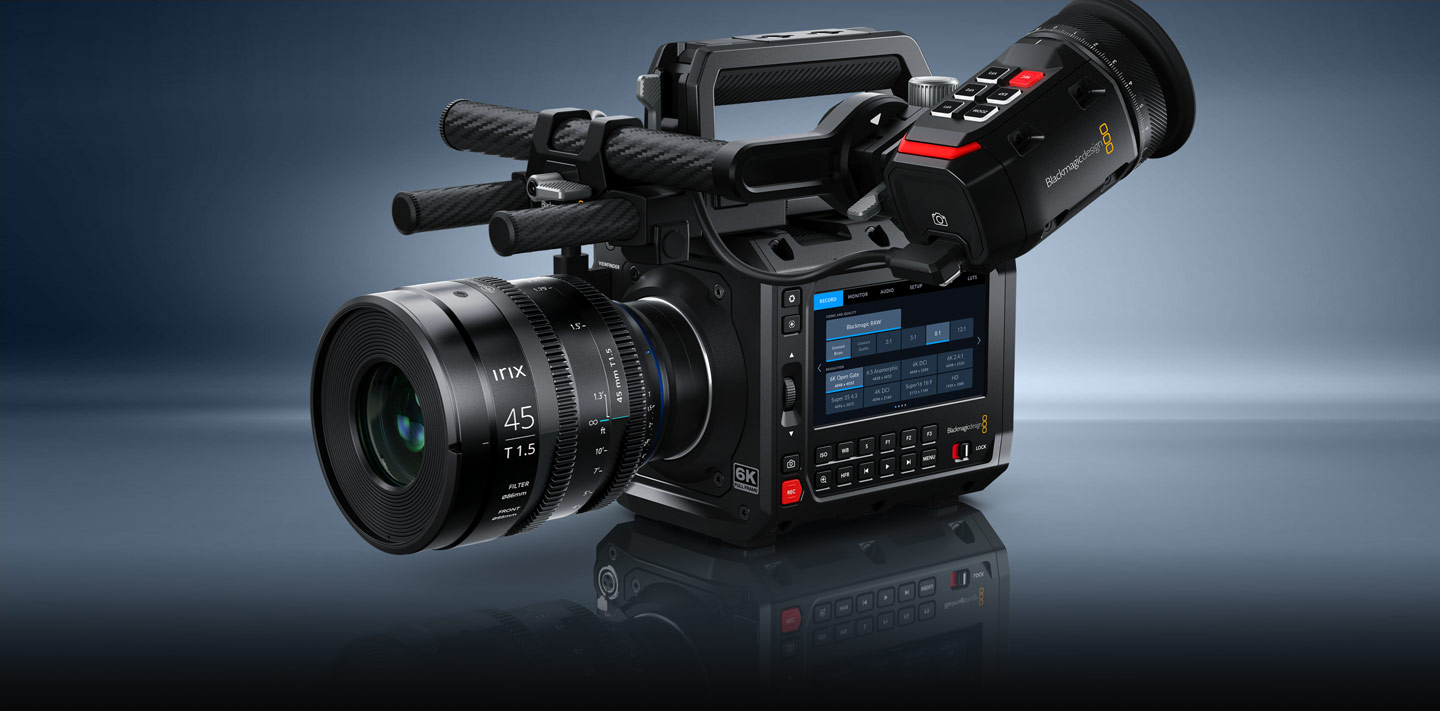
After the large success of their new full frame Cinema Camera 6K, Blackmagic Design today announced three new cameras as part of their NAB 2024 offerings. One of them is the full frame PYXIS 6K in an all new box style format!
This redesign has been a long awaited request from filmmakers surrounded by similar cameras from RED, Panasonic and Z Cam. There was even a recent initiative by a 3rd party to convert existing Blackmagic Design cameras into a box-style build.
PYSXI 6K Advantages & Details
Never before have these types of features been available at this price point in a full frame 6K sensor! Here are just a few of the shared advantages of both the Cinema Camera 6K and PSYXI 6K:
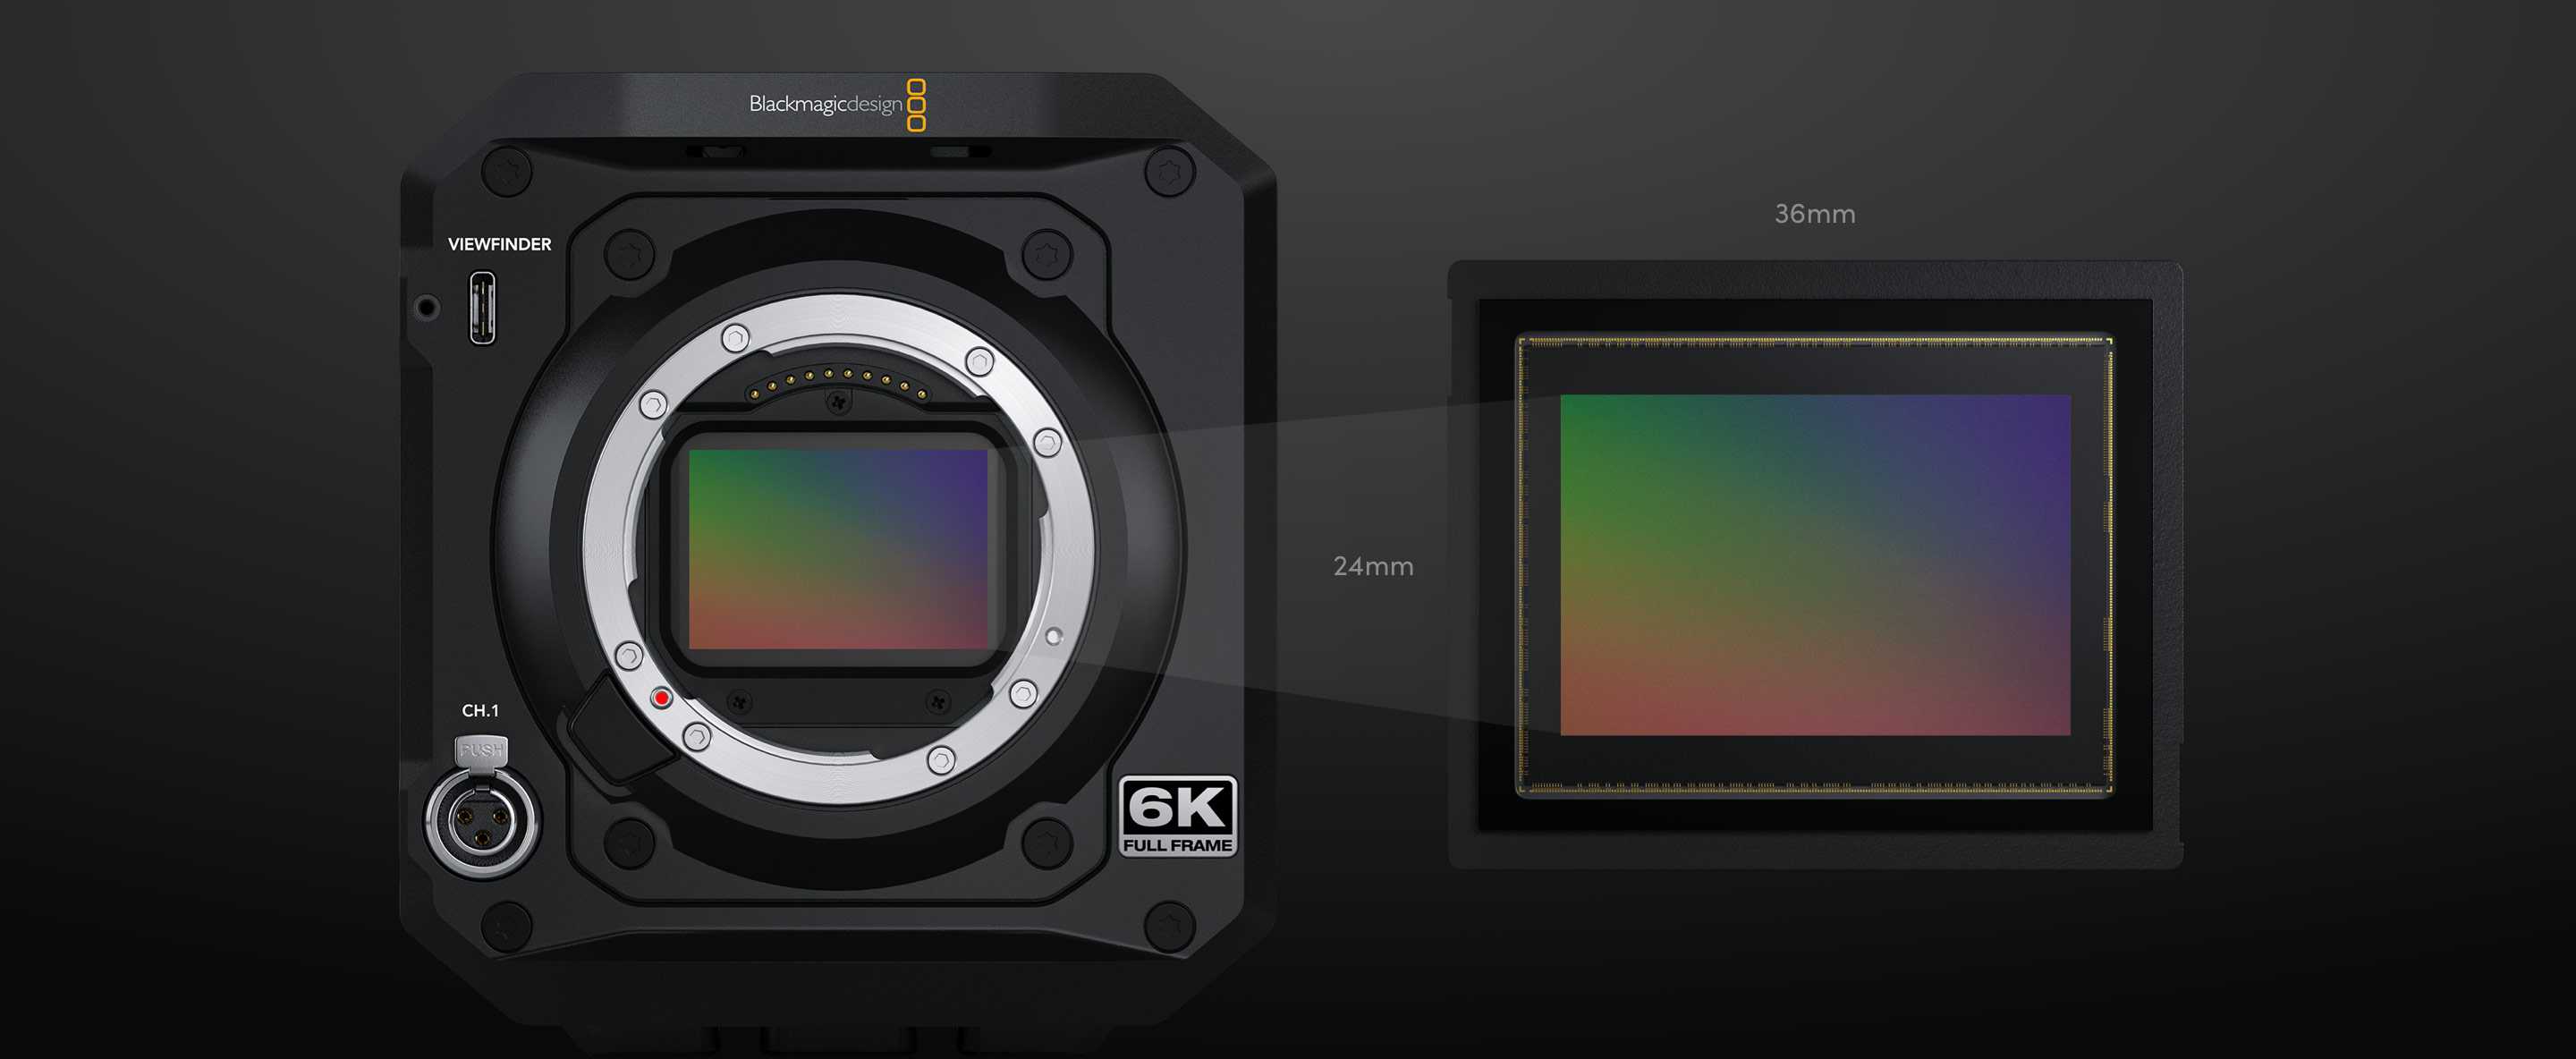
36mm x 24mm (Full Frame)
13 Stops of Dynamic Range
Dual 400 and 3200 Native ISO
6048 x 4032 (Open Gate 3:2) up to 36 fps
CFexpress Cards
Active L-Mount
Small Form Factor / Light Weight
Large 1500 nit LCD
Focus Assist / False Colors
Automatic h.264 Proxy Files
Blackmagic RAW
DaVinci Resolve Studio
Advantages Over the Cinema Camera 6K
The PYXIS 6K has the same full frame sensor and identical color science of the Cinema Camera 6K which boasts 13 stops of dynamic range, dual ISO and full 6048×4032 open gate shooting. A few advantages over the Cinema Camera 6K are as follows:
Machined aerospace aluminum with mounting points and side plates that allow a wide variety of accessories and rigging configurations without the need for cages.
Dual CFexpress card slots (CC6K has single)
L-Mount model works with full frame lenses from Sirui, Leica and others.
EF model to continue using Blackmagic Pocket Cinema Camera lenses.
PL model to use the likes of Zeiss, ARRI and Cooke.
Supports Live Streaming
Supports Blackmagic Cloud
Watch the 2024 NAB Announcement:
Revolutionary Cameras for Independent Film
Blackmagic Design has proven to be a lighthouse for independent filmmakers. Just a handful of years ago the budget choices were limited to cameras like the Panasonic DVX100B. Standard definition camera with the limitation of 23.976 shooting. Now in 2024 for nearly the same price we have full frame 6K cameras with incredible dynamic range, color science and so much more!
The Future For Independent Film
Write & Direct is proud to exclusively feature cameras from Blackmagic Design in our film school training. The Pocket 4K, Cinema Camera 6K and now PYXIS 6K combined with their industry demolishing DaVinci Resolve Studio are a powerhouse that fuels the next generation of filmmakers. We’re excited to shoot our next production partnered with Theater Eleven Pictures on BMD Full Frame 6K cameras!
Video editing is demanding on I/O (input output) devices. If you’re cutting a 4K or 8K film, you need fast throughput. SSD drives are lightning fast, but also still very expensive when it comes to the terabytes required for movies.
A RAID array is typically the way to go. Why?
A RAID Array is FAST
An array of disks has an advantage over a single hard drive. When you copy your camera and audio data to the drives, the files are “striped” across all the disk drives in the array. The advantage of this is when accessed for playback, the video and audio files are read from all the disks simultaneously vs an individual disk drive. The speed increase is monumental.
RAID Can Provide A Safe Guard
RAID stands for random array of independent disks. What this means for us as filmmakers is an extra layer of protection if we choose to setup our drive array as RAID 5 (there are various RAID options). In a RAID 5 array files are striped across all the drives along with parity information. If you have a drive fail mechanically, the parity information on the remaining drives is used to completely rebuild the lost drive when you replace the failed drive. It’s amazing.
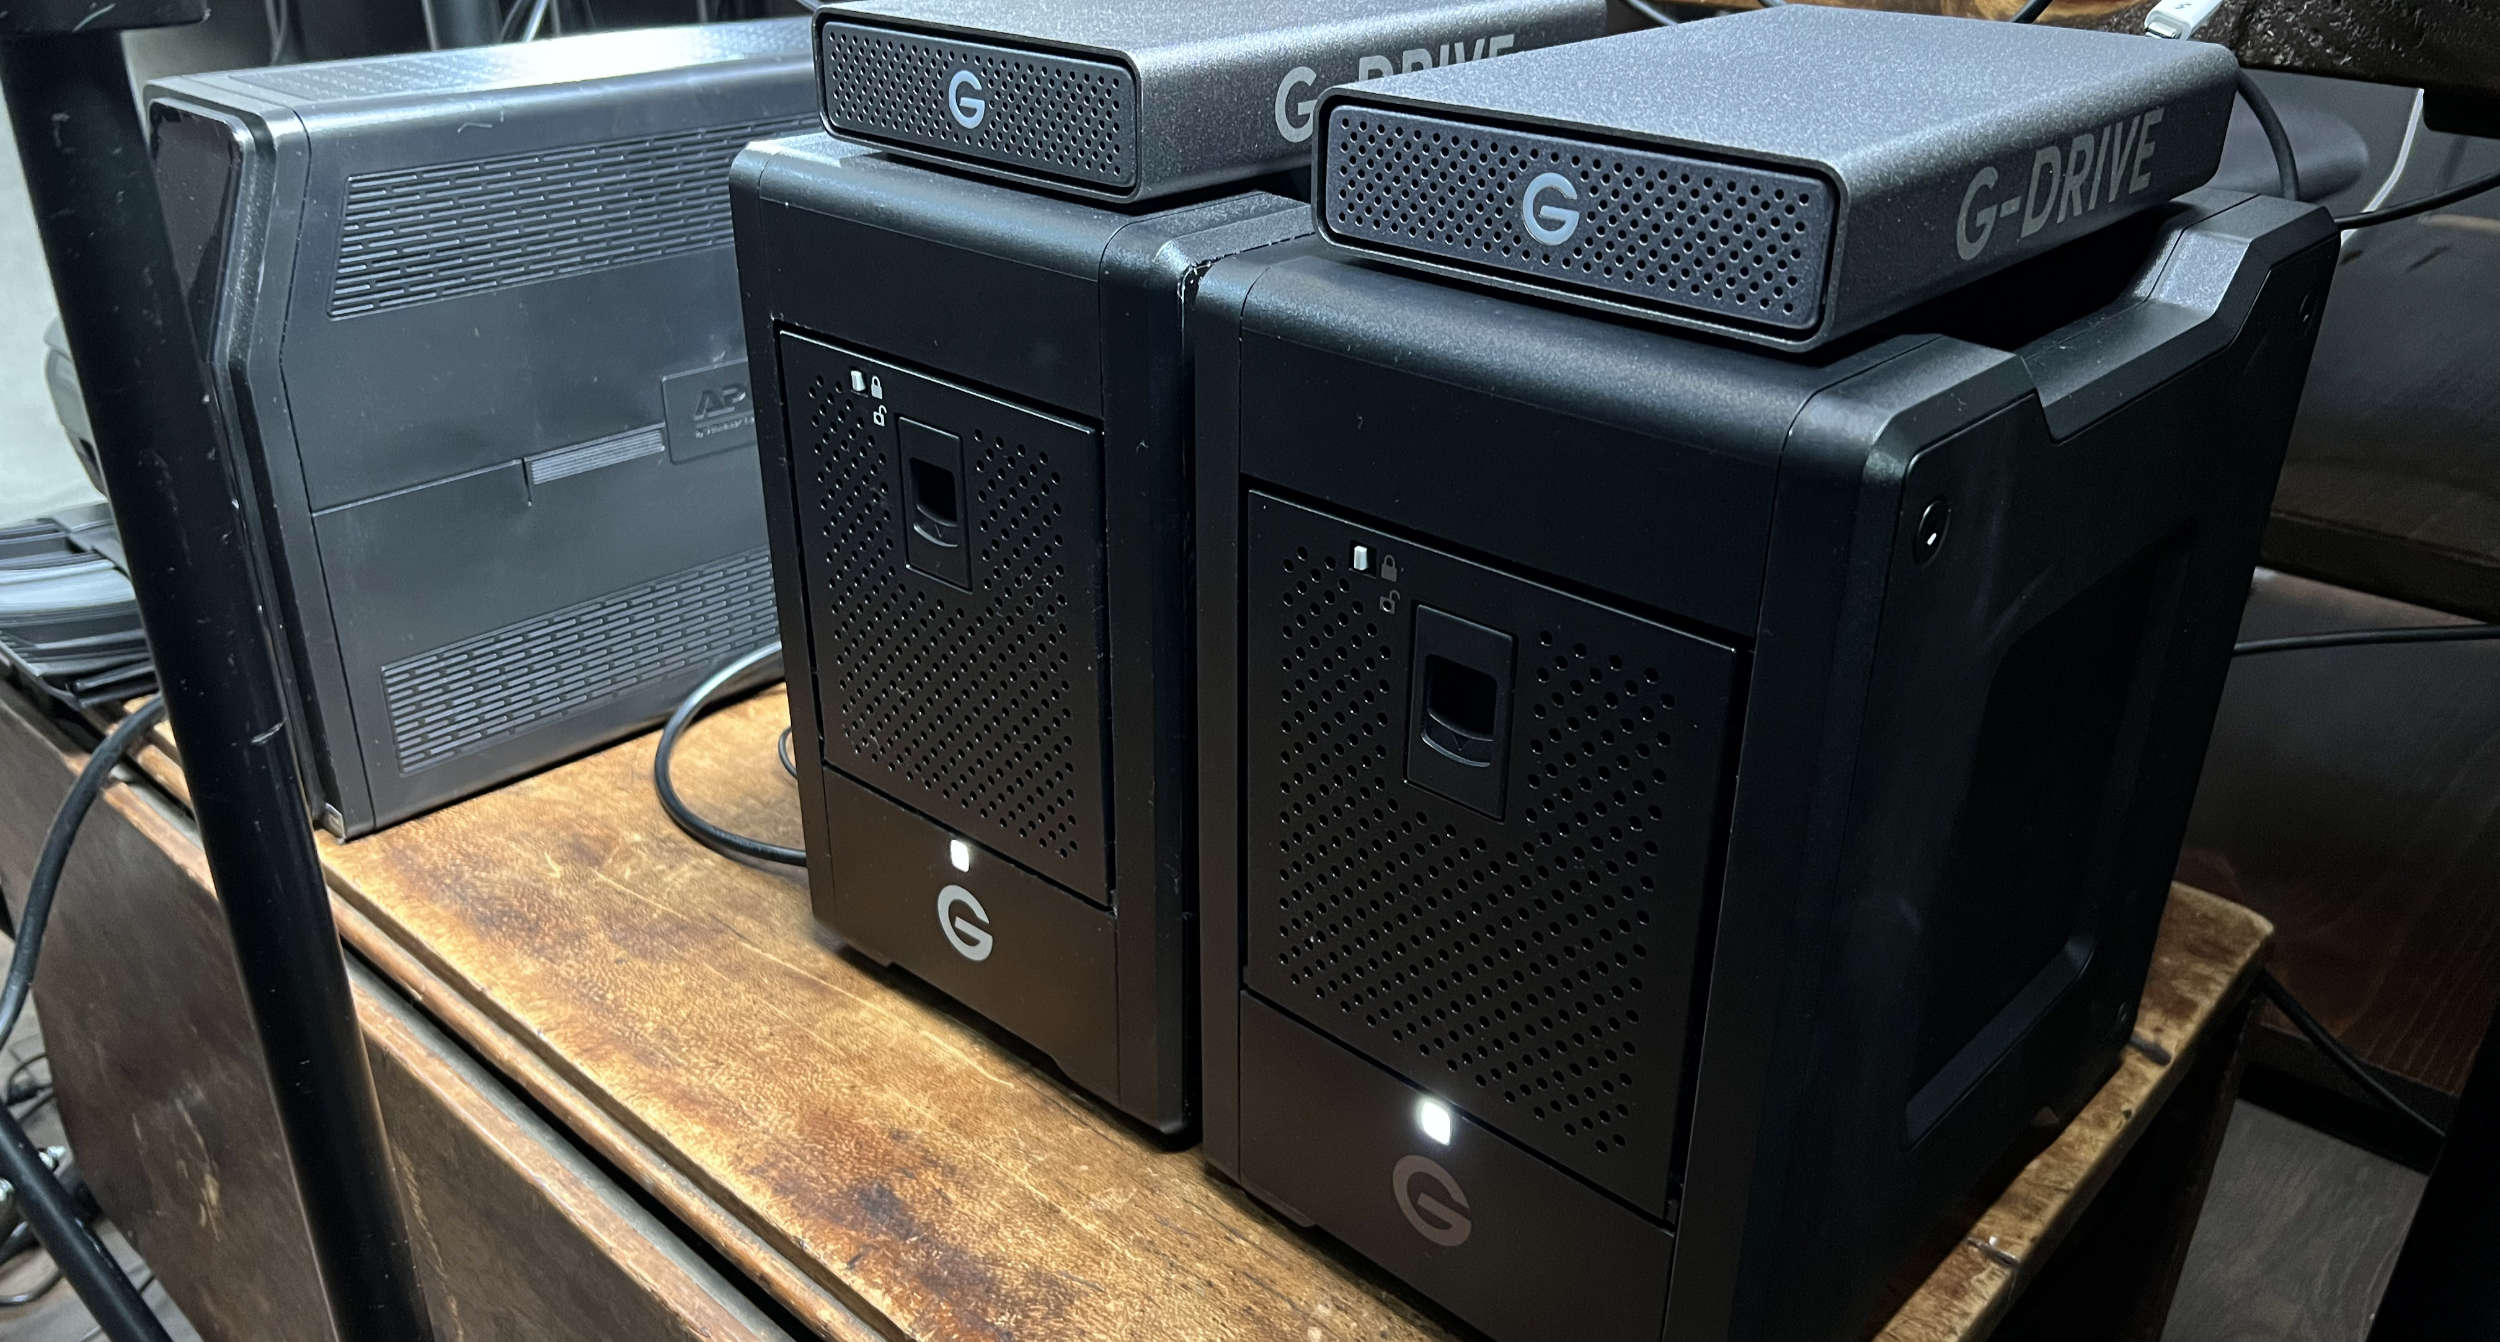
SanDisk Professional G-RAID
My favorite brand of external drives is G-Technology. When I first started as a filmmaker, I witnessed drives from various manufacturers crash and burn. People lost valuable data. My G-Drives were rock solid.
Now G-Technology is owned by Western Digital and resides under the SanDisk Professional product line. A popular option for filmmakers is the G-RAID Shuttle which can have 4-8 spinning disks configured in various RAID arrays. And it connects via Thunderbolt 3.
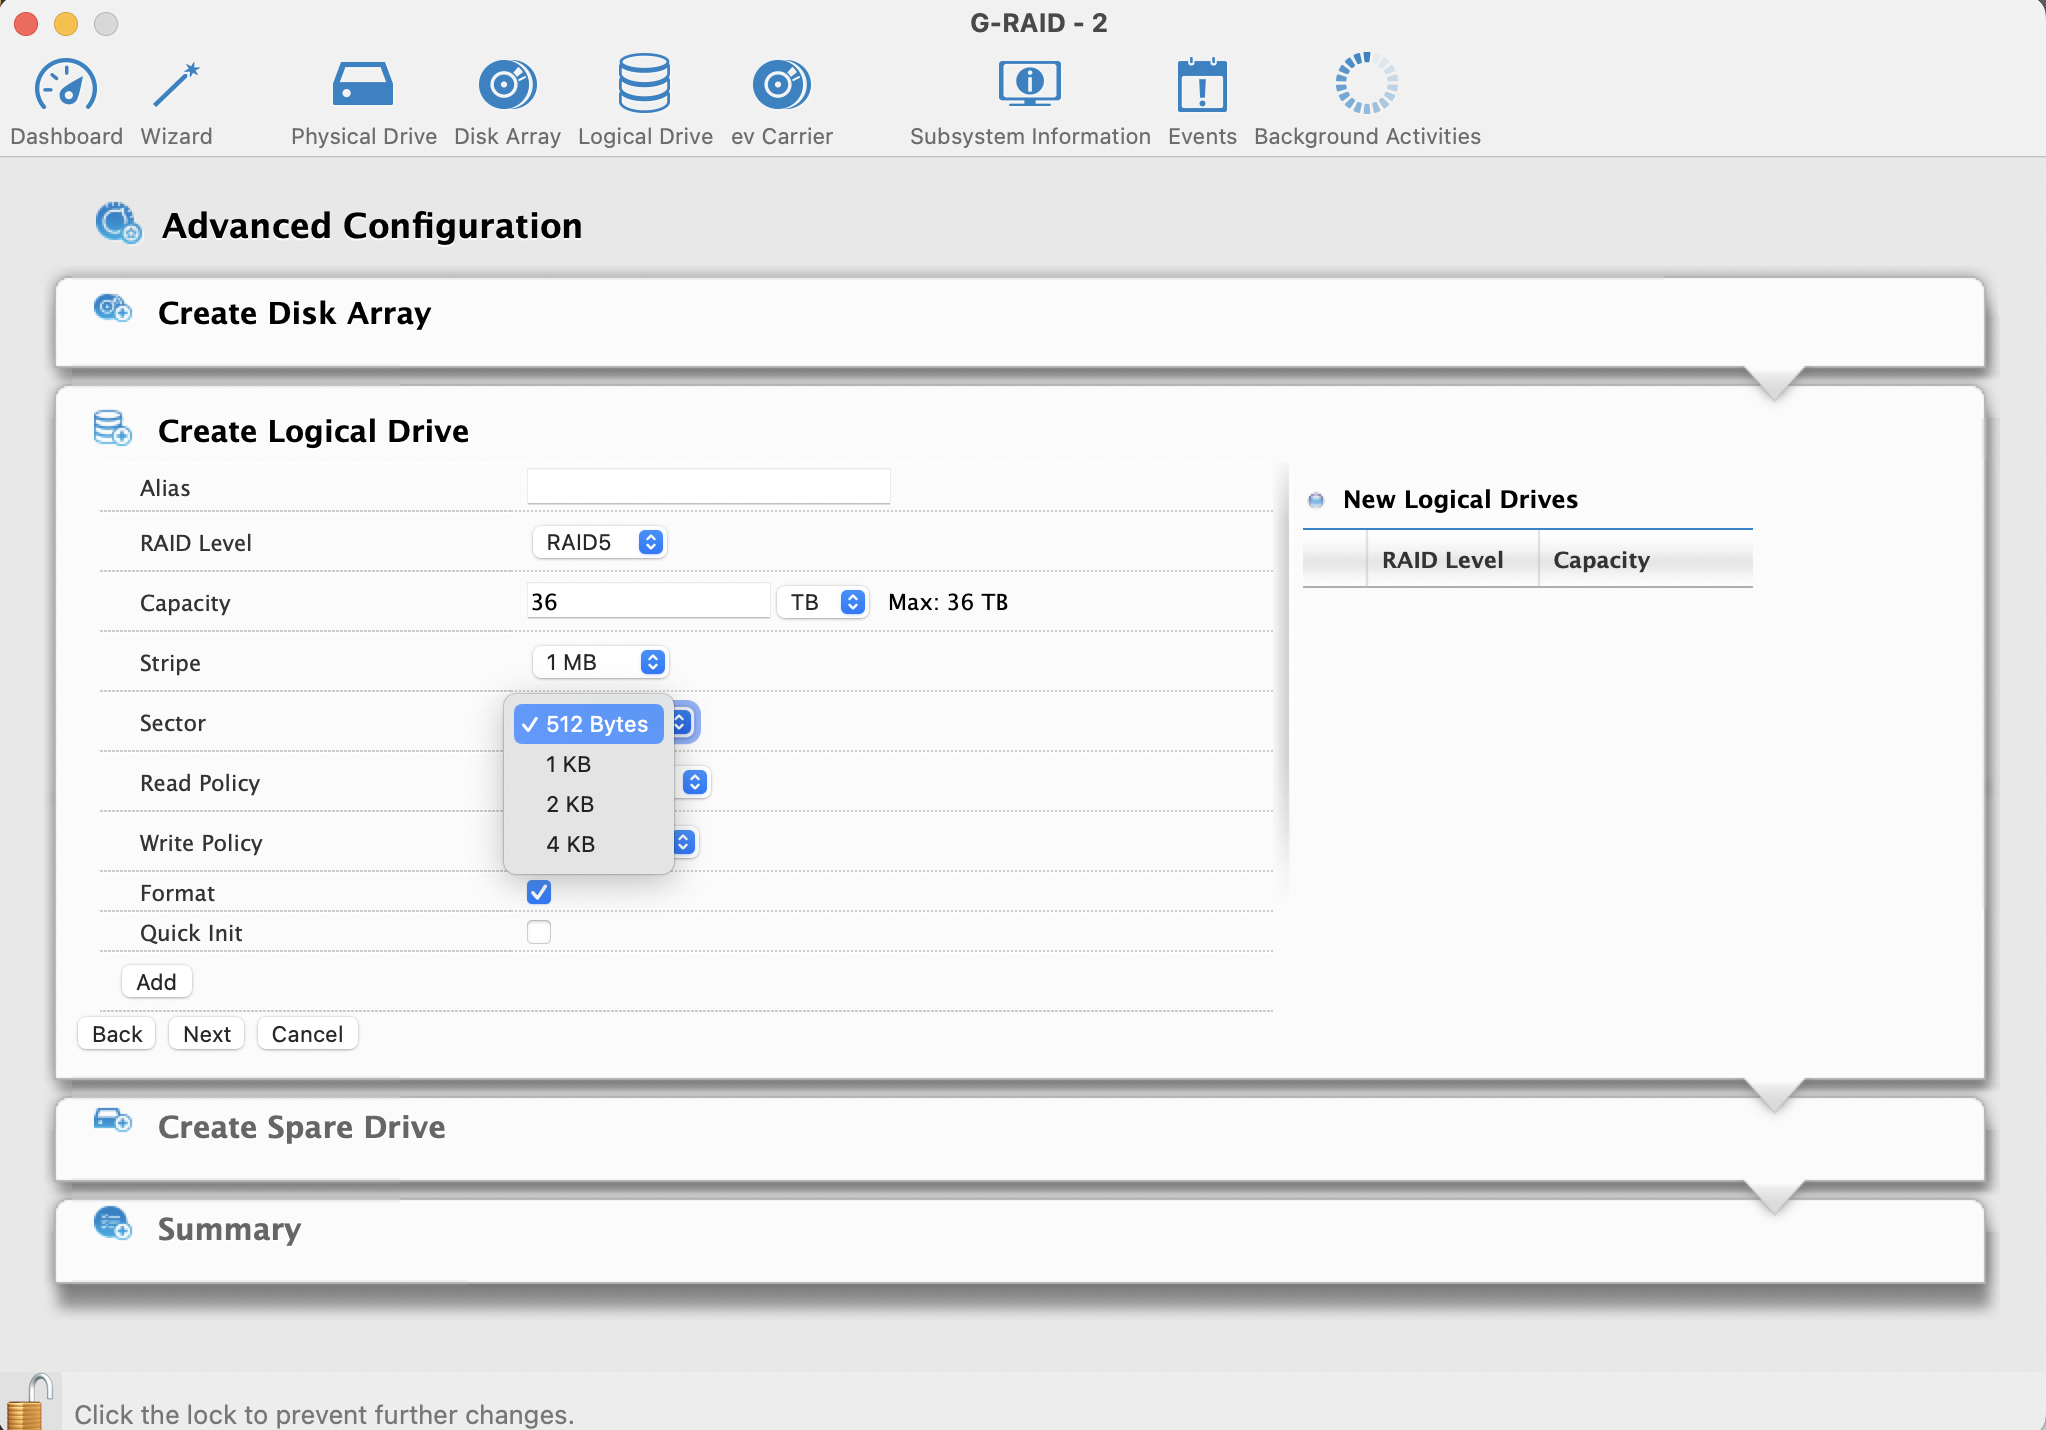
G-RAID Configuration
Now to the purpose of this article: Stripe size and sector size!
When you hookup a new G-RAID to your computer and open the G-RAID Software Utility you can setup a new disk array and then a new logical drive on the array. You can also use the wizard to this for you.
WARNING: If you use the first two wizard options, you’ll lose out on a major performance option.
Use the 3rd option in the wizard which allows you to configure specific details of your array and logical drive, or manually create the array and then add the logical drive. Regardless of the method you choose, you’ll be presented with two choices that are key to performance:
Stripe Size and Sector Size as shown below.
Stripe Size
Stripe Size is the size of each block of data written as your video and audio is striped across your array of disks. For large files like camera and audio data, you want the largest stripe size you can configure so the data can be read and written with the least amount of work from the hard drives. A small stripe size means the disk arm have to perform more read operations to serve up the files.
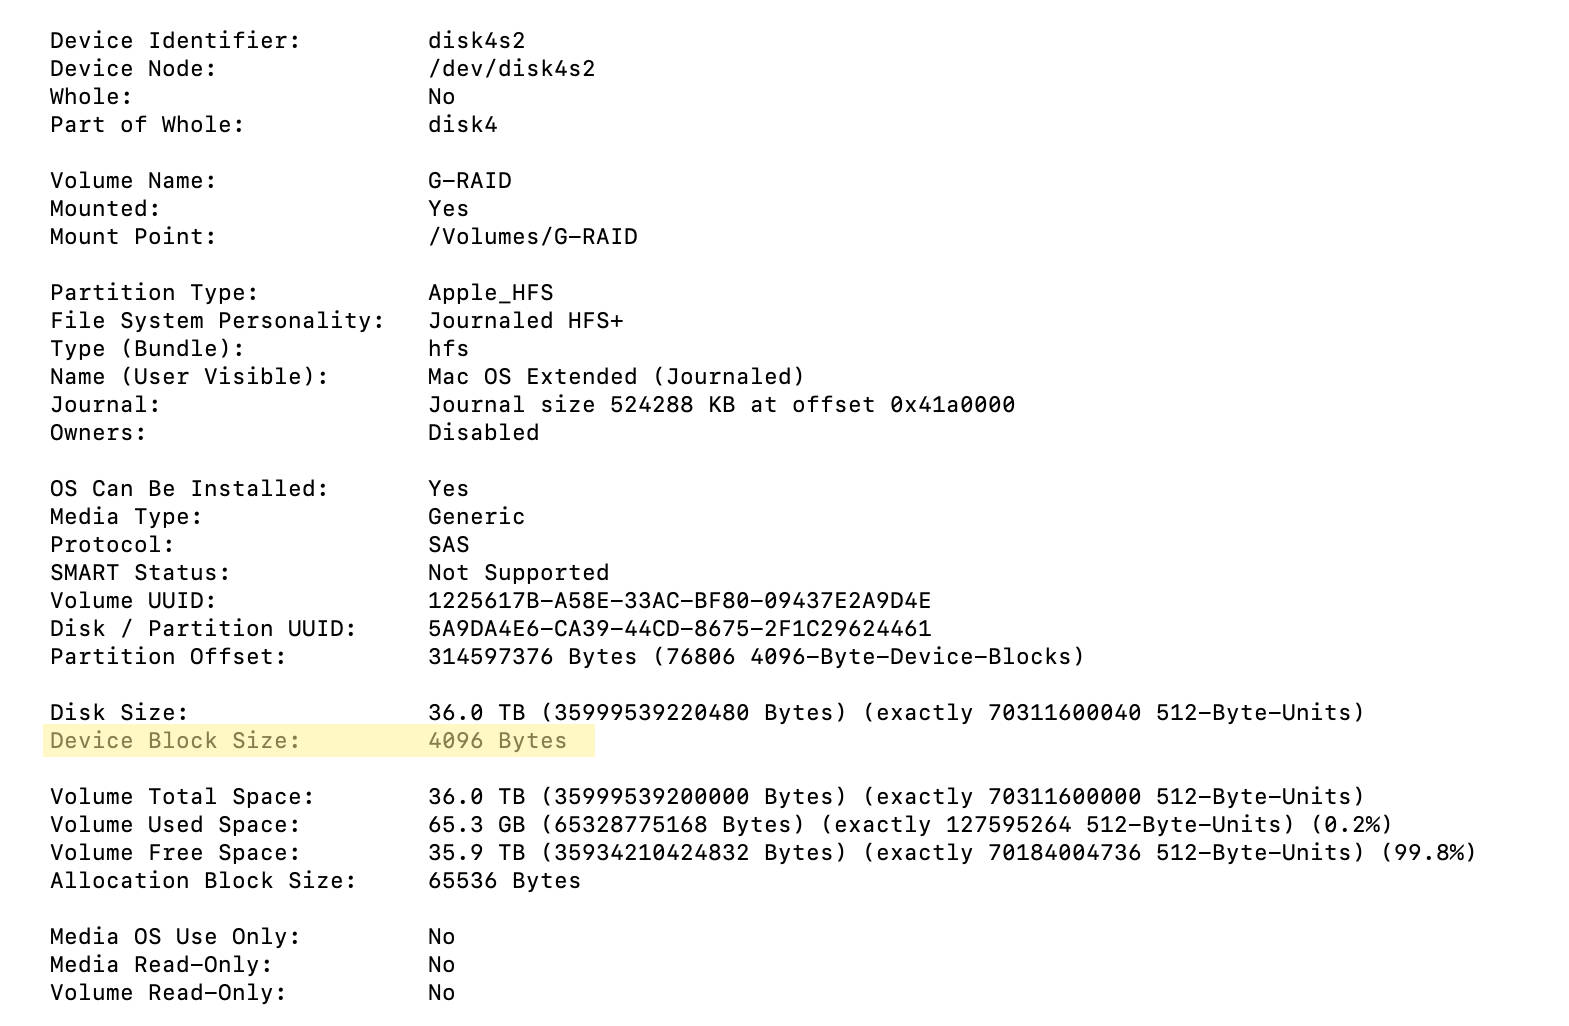
Sector Size | 512 byte or 4K?
This is the one that isn’t documented very well. A sector is the smallest data area on a hard drive. All your files are split up into tiny sectors. Sectors make up the stripes of data.
Should you choose 512 or 4K for your logical drive on a SanDisk G-RAID?
You’ll notice the default sector size for G-RAID is 512 bytes. This was the most common size years ago for hard drives. However, the drives in your G-RAID support the newer 4K sector size. And just like the stripe size, a larger sector size means less work from the drive when you’re writing and reading data.
In my quest to determine the ideal configuration for G-RAID I contacted SanDisk Professional Support (i.e. Western Digital). They told me to use the 512 byte sector size as this would be better for efficiency and performance of the array.
But…I decided to do my own test.
I setup an array and logical drive using 1MB stripes and 512 sectors. Copied a file from an SSD drive to the array, and then back again. Since SSD is faster, this ensured an accurate test. I then toasted the array and set it back up using 1MB stripes and 4K sectors. Did the same write and read with the same file. No cable changes.
The file size was 60.41 GB. You can verify the setup from terminal (OSX) or with the G-RAID Software Utility by viewing info on the logical drive. From terminal, type:
diskutil info -all
Find your external drive to see the configuration details:
512 Byte Sector Size Results
The 512 byte sector test had a write time of 7 minutes and 57 seconds. Read time was 1 minute 35 seconds.
4K Sector Size Results
The 4K sector test write time was 1 minute 21 seconds. The read time was 1 minute 32 seconds.
I was shocked at the write time difference! It went from almost 8 minutes down to a minute and a half. That’s insane. And read time was also slightly better.
Even though the wizard (even if you select the video server option) and Western Digital support will push you towards 512 byte sectors for your logical drive on the array, my advice is to never do that. 4K will deliver the performance you need when cutting your movie!
If you’re an aspiring filmmaker and want to learn the craft from development through post production, click this link now: The Director’s Film School
Anyone who wants to make movies thinks about film school. It’s inevitable.
But do all successful directors go? No, not really.
Tarantino didn’t attend film school. James Cameron dropped out of college. But conversely, Robert Zemeckis attended USC, Ed Zwick AFI and Kathryn Bigelow was a grad from Columbia University.
So okay, a few strong examples of good education. But how much does film school cost? According to the Hollywood Reporter, it’s not that cheap. Let’s take a look:
Columbia University boasts filmmakers such as Kathryn Bigelow, Jennifer Lee & Greg Mottola
USC costs $55K (undergrad); $33K to $44K (grad) per year.
AFI rings in around $59K to $61K.
Columbia University hits at $60K (grad).
UCLA is $28K for in-stater and $31K to $40K for out-of-state.
As you can see, an education in film hits the wallet pretty hard.
My Film School Experience
I moved to LA in 2005. Attended the Los Angeles Film School located on Sunset Blvd in Hollywood. The dean of the school wouldn’t allow students to work and attend school because in his mind the school was too intense. And…he was right.
So I had to take out a loan for tuition and living expenses. Sixty-two grand.
In 2023, tuition at LAFS rings in around $33K per year after aid.
But hey, all education is pricey. Who cares? What’s the big deal?
The big deal is that the entertainment industry is unique. Graduating from a film school with honors as a directing major does nothing to get you a job.
Let me say it another way:
The entertainment industry does not care about your education. Especially if you want to write and direct.
Yes, they want you to know the craft. But to land a job as a paid director you’ve gotta do so much more. You need directing credits on IMDb. You need an audience.
Are you thinking this through?
If you spend $62K on one year of education like I did, there’s typically no money left over to produce your own movies after school. And this is a sobering reality that many aspiring filmmakers don’t think about until it’s too late.
Trust me, I’ve been there. Along with my entire class of 2005.
The entertainment industry does not care about your education. Especially if you want to write and direct.
But hey, don’t take my word for it. Call up any studio or production company and tell them you just graduated with honors from school X and you want a job. See what they say. If you’re lucky, you’ll be getting coffee and lunches for one of their productions.
And that’s if you’re lucky.
After school I had some low points. Even rented a couch for a month in a two bedroom, one bathroom apartment with three other guys already living there. I was 30 years old with nothing to my name except a film school education that couldn’t get me a job.
It didn’t matter that I was a double major or that I graduated with honors or that my demo reel was polished and ready to go.
When I called around trying to find work after school, I couldn’t even get beyond the receptionist. The lady at Fox told me they only hire “award winning editors” when I called trying to land an assistant editing position.
“You know we only hire award-winning editors, right?”
Receptionist, 20th Century Fox
So how do you go to school, direct movies, win awards and get IMDb credits if no one will hire you?
This is what Write & Direct is all about.
Write & Direct is cohesive instruction on the craft of filmmaking
The Write & Direct online film school is training like you’ve never seen before. Cohesive instruction on the craft of narrative filmmaking. Step by step guidance from development through post production.
If you’re after a career shooting real estate commercials or wedding videos, this isn’t for you. But if you want to tell stories for the big screen, Write & Direct will teach you how.
You’ll begin with development and work your way through post production in literal, actionable steps. At the end of the training you’ll have a completed film that you can submit to festivals, and even get on IMDb.
And that’s just the beginning.
If you’re considering the cost of film school, consider Write & Direct. Side step the educational and financial minefields that claim the careers of so many aspiring filmmakers.
What is exposure? It deals with controlling light to capture details in an image.
If you let too much light in you’ll over expose and lose details in the brights. If you don’t have enough light you’ll under expose and lose details in the darks.
I’m about to teach you how to get proper exposure using what I call the “exposure layers.” These are ISO, Shutter Speed, Aperture and Light.
First, there are two things you must understand:
Ansel Adams Zone System
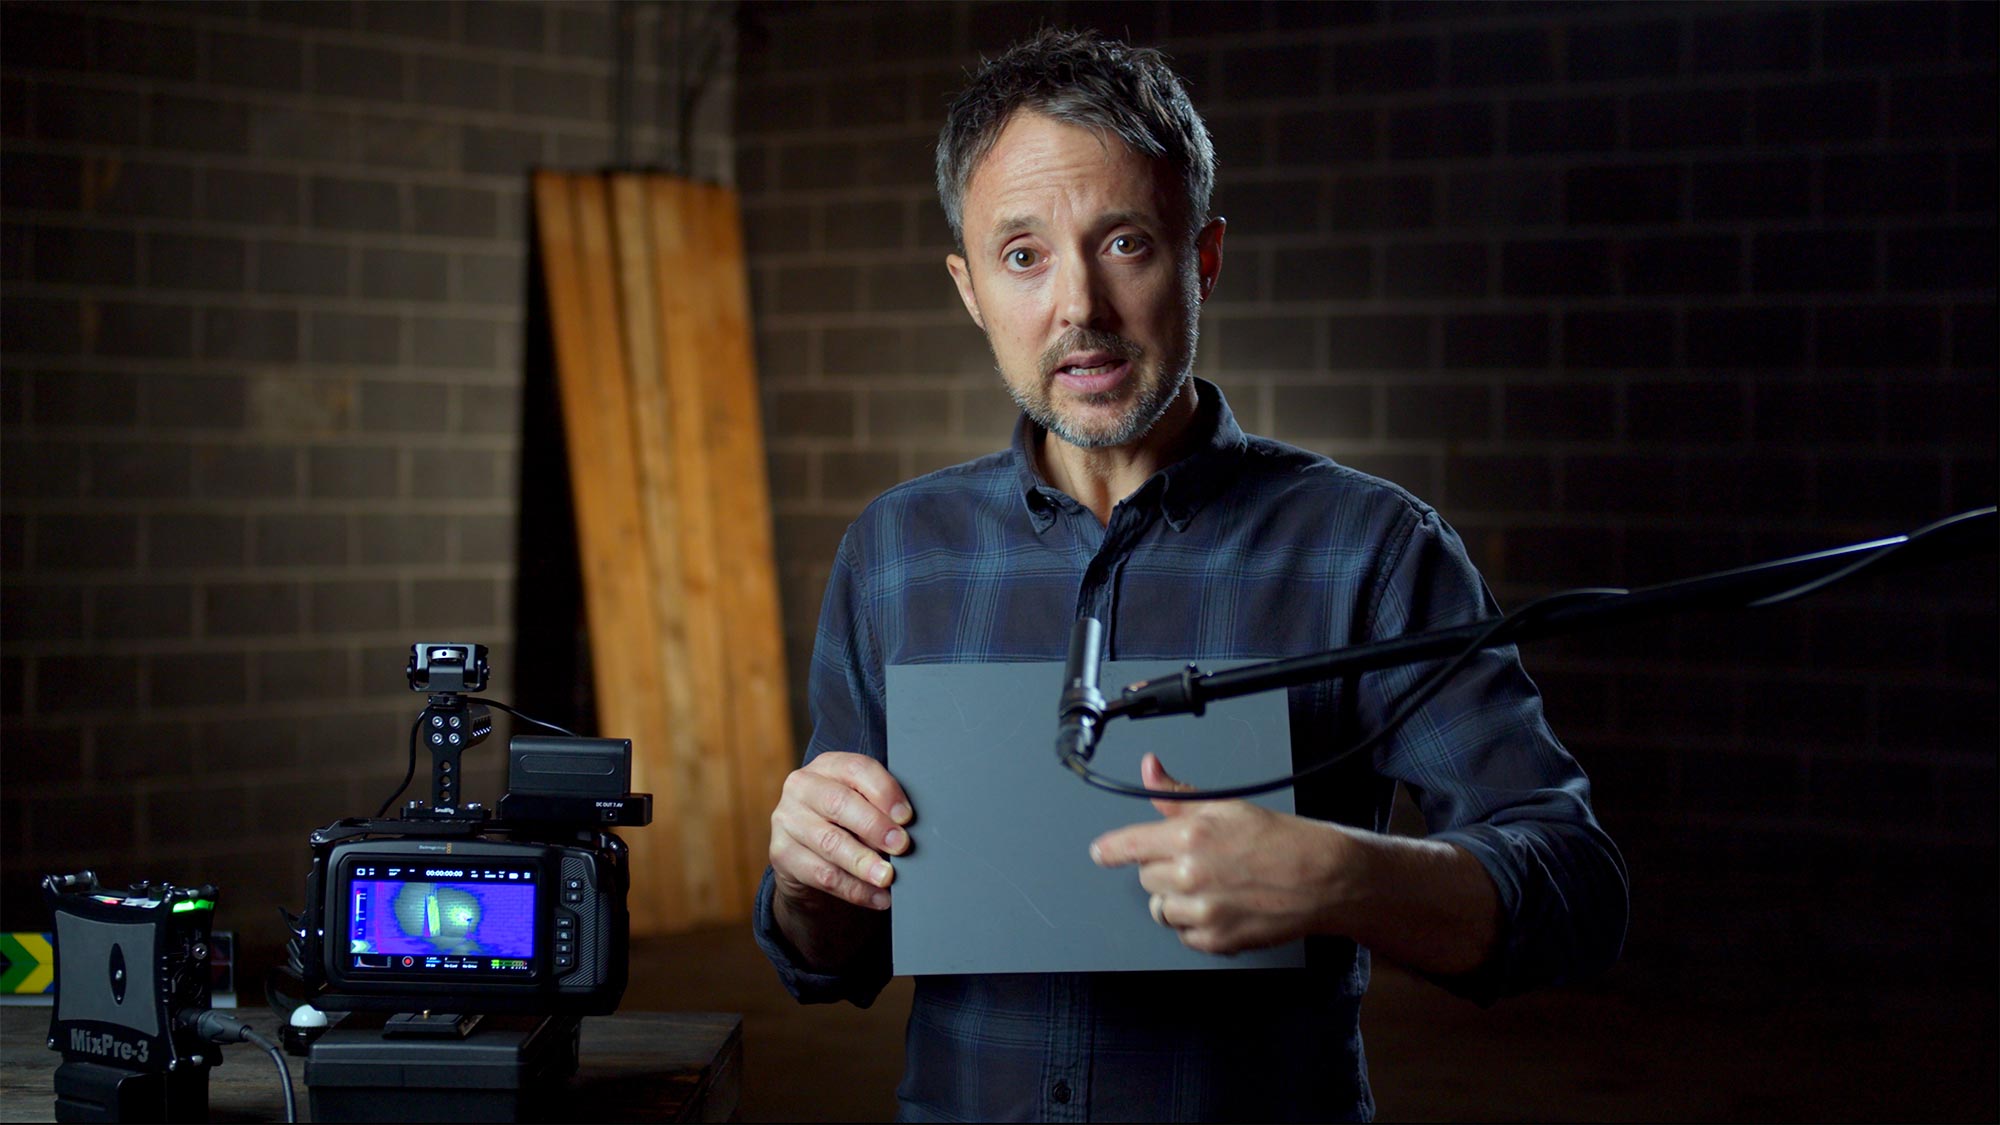
Ansel Adams, a famous black and white photographer born in 1902, developed an eleven zone-system that defined pure white to pure black with nine shades of gray in between. The exact halfway point of the zone system is called “middle gray” and it reflects 18% of light back.
A middle gray card which can be used with false colors on a cinema camera.
For now, this all we need to know about middle gray. Next is a thing called dynamic range.
And btw, if you’d rather see a video version of this post, here it is:
Dynamic Range
The ratio between the brightest brights and the darkest darks in an image is called dynamic range.
Imagine this: The sun sets over a small town. A white billboard catches the rays while the lower streets are encompassed in the early shadows of night.
There is a large ratio or dynamic range in this image.
Dynamic range is measured in stops of light. The human eye can see 21 stops of dynamic range while cinema cameras don’t come close. For example, the Black Magic Pocket Cinema Camera captures around 13.1 stops of dynamic range while an Arri Alexa captures 14 stops. And there’s a $30K price difference between these cameras!
So what does this mean for us as filmmakers?
It means if we’re filming the city example, we won’t capture all the details in that setting. It’s literally impossible. We must decide where we want to compromise.
And this leads us to our first exposure layer.
ISO (International Standards Organization)
ISO is the foundation layer of the exposure stack. It’s also the most complicated layer to initially understand, but you’ve gotta wrap your head around it so everything else makes sense.
Back in the days of film, ISO dealt with a film stock’s sensitivity to light. Also called the speed of the film. A production would decide on a certain film speed based on their needs for the scene. Film with an ISO rating of 300 is less sensitive to light than film with a speed of 800.
Digital cameras also have an ISO setting that can begin at 50 and go up into the thousands, depending on the camera. And similar to film, the ISO setting on a digital camera deals with the camera’s sensitivity to light.
Well, sort of.
You can nerd out on ISO like crazy and run down the rabbit hole of analog and digital gain, etc. But for us aspiring directors, it’s overkill.
Here’s what you need to know:
Let’s jump back to the concept of middle gray, but instead of the eleven zone-system we’ll reference the full dynamic range of the human eye.
From purest black to purest white with middle gray in the center.
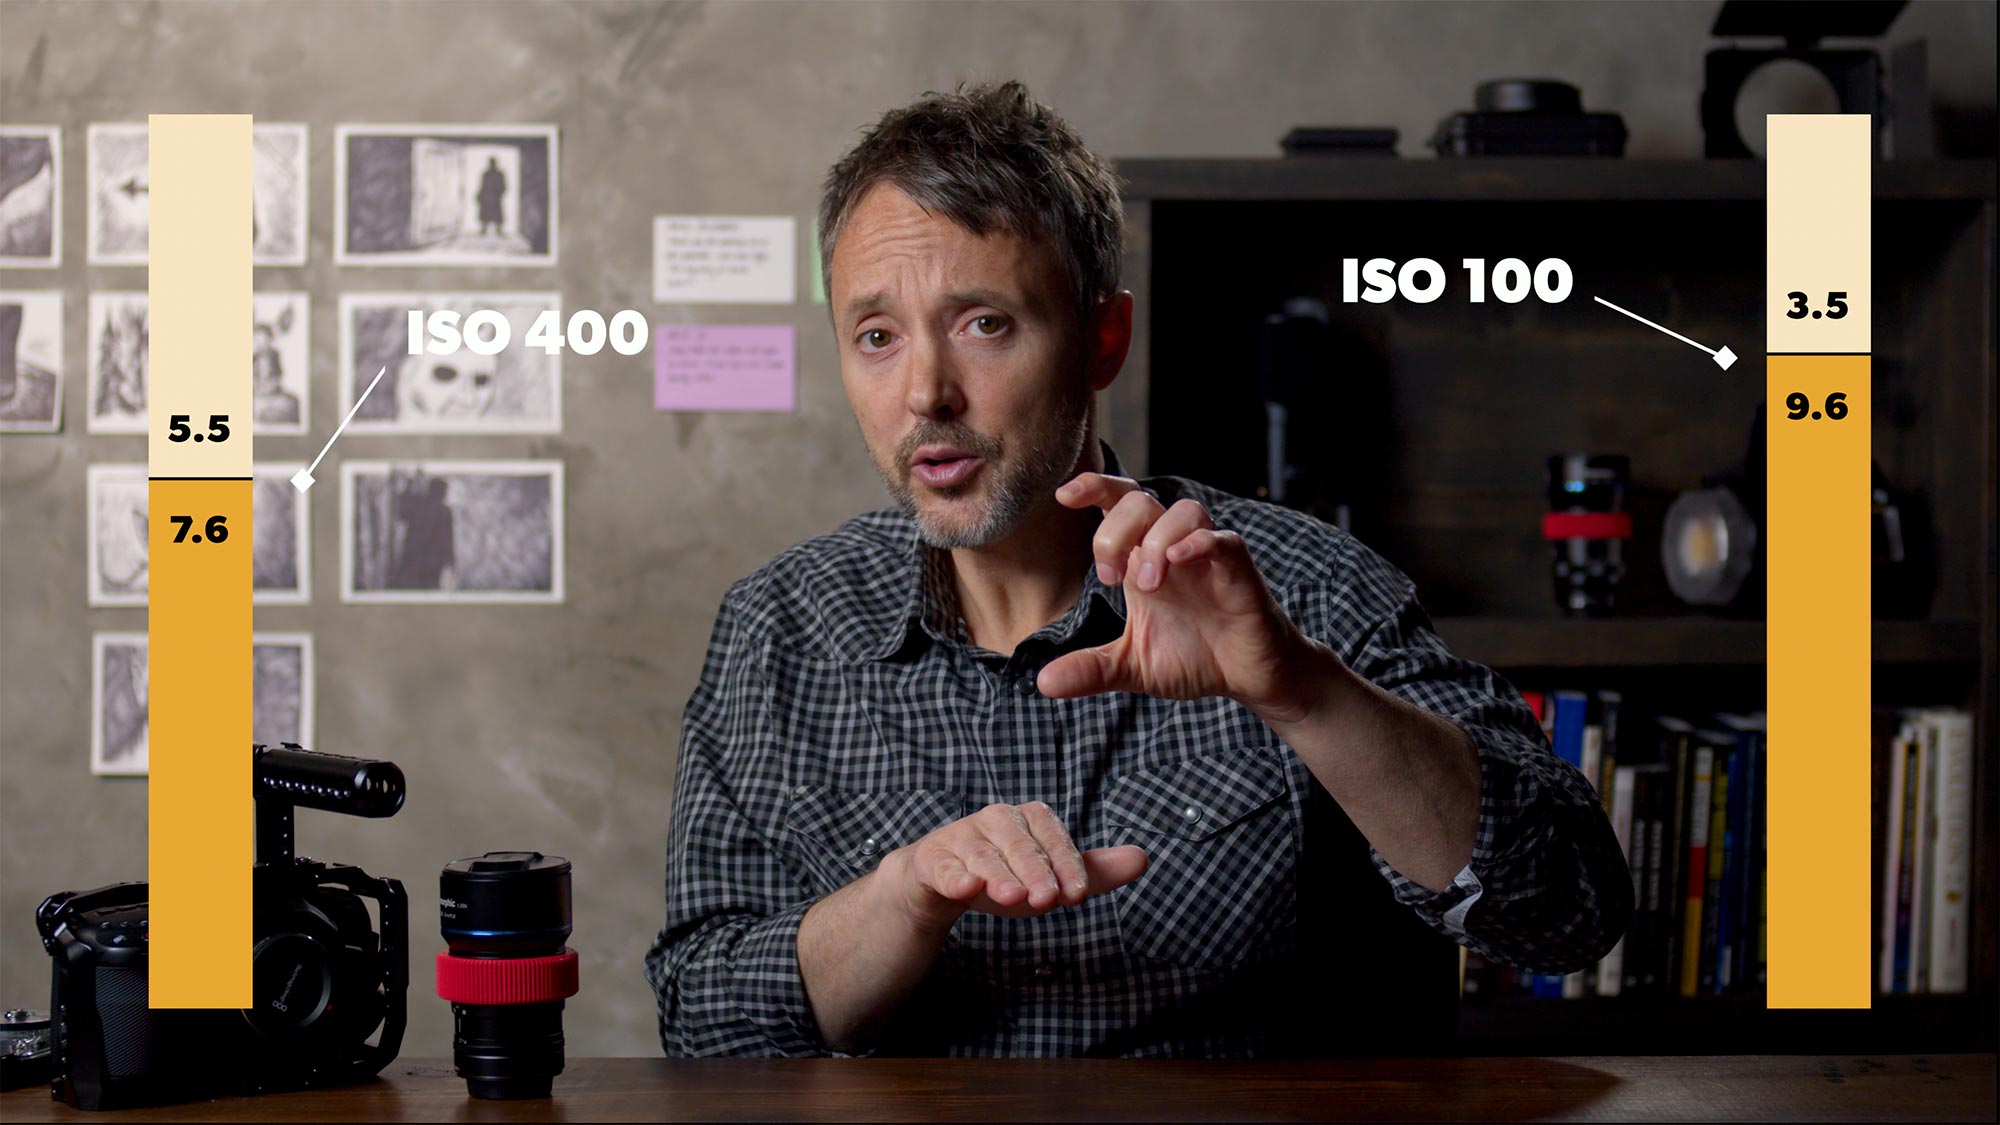
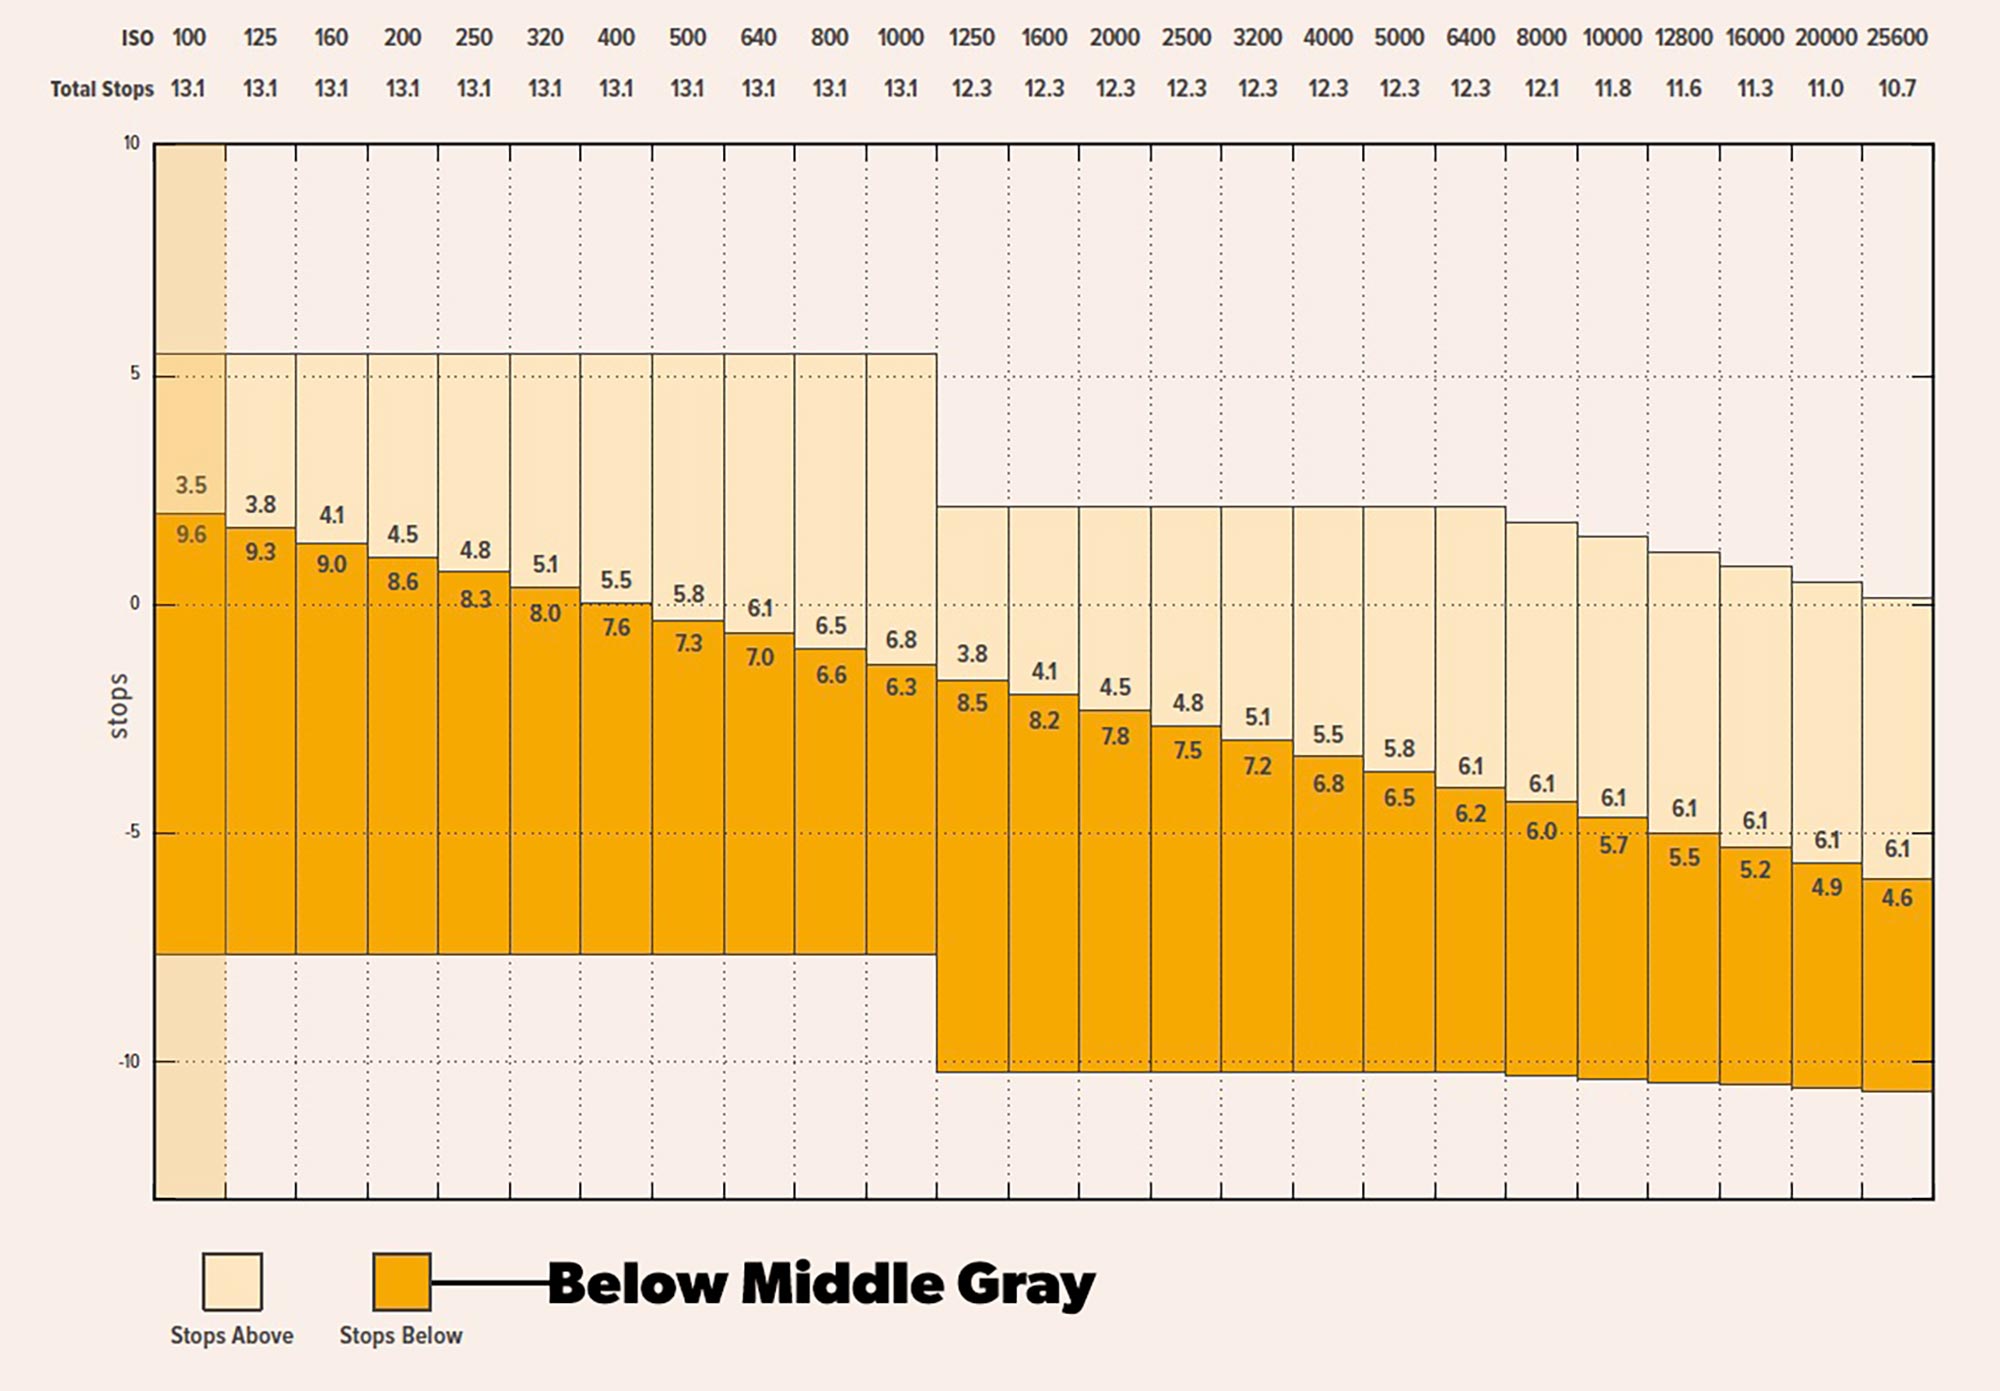
If my camera has 13.1 stops of dynamic range, I have a certain amount of stops above and below middle gray. ISO controls this. See the image below for the Pocket Cinema Camera’s 13.1 stops of possible dynamic range for ISO 400 vs ISO 100.
ISO acts as a dynamic range positioning tool vs an exposure tool.
Are you tracking with me?
Cinema cameras have what they call a “native” ISO which is the camera manufacturer’s recommended ISO setting for the best range above and below middle gray (given proper exposure).
The Pocket Cinema Cameras have a native ISO of 400. At ISO 400 I have a theoretical 5.5 stops above middle gray and 7.6 stops below middle gray of image detail that can be captured. If I move the ISO to 100 it changes to 3.5 above and 9.6 below (see the above image).
So let’s review: More stops below middle gray does what?
It captures more details in the shadows.
However, dropping my ISO down to 100 doesn’t work any miracles. I still have to expose to this setting.
We’ll get to this in a second.
For now, just know that as a filmmaker we typically shoot at the native ISO of a camera unless we have a specific reason not to. The foundation layer of the exposure stack is not an exposure tool. Instead we expose to our ISO setting.
Cool? The next layer in the exposure stack is…
SHUTTER SPEED
The camera’s shutter controls how long the sensor is exposed to light.
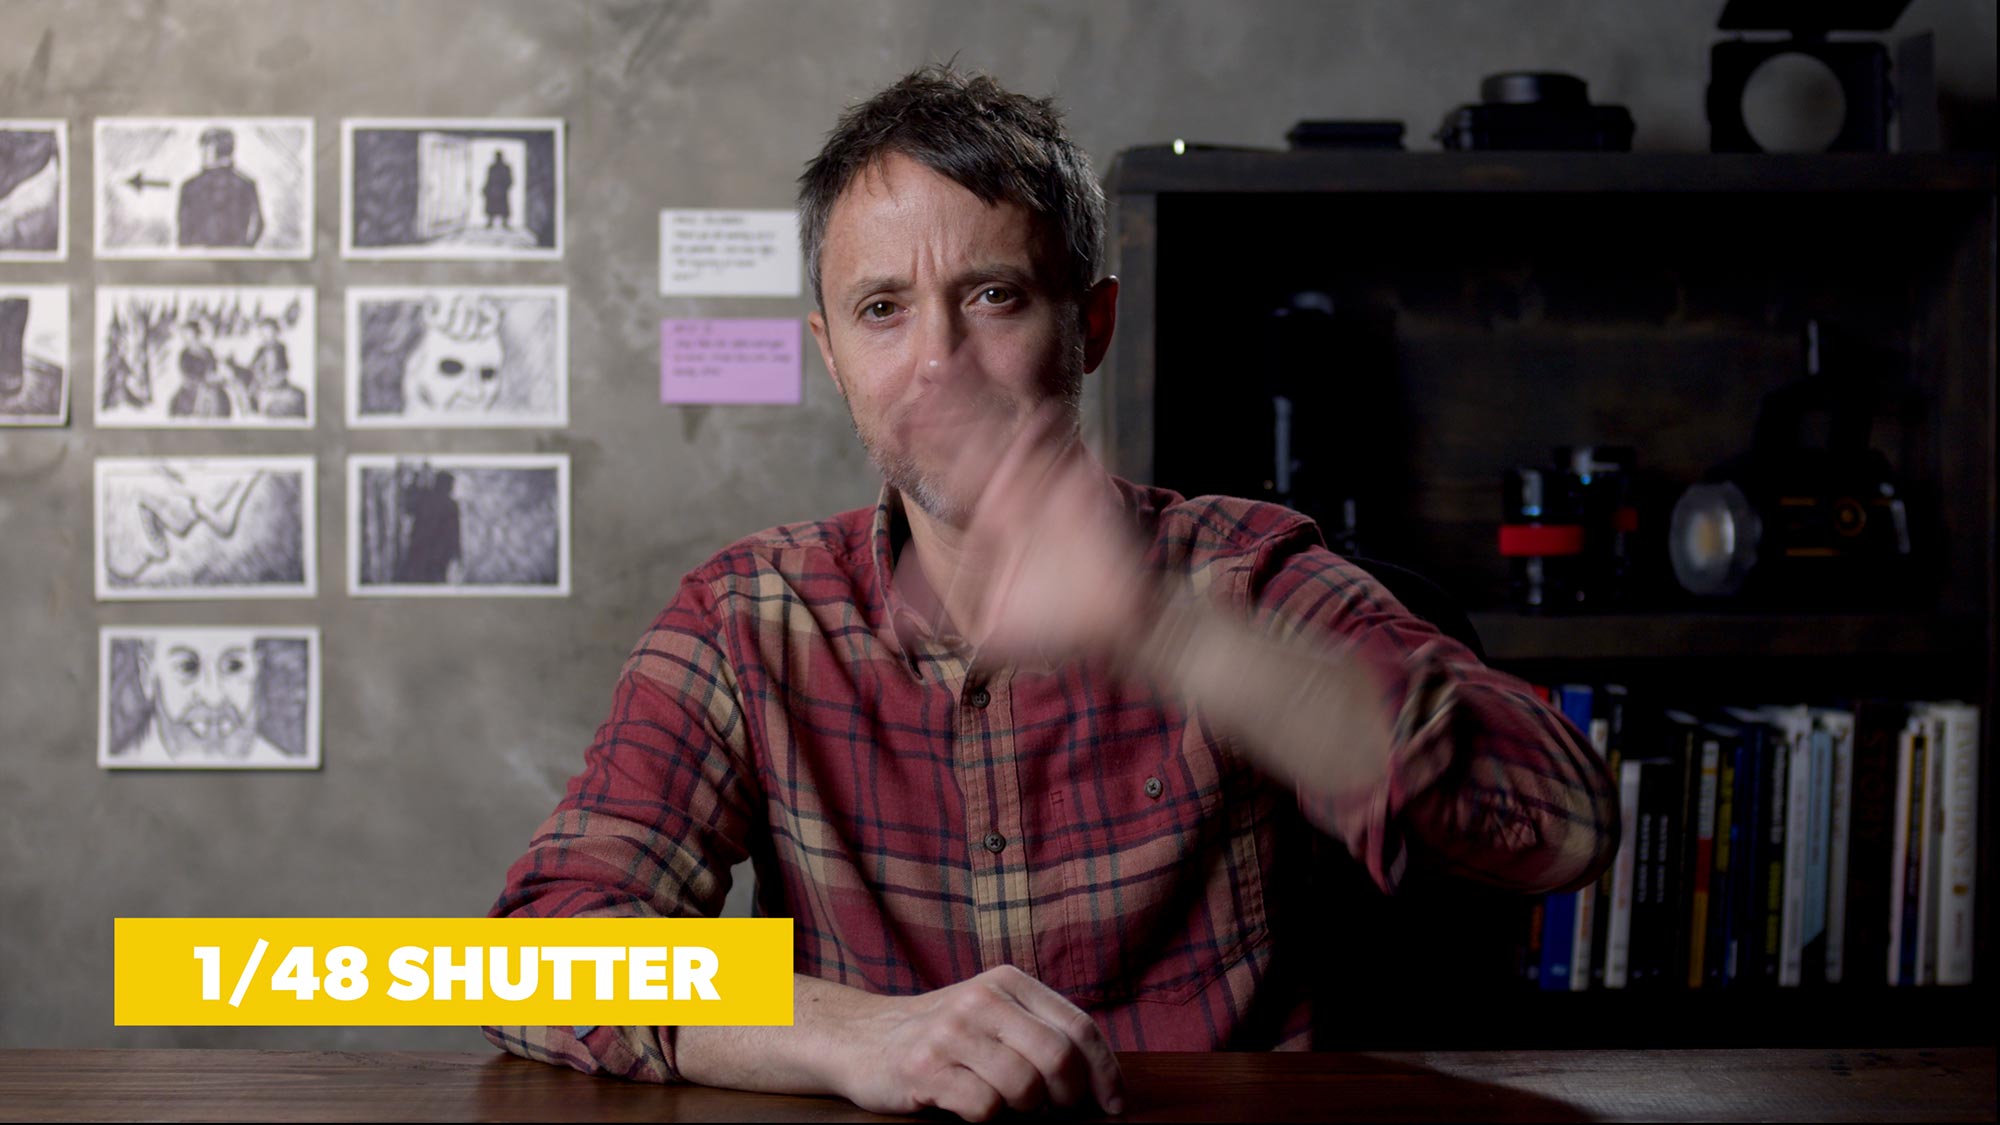
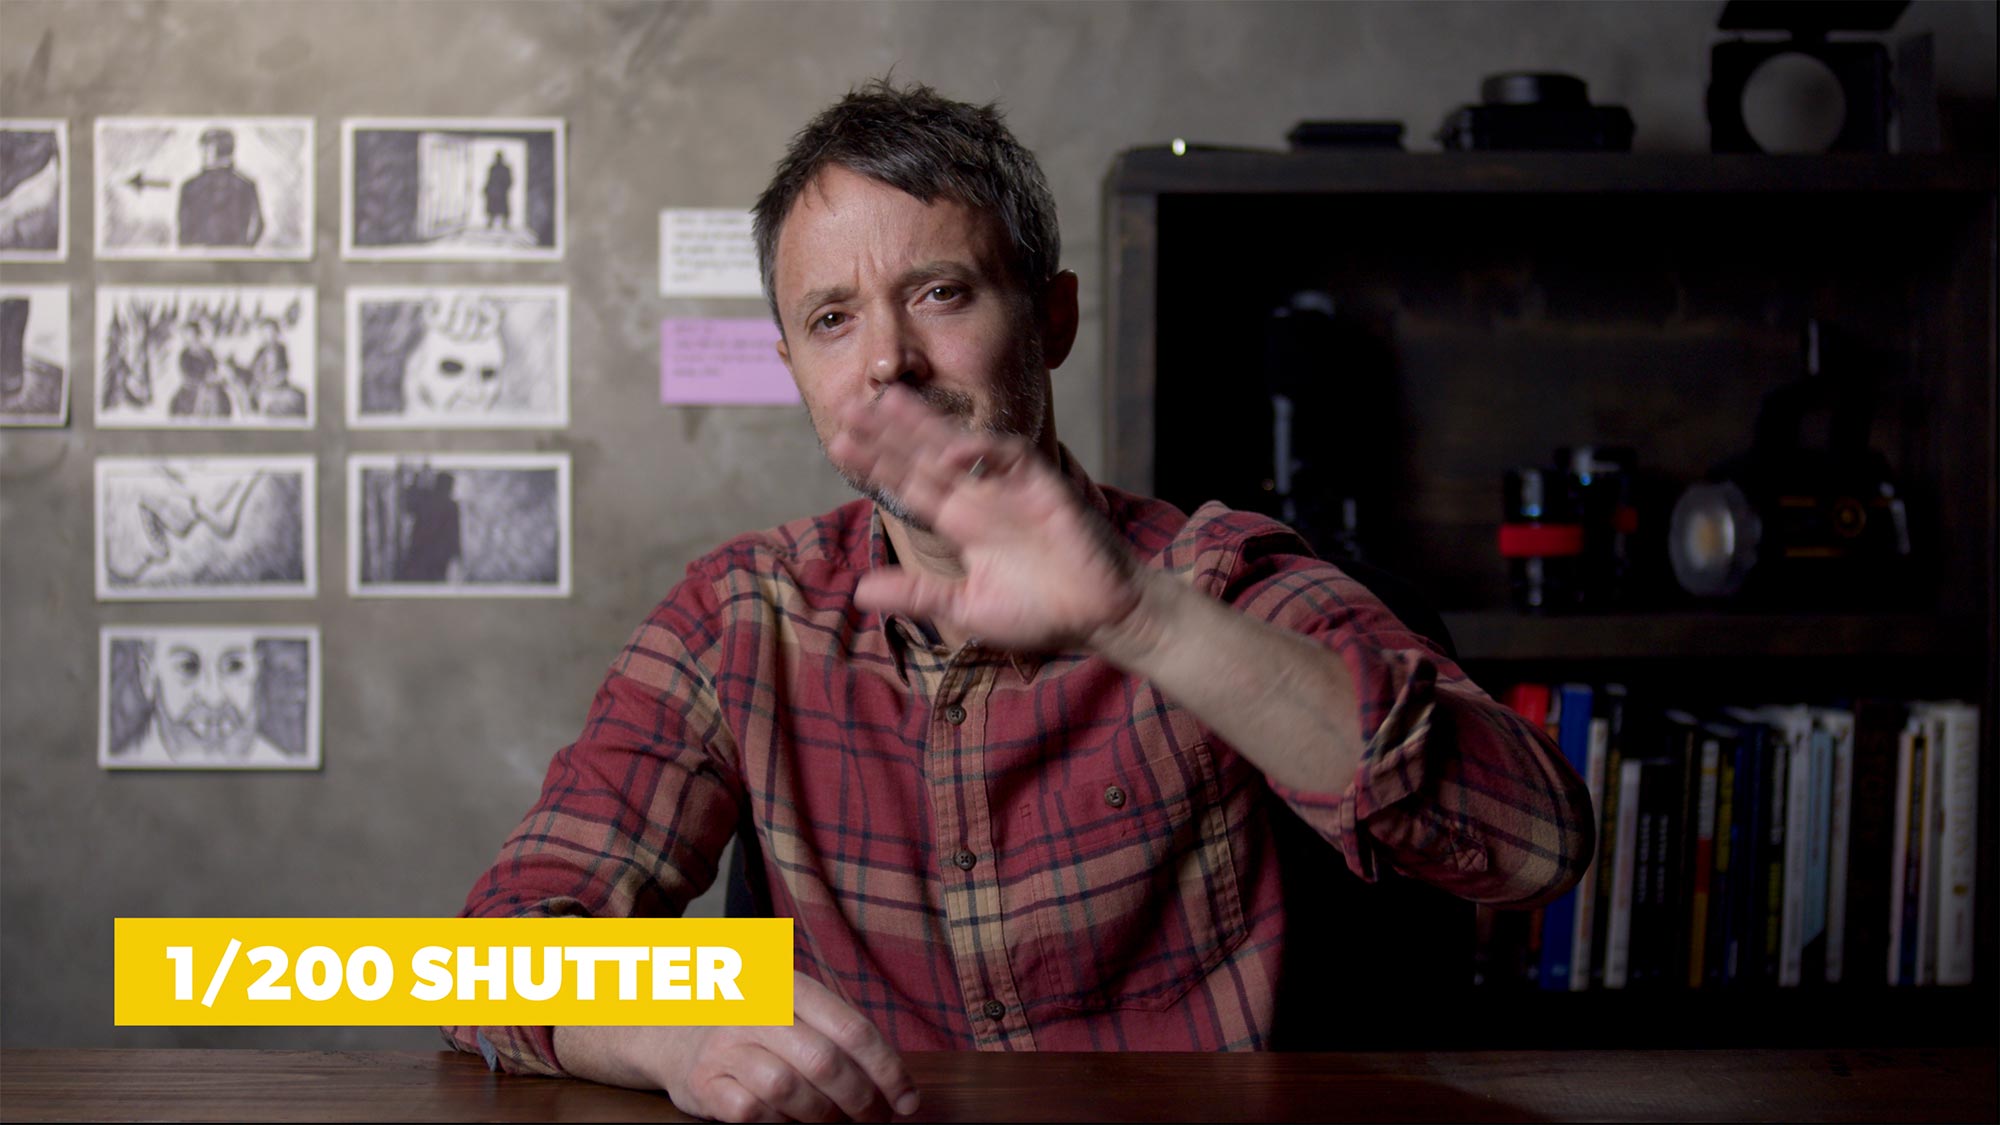
Shutter speed is measured in parts of a second. A 1/200 shutter is open for one two hundredth of a second, and would be considered a fast shutter. A fast shutter cuts down on motion blur and produces a crisper image. A slow shutter introduces motion blur.
Although the shutter controls how long a sensor is exposed to light, it’s not an exposure layer we can use to actually control exposure. Why not?
Cinematic motion blur.
We often shoot narrative film at 24 frames a second for a cinematic look and feel, right? There’s another part to that. It’s an associated cinematic motion blur defined by the 180 degree rule.
Film cameras used to have rotating shutters that exposed each frame of film to light based on a degree of the shutter’s opening. For proper cinematic motion blur, the shutter angle was set to 180 degrees.
To achieve this same motion blur with digital cameras you multiply your frame rate by two.
24 x 2 = 48
If we’re shooting 24 frames our shutter should be set to 1/48th of a second. Shooting 24 frames with a faster shutter would not deliver the cinematic feel that we’re after.
Some cameras (like the Black Magic Pocket Cinema camera) allow you to set the shutter by parts of a second or by angle. This doesn’t change the mechanics of the camera, but simply allows you to do it either way.
The advantage of angle is that you’re guaranteed the right motion blur regardless of your frame rate. For example, if you were shooting a higher frame rate for slow motion for part of the project, the 180 degree setting does the math for you.
Right, so even though the shutter speed technically does affect light hitting your camera’s sensor which affects exposure, it can’t be used as an exposure tool due to the 180 degree rule.
Seriously??? What’s next?
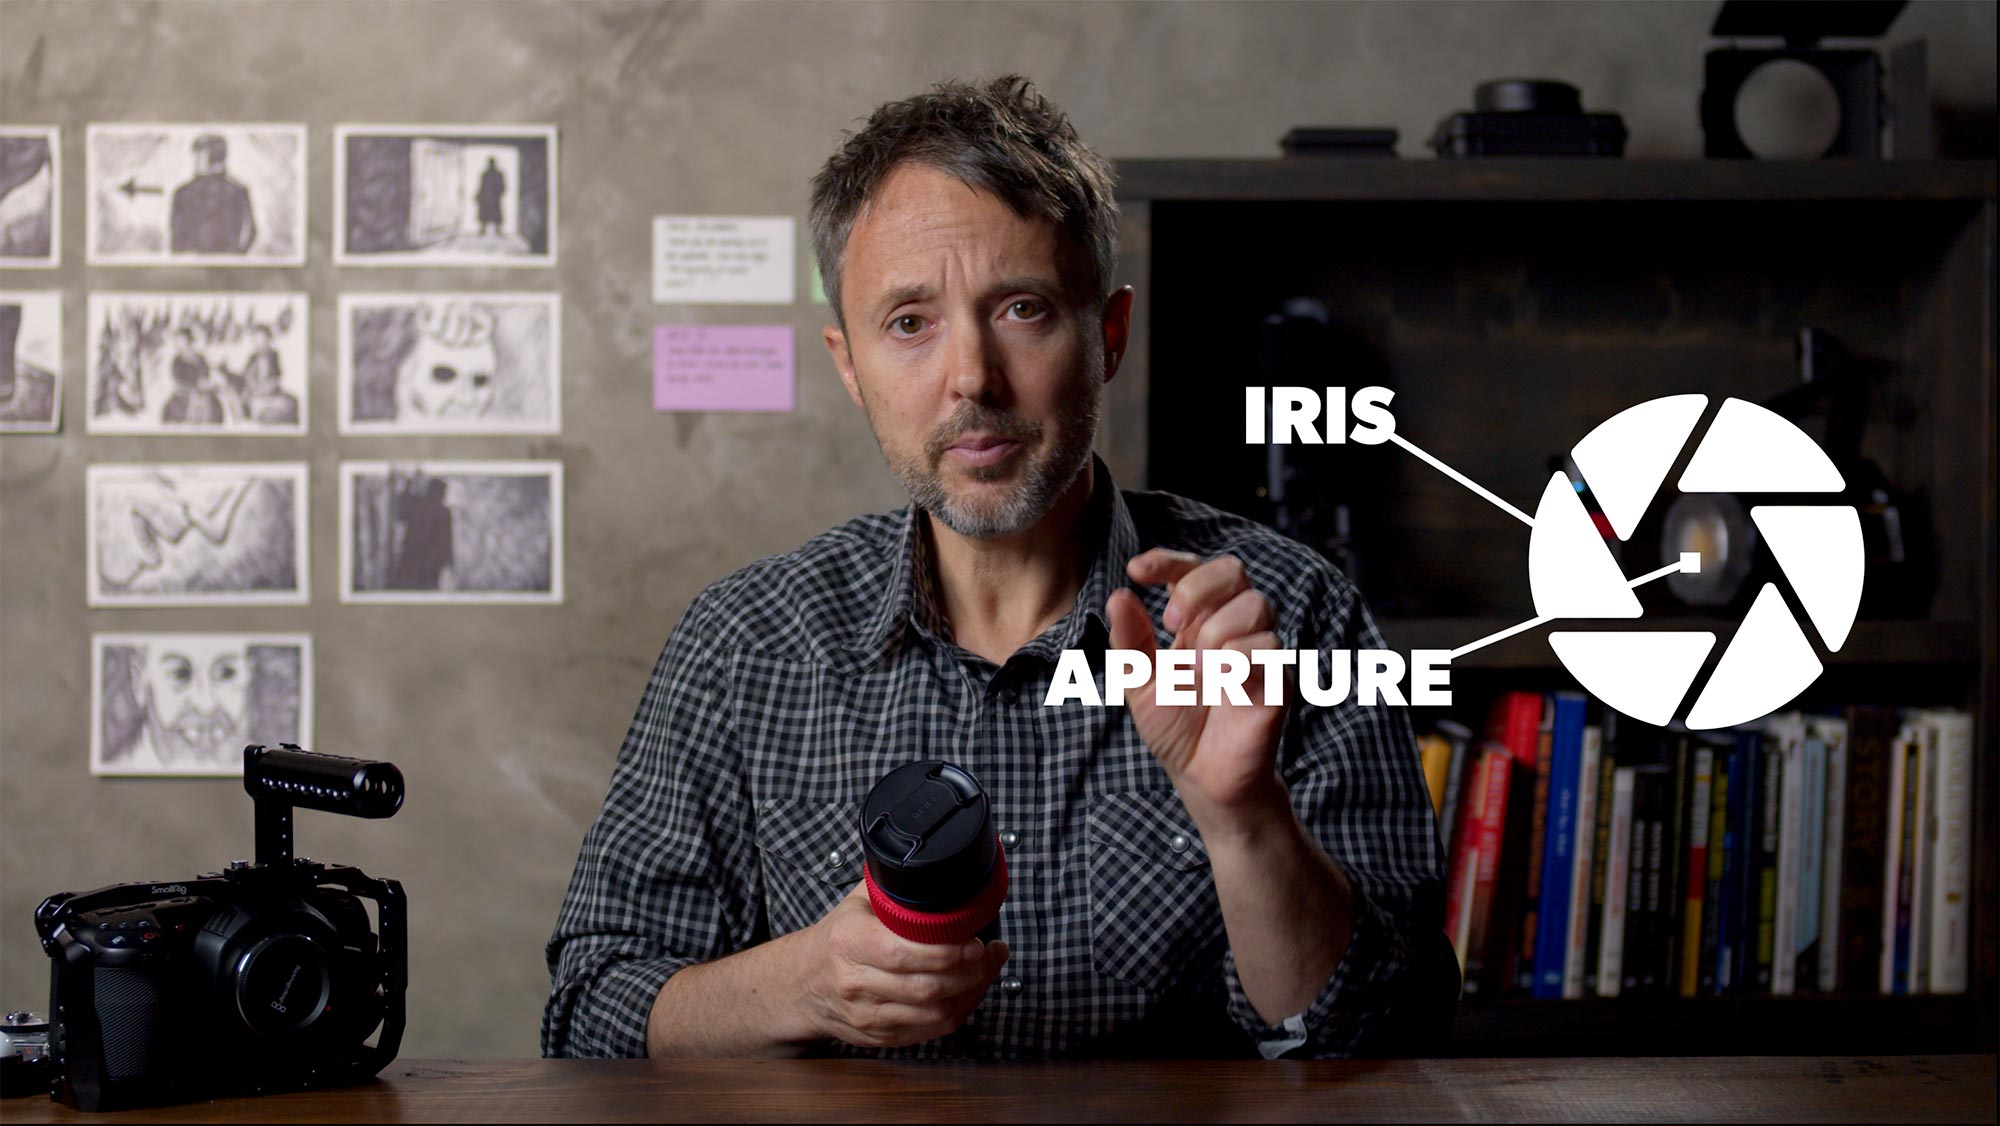
APERTURE
For aperture we leave the camera and move into the lens itself.
A lens has an entrance pupil similar to the human eye. The entrance pupil opens to allow light in and closes to cut light out. The mechanics that open and close is called the iris, and the actual opening itself is aperture.
Aperture is measured in stops of light, and these are called focal stops or F-STOPS on the lens.
The lower the F-STOP the wider the aperture. If you ever hear someone say “I’m shooting wide open” it means they’re at the lowest F-STOP value for that particular lens. This means they’re letting in as much light as possible.
Nice! We finally have an exposure layer that helps control exposure.
Actually, not so fast.
What’s the other thing aperture affects? Depth of field.
Opening and closing the IRIS on a camera mimics a distance change to your subject which affects your depth of field. The lower your F-STOP the shallower your depth of field. If you’re shooting a scene with a couple actors in it, your minimum F-STOP is gonna be 5.6 or greater. Otherwise you’ll have them falling out of focus way too easy.
So what does this mean?
It means another layer of the exposure stack is sometimes not available to us for exposure.
Crazy right? So what’s next?
LUMINANCE (LIGHT)
Our final exposure layer is light, and this is often the only layer available to us as filmmakers that directly affects camera exposure.
Let’s look at a real world example:
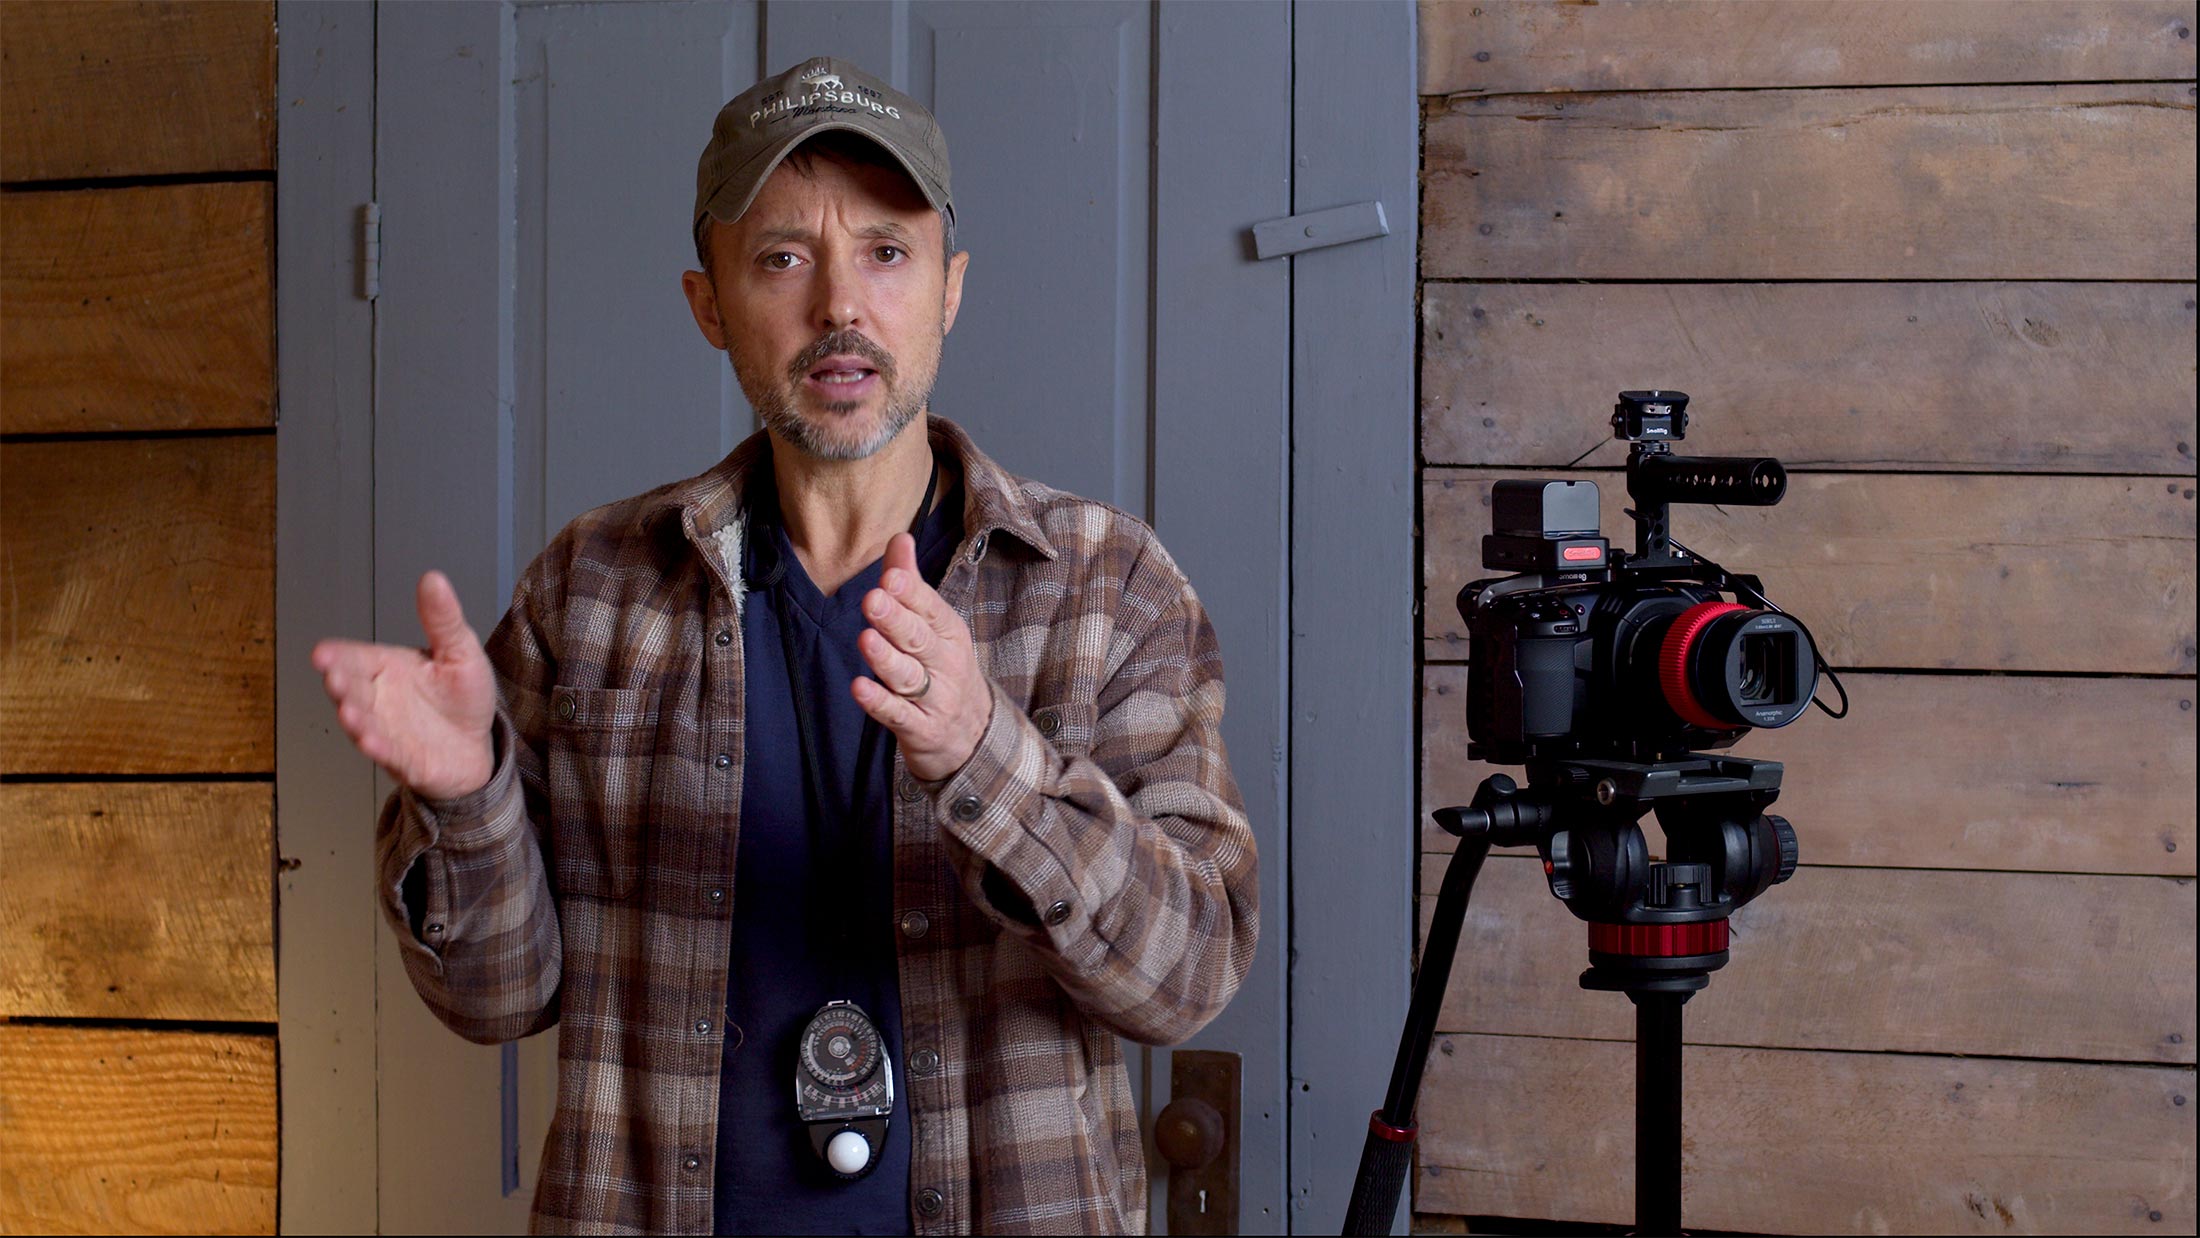
Let’s say the above image is our set and I’m the actor. After we find our motivated light and setup key, fill and background lights (at a minimum) to dial in the mood and add depth we’re ready to work through our exposure layers. To do that we grab a light meter and begin with the foundation:
ISO
For ISO we’ll go with the native ISO of 400 for the Black Magic Pocket camera. This will give us a good balance of dynamic range above and below middle gray. If we can get exposure at the native ISO, unless we have a specific reason otherwise, this is what we do (more on this in a second).
SHUTTER SPEED
We’re shooting 24 frames a second so our shutter is set to 1/48 or 180 degrees.
APERTURE
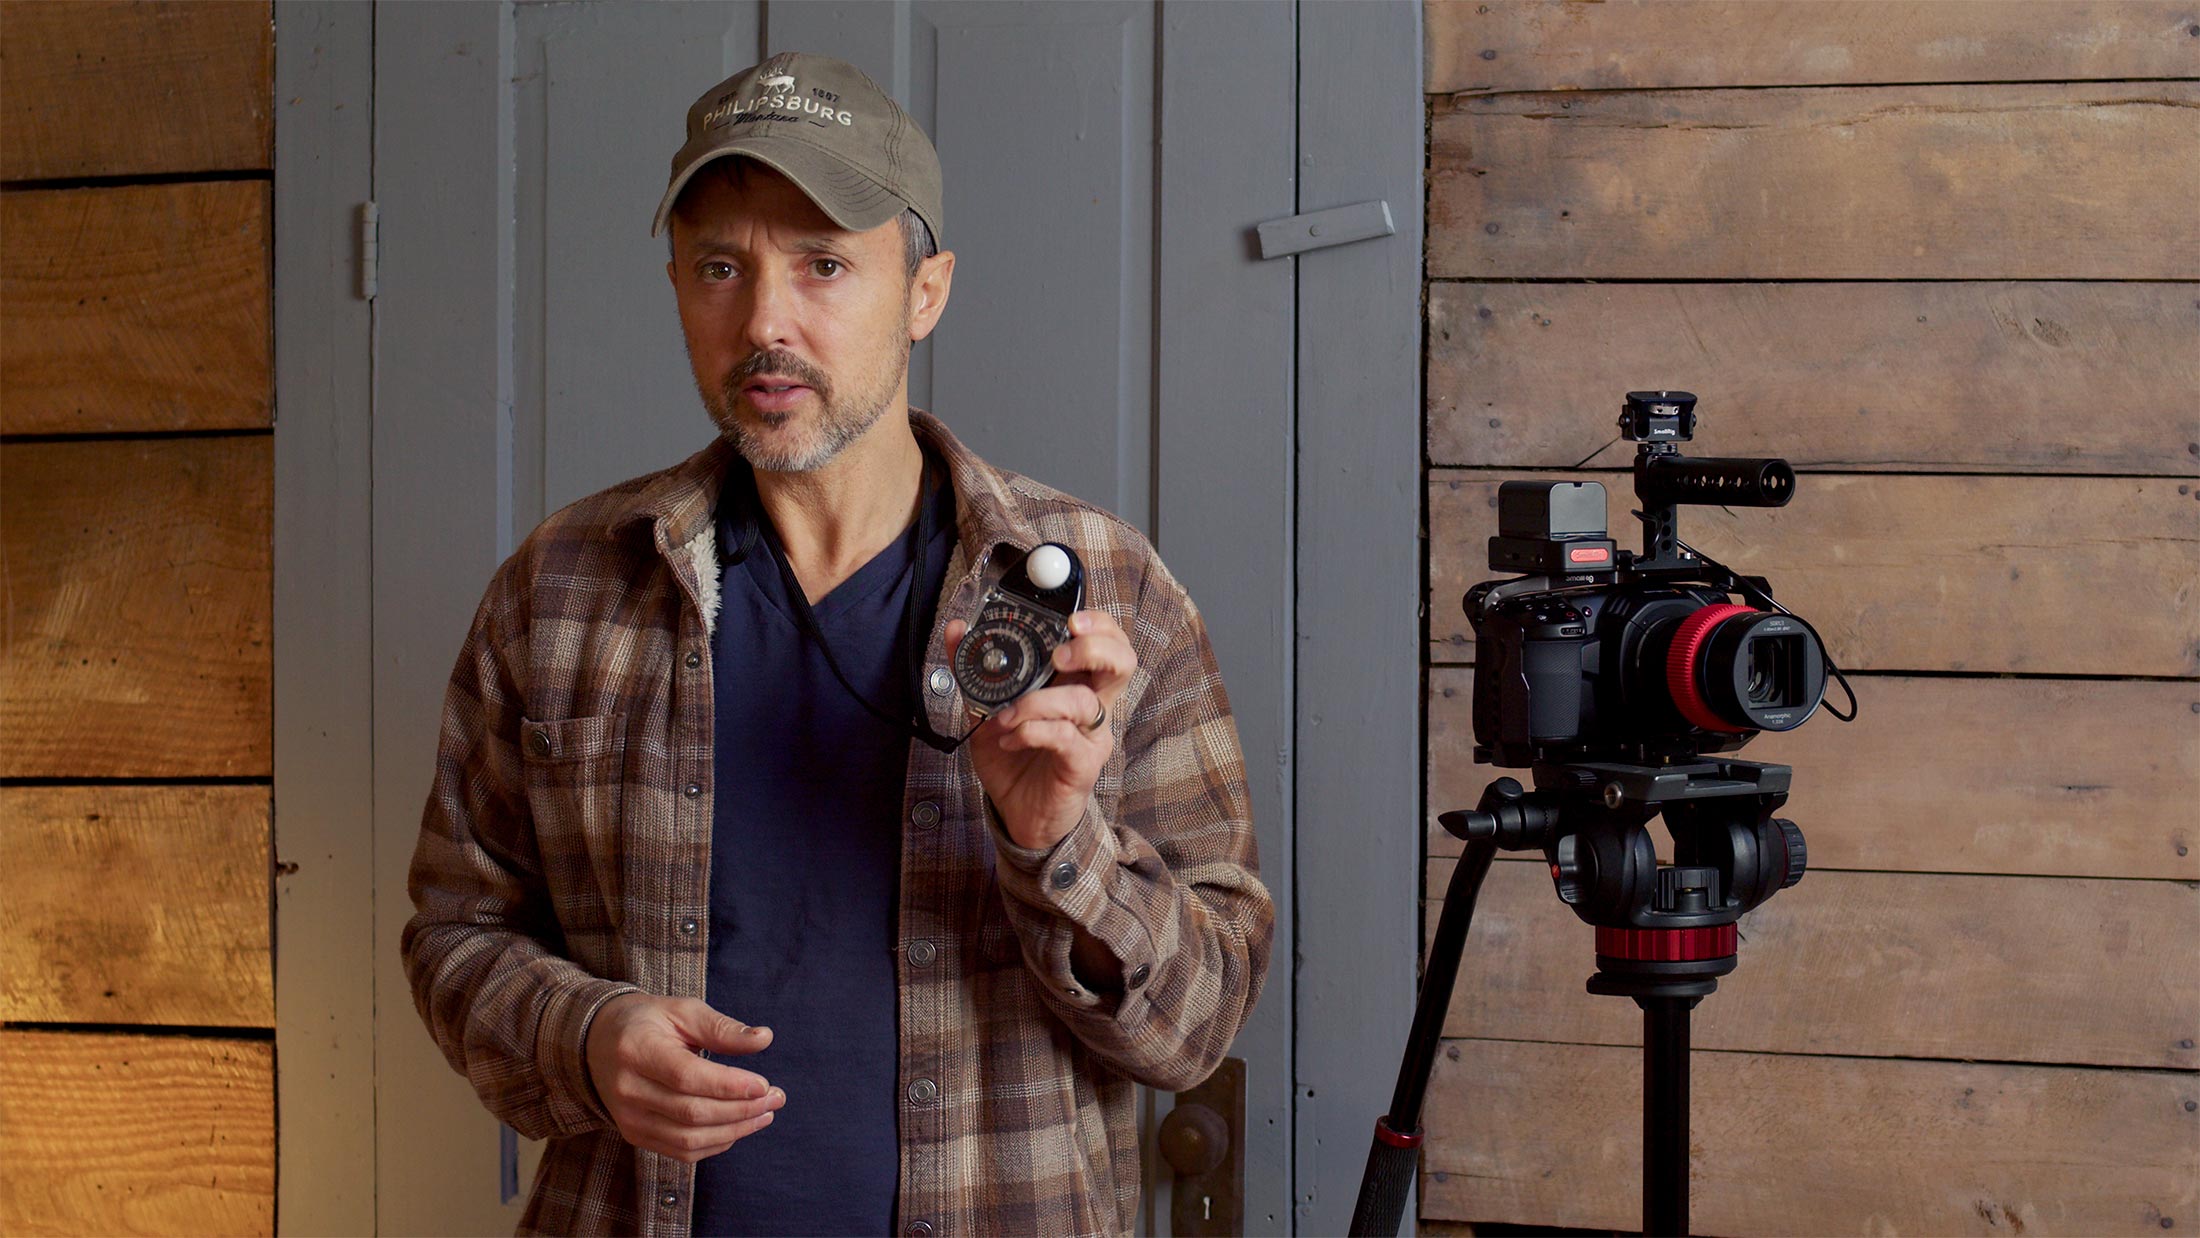
I’ll grab an incident light meter and take a reading. It tells me the current lighting is 40 foot candles.
I’m shooting 24 frames so this has me at an F-STOP of 2.8 for proper exposure (according to the light meter). So if I set my lens to 2.8 that’s it. I’m done! I’ll have proper exposure.
Easy right?
So even though layers 1 and 2 weren’t used for exposure specifically, layer 3 allowed us to dial it in.
But what if this scene had 2 or 3 actors? As mentioned we need to be at an F-STOP of at least 5.6 or higher for a proper depth of field. If I move the light meter to the desired 5.6 F-STOP it will indicate my foot candles rating needs to hit 160. Quite a bit brighter!
The only way to get proper exposure in this scenario would be to modify our final layer: The lighting on set. We’d need to go to our key light and increase it until we get a light reading of 160. And we’d also have to adjust fill and background lights to keep the balanced look we have.
Then and only then would I have proper exposure at an aperture of 5.6.
Make sense? Let’s take another example:
OUTSIDE: Too Much Light
Let’s assume we’re outside on a cloudy day. We’re again shooting on the Black Magic Pocket Cinema camera, and we’re using a SIRUI anamorphic lens with an F-STOP range of 2.2 to 16.
We’ll stick with the native ISO on the camera and set the shutter to 1/48. Next we’ll take a light reading. Let’s say it says it tells us we need to be at an F-STOP of 16 to get proper exposure. We close down to 16 and we’re good!
But that’s also a very deep depth of field. What if we didn’t want that?
We need to operate at our fourth layer…but we can’t control the sun.
What to do?
A large silk could be used to remove stops of light. Or an easier method would be to use an ND filter. “Sun glasses” for your camera. ND filters can be added to a lens (the 6K Pro has internal ND) and such a filter removes stops of light allowing us to open up.
OUTSIDE: Not Enough Light
We’re still outside but losing daylight.
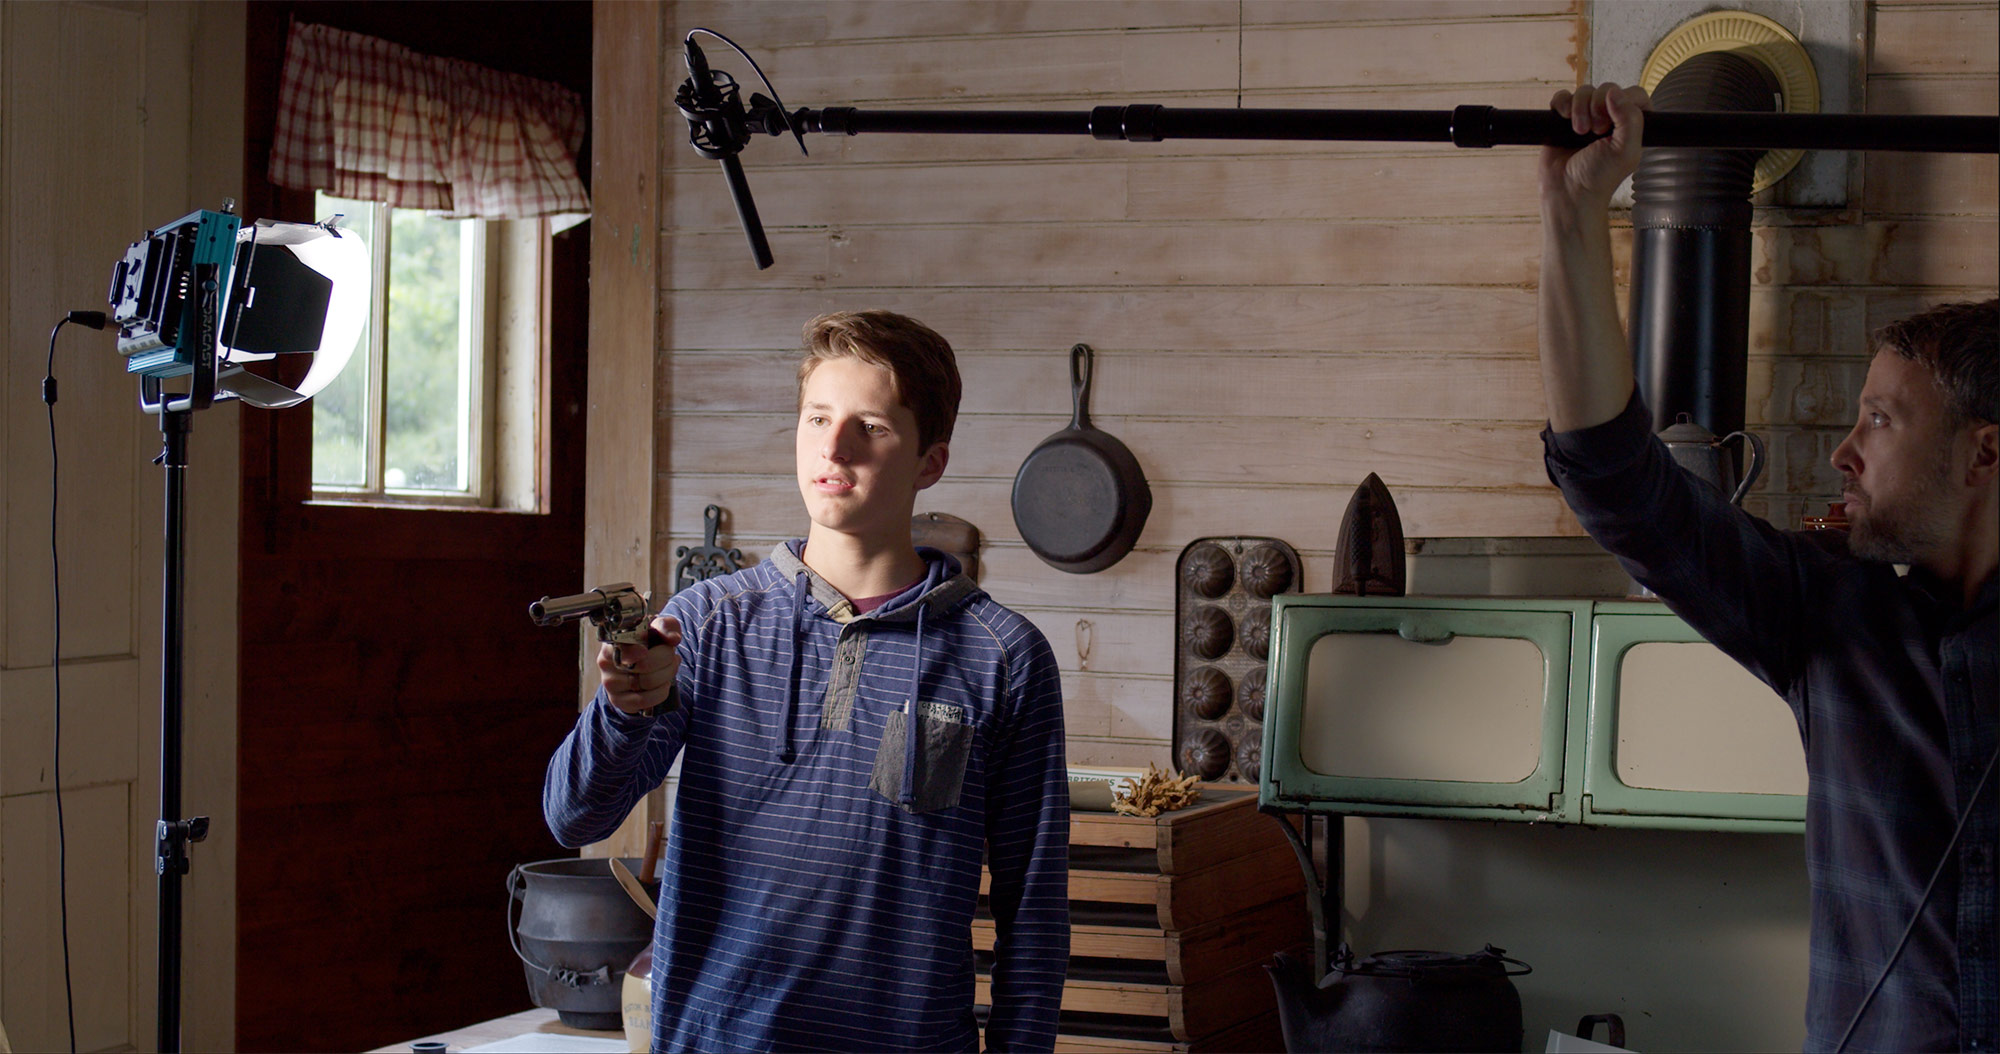
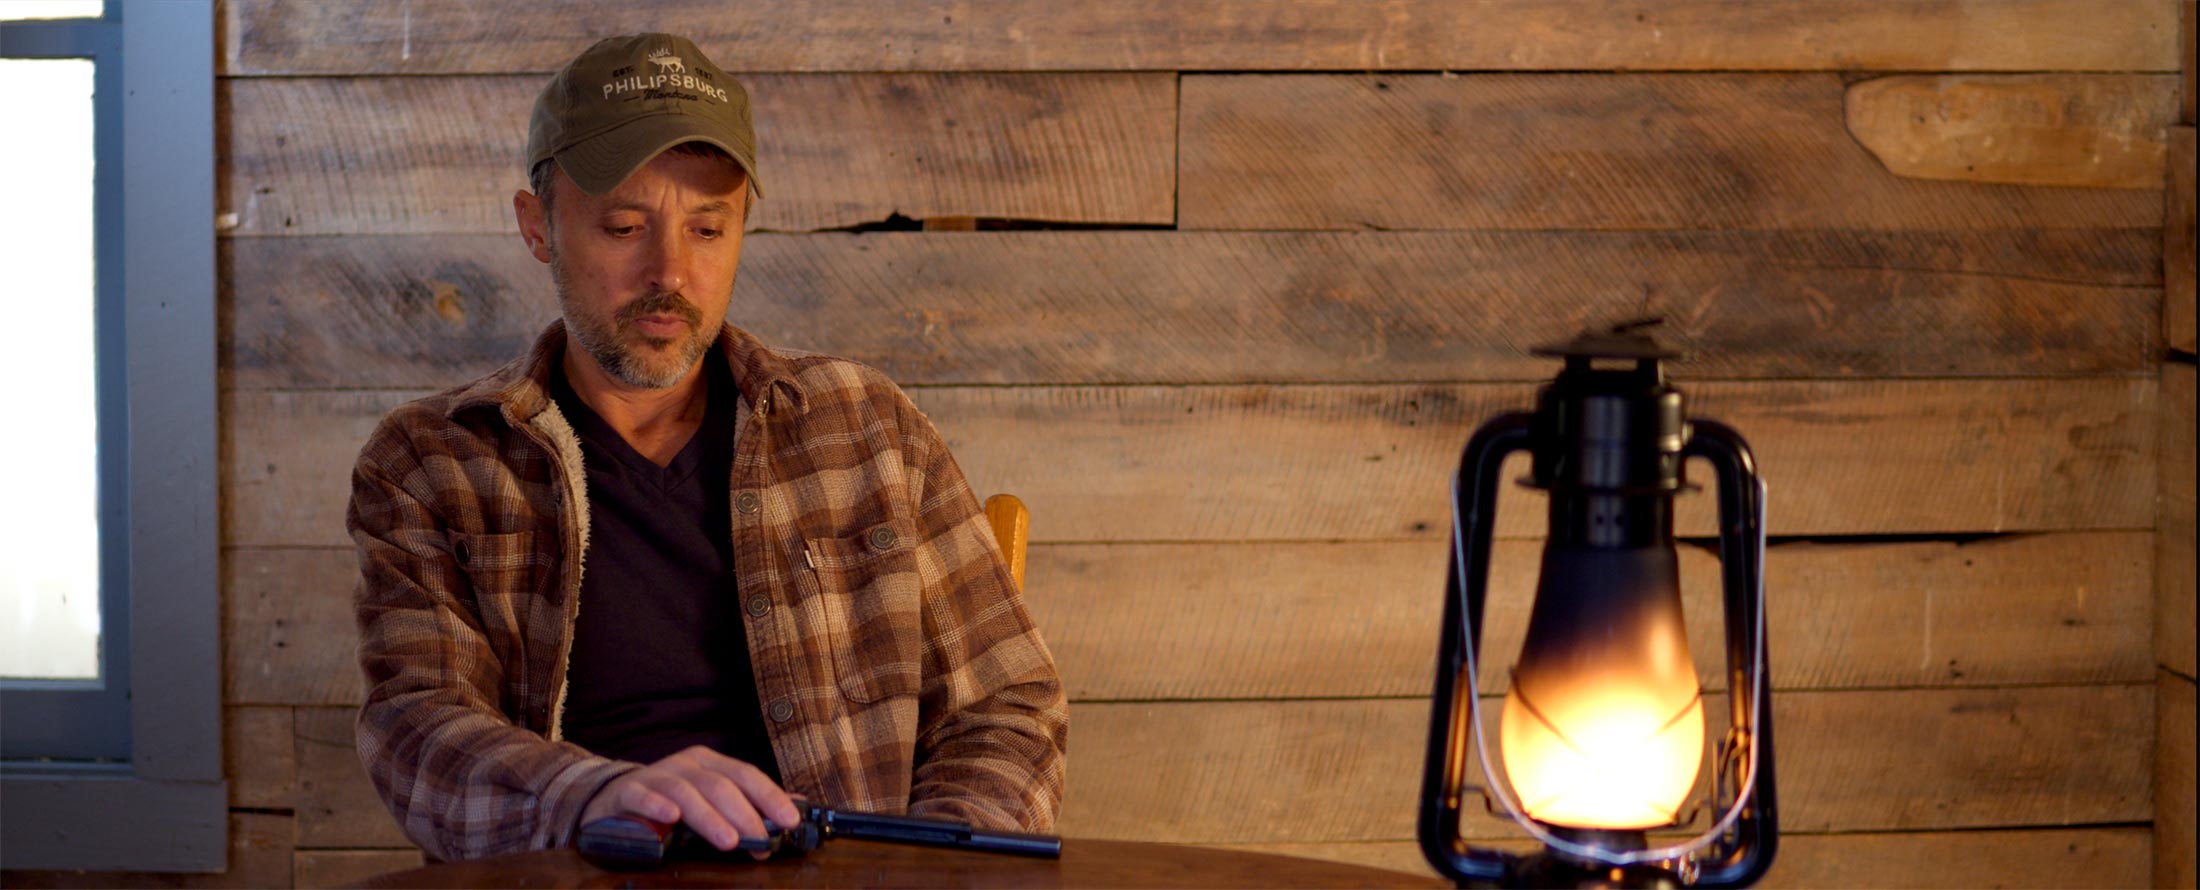
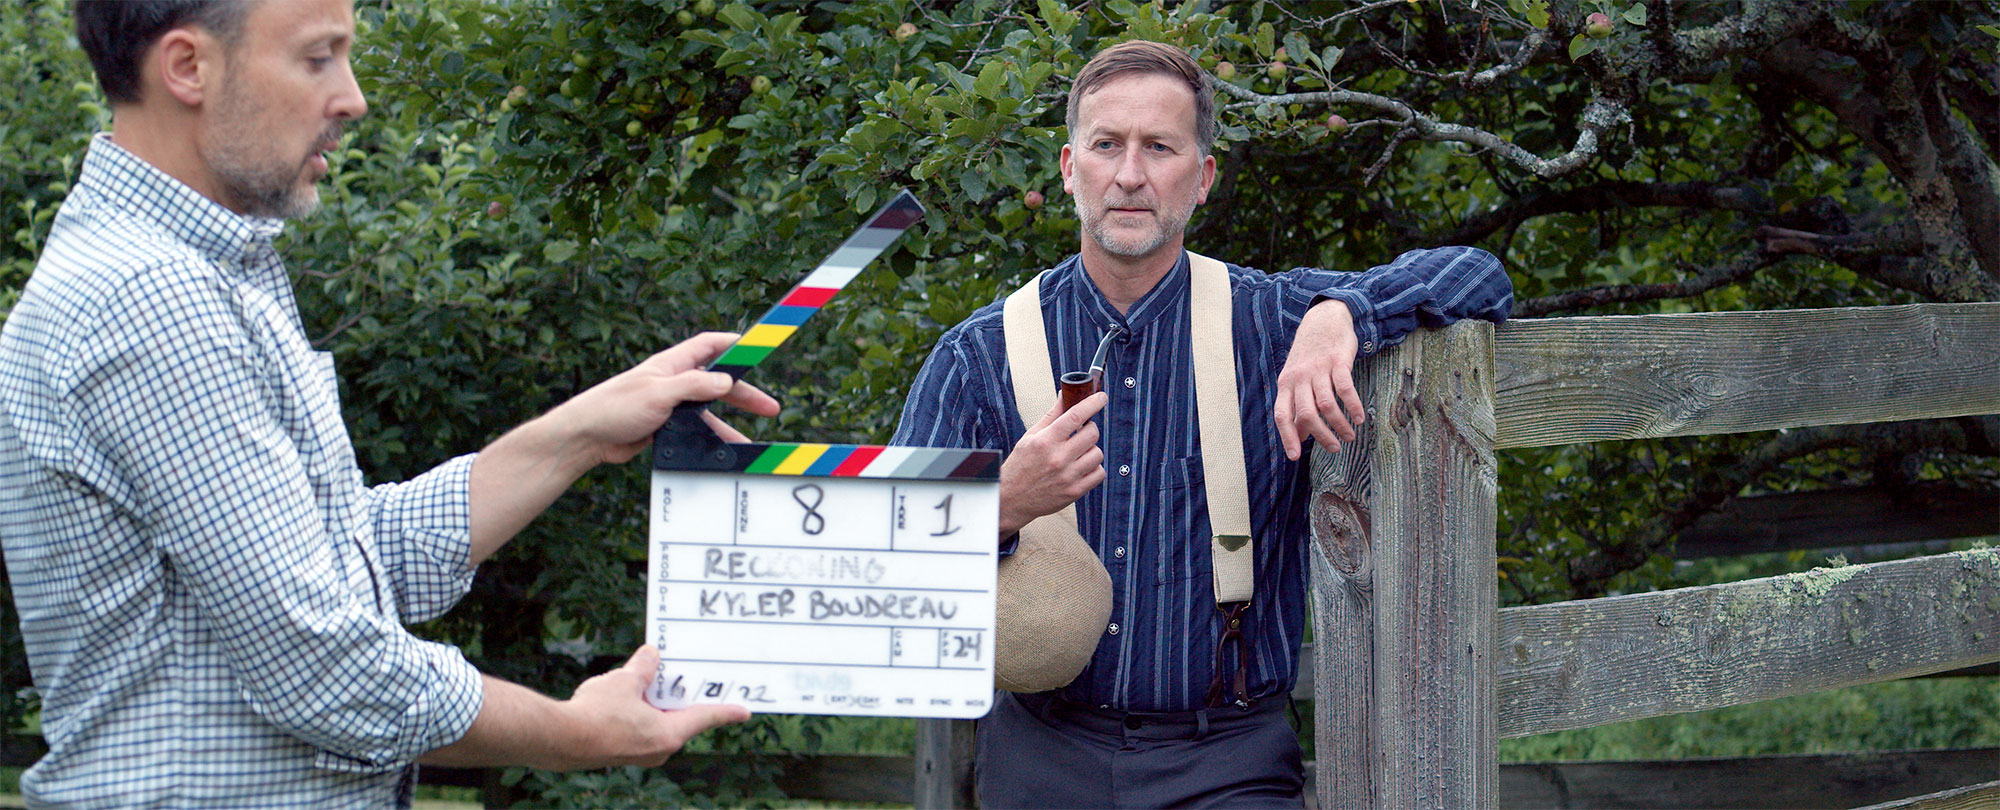
This happened to me on my latest film RECKONING. It was evening. I was opened up all the way to 2.8 on my particular lens, but still didn’t have enough light.
What was the solution?
I had to go back to my foundation layer. A secret weapon on the Black Magic Pocket Cinema camera is called dual native ISO.
We’ve already seen how ISO moves the camera’s dynamic range above and below middle gray, right? Cranking up the ISO to make the sensor “more sensitive to light” doesn’t work as it introduces noise in your footage.
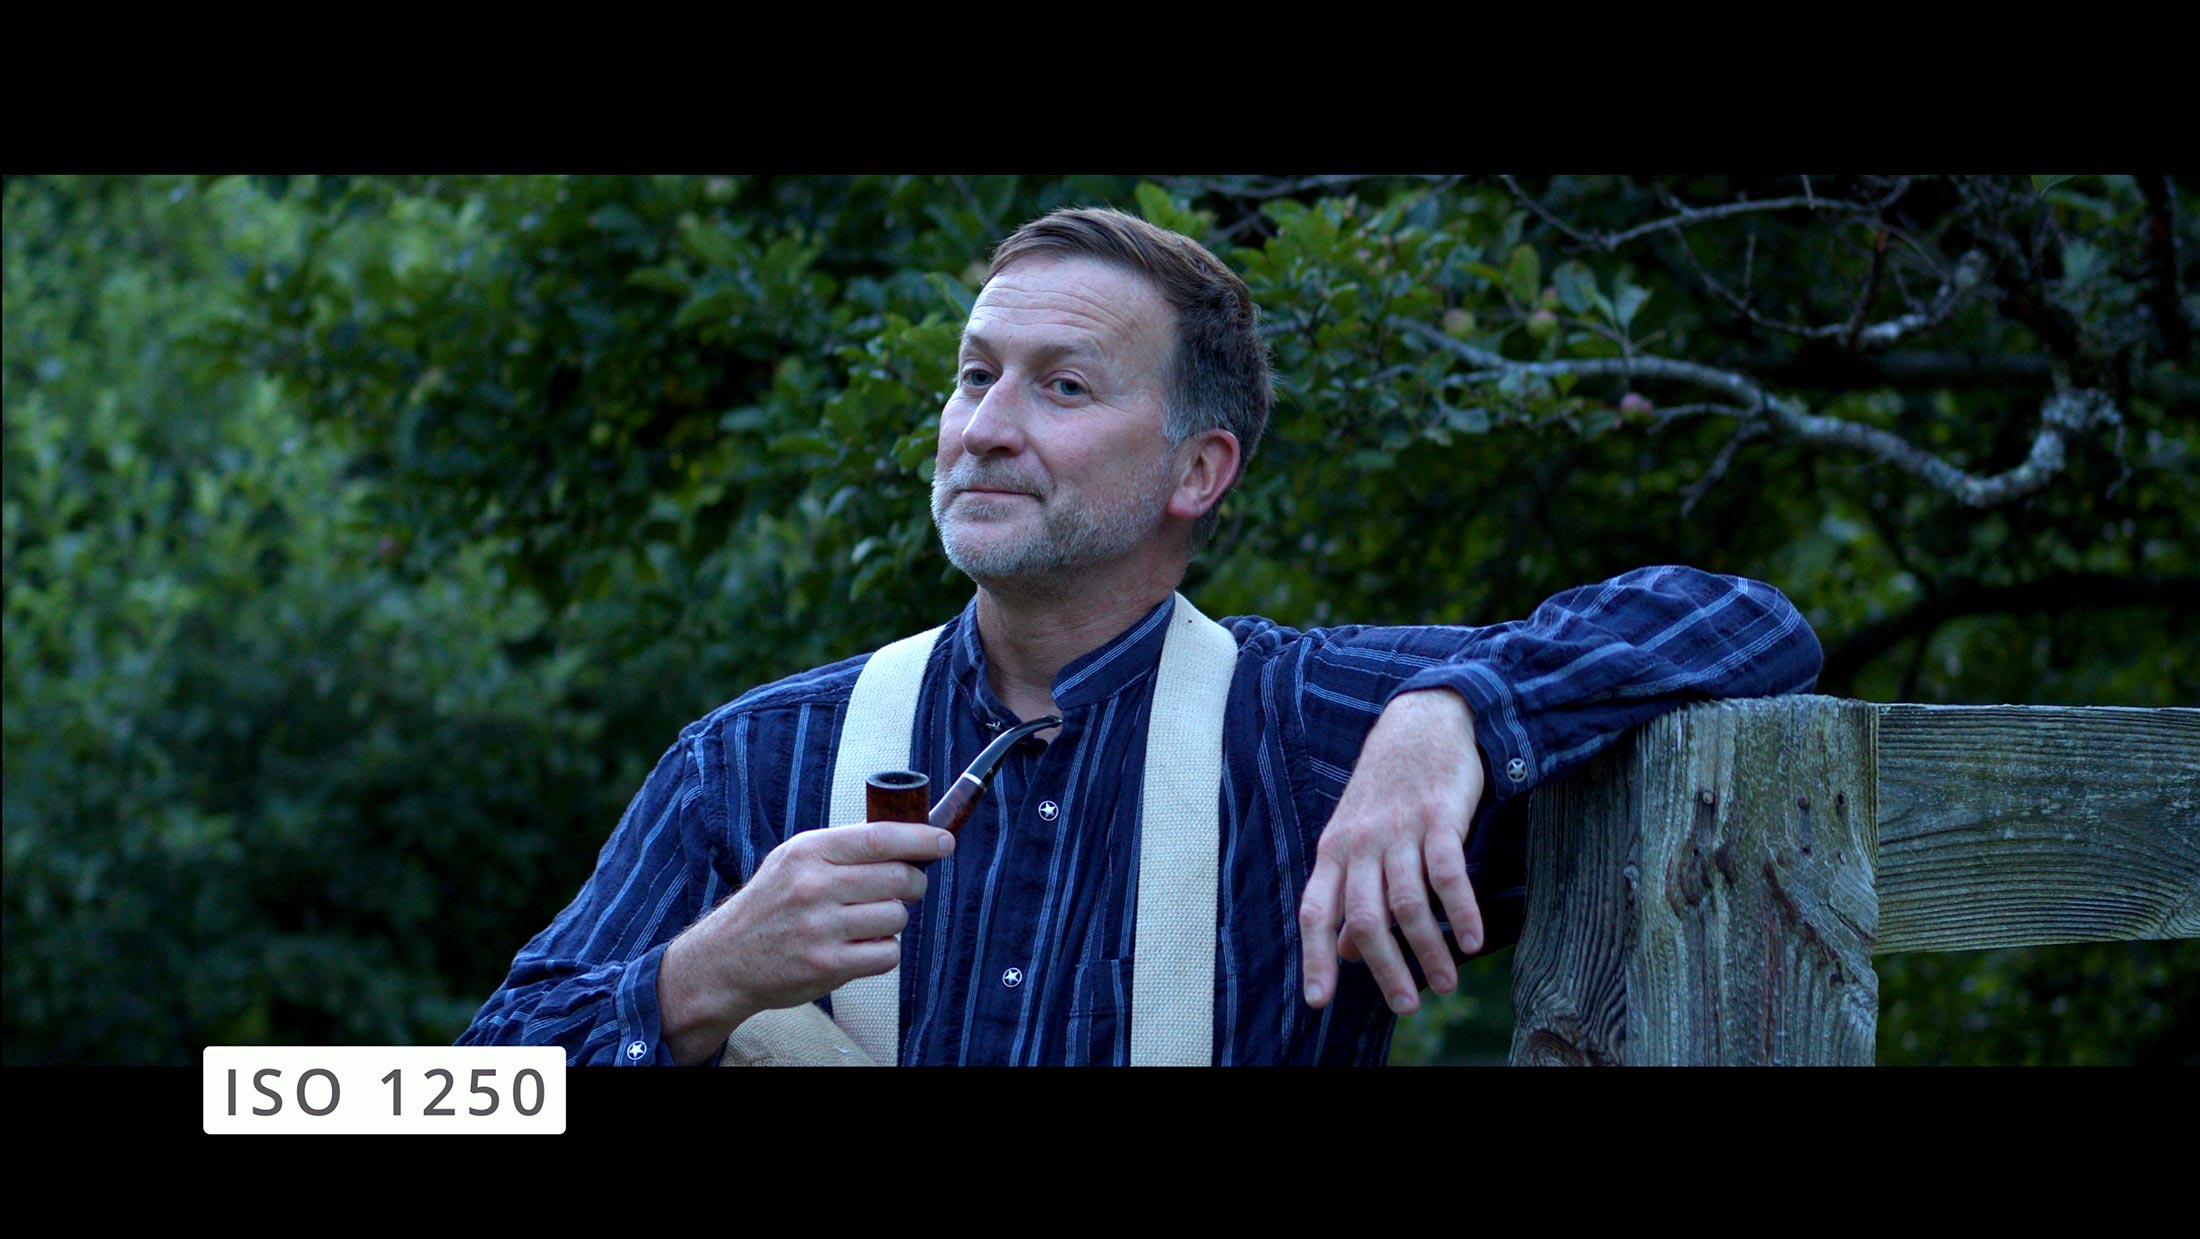
Black Magic Design built a second native ISO bank to help with this. It’s literally like introducing another camera to your workflow. The second ISO bank on the Pocket 4K starts at ISO 1250 with 3200 being the “native” ISO or the best compromise on dynamic range for the second ISO bank.
So as the sun set and sucked away my daylight, I switched to ISO 1250 and used false colors on the camera to adjust my aperture back down so I didn’t over expose.
Check out stills from the footage:
In this instance, our foundation layer was actually used as an exposure tool. But only because of the dual native ISO. And remember, when you change the foundation layer you must ensure layers 3 and 4 fall in line.
Let’s look at a final example:
CONTROLLED SET: Low Light Details
Let’s say you’re shooting a scene for a thriller that takes place in an old house at night. You want to capture a lot of details in the shadows. This means we want to move our camera’s dynamic range further below middle gray.
The obvious thought is to drop our ISO down to 100 (see the chart from Black Magic Design below). An ISO of 100 delivers the most stops of exposure detail below middle gray for the Pocket 4K.
But here’s the thing: Setting your camera to ISO 100 isn’t a miracle worker.
Example: We’re in the old house. Let’s say I need a decent depth of field so my actor doesn’t fall out of focus. So we’ll set our F-STOP to 5.6. Cool.
Now if I set my lighter meter to an ISO of 100 and an aperture of 5.6, the light meter tells me I need to be at…wait for it:
640 foot candles.
Whoa! That’s an insane amount of light.
Once again we’re relying on the light layer to get proper exposure based on the foundation we are exposing to, which is ISO 100.
Telling the camera to be at ISO 100 is only a dynamic range positioning tool, not an exposure tool.
Hopefully this makes sense.
So what’s our main takeaway as filmmakers?
1) There are four main exposure layers: ISO, Shutter Speed, Aperture and Light.
2) ISO is typically not an exposure tool. It’s more of a dynamic range selector.
3) Our Shutter must be at a multiple of 2 of our frame rate.
4) Aperture can be used for exposure, but may be limited by depth of field requirements.
5) Often our final layer, the light layer, is how we obtain proper exposure. And the tools at this layer are of course lights, ND filters, silks, scrims, etc.
Once you truly understand exposure and have a quality light meter, dialing it in is no longer a gamble.
If you’re an aspiring filmmaker, the Write & Direct online film school can save you years in your pursuit of the craft!
Check out our FAQ page, or contact us with any questions.
Or if you’re ready to “change your stars” (A Knight’s Tale) then enroll in Write & Direct today!
Does the school you attend make that much of a difference in your chances at a career in Hollywood?
No. The school you attend has very little to do with where you’ll end up. Why? Because if there’s one thing the entertainment industry doesn’t care about, it’s your education.
Sure, you’ve gotta know what you’re doing. Yes, you need to network.
But how you get to these points is irrelevant. Ask Tarantino who dropped out of high school. Chris Nolan who studied English in college. Or James Cameron who dropped out of college entirely and worked as a truck driver while learning to write.
If there’s one thing the entertainment industry doesn’t care about, it’s your education.
Personally, I did the normal thing. Attended film school right on Sunset Boulevard in the heart of Hollywood. My directing teacher was a member of the DGA. My sound design teacher worked on Law & Order during the day and taught us at night. I graduated with honors with one of the most polished reels in my class.
Did this land me a job in the industry? Not in the least.
The reality for wanna be writers and directors is that after you put your heart, soul (and bank account) into film school, there’s nothing waiting for you. No one is going to hire you to direct a movie. Ask me and my fellow classmates!
After graduation, many wanna-be filmmakers work odd jobs just to pay rent. Others end up actually working in the industry, but in a job that has nothing to do with directing. Still others call it quits and move back to you know….Iowa.
It took years for me to finally write and direct my own projects. And it took equally long to truly understand the craft of story telling. You see, as educational as film school was, I graduated without understanding the deep truths of telling a story for the big screen. And I’m not a solo case of this.
Directing actors on the set of RECKONING
So back to the question, which film school should you go to?
The answer is simple: One that will truly teach you the craft, and do it in the right way. A school that will assist in networking with other filmmakers. And finally, a school that educates you in the least amount of time possible with little money spent.
Because regardless of where you go to school, you’ll end up the same as everyone else. A film school graduate faced with the daunting task of paying rent, buying food and funding your own films in order to gain credits as a writer and director.
This is the indisputable fact of the entertainment industry.
Regardless of where you go to school, you’ll end up the same as everyone else. A film school graduate faced with the daunting task of producing your own projects in order to gain credits as a writer and director
So what’s the good news? You can achieve this with Write & Direct.
Write & Direct is cohesive training that will make you unstoppable as a filmmaker. During the training you’ll write and direct your own film with the goal of submitting to film festivals and IMDb.
More importantly, you’ll learn how to do it right. From development through post production.
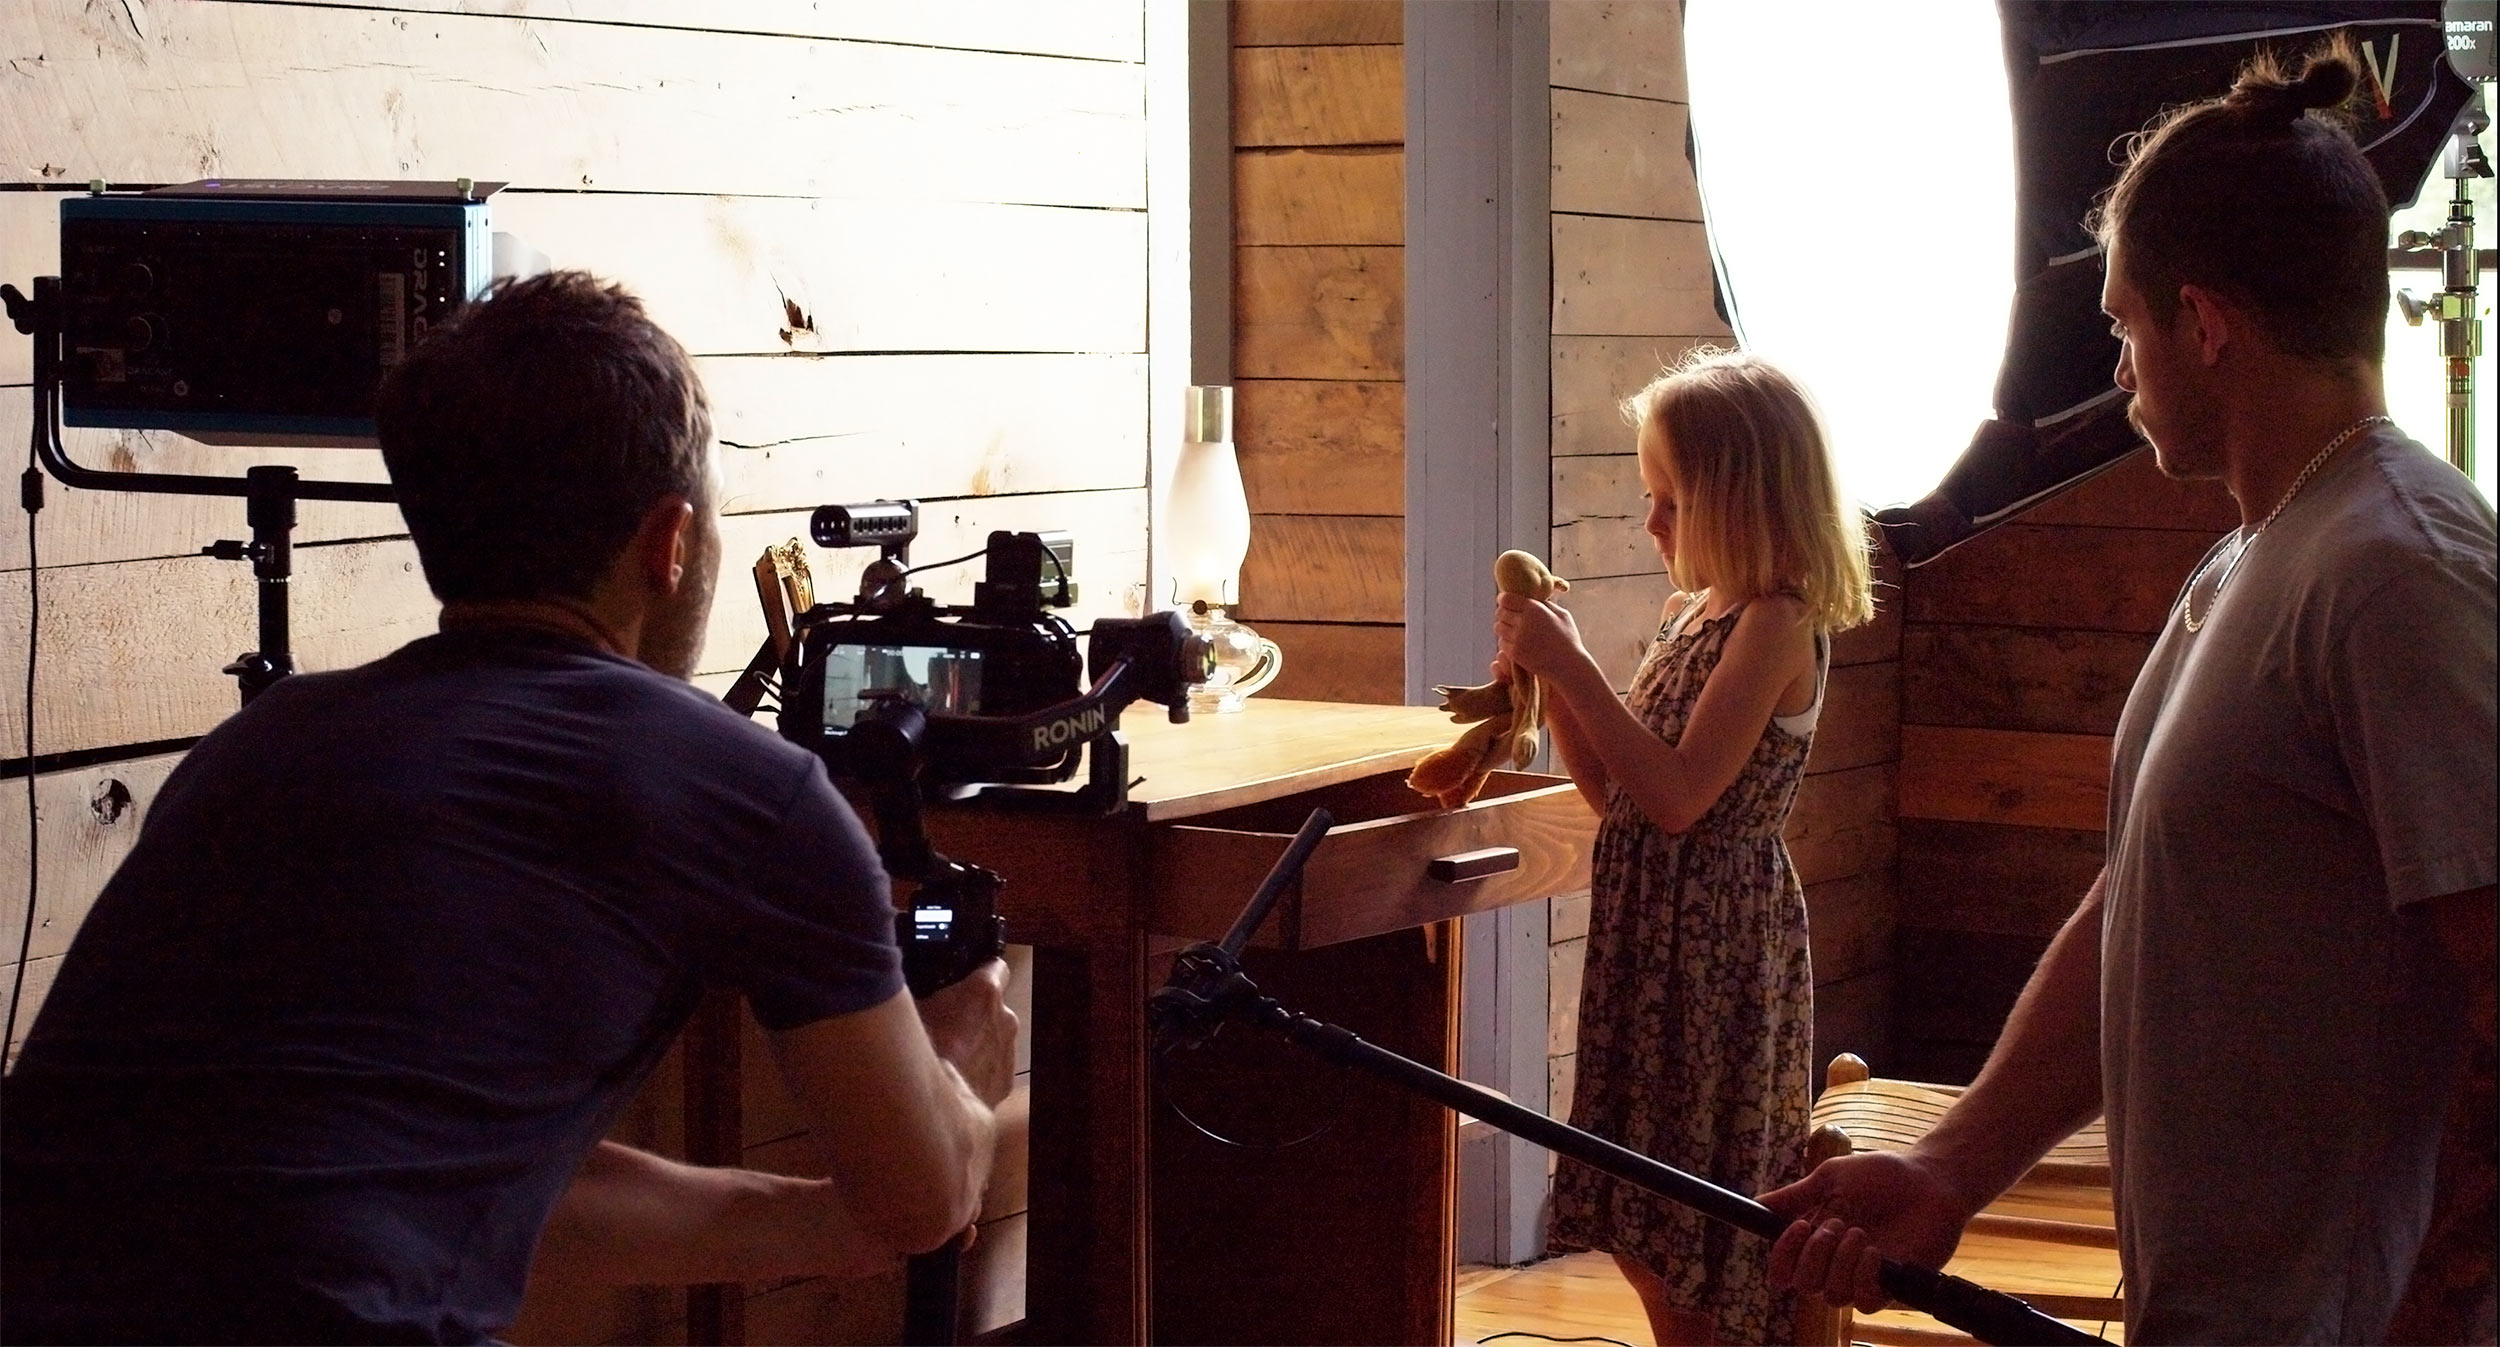
Playing the role of Director, DP, Sound Mixer and 2nd AC on the film RECKONING
I too am an independent filmmaker, currently wrapping production on a film as this blog post is typed. Back in 2020 while on another movie, the idea of Write & Direct hit me, and I’ve been on mission to create this school ever since.
I know what you need to know to get started as a filmmaker.
Write & Direct is the film school that can shave years off your pursuit of the craft. Trust me, I know what it’s like to do it the “normal” way.
Have you heard a similar story before? Maybe this is you?
You’re crazy about movies and can’t imagine anything more fulfilling than a career making them. So now you’re wondering how to make it happen!
That was me all the way.
So the question: Does film school matter? I put my heart and soul into film school. Even though directing was my goal, I realized early on that nobody was going to hire me to direct anything after school. Decided on a double major in editing and sound design. Graduated with honors and had a polished demo reel ready to hand out prior to graduating.
Things were going to happen!
But something unexpected materialized after graduation. It was this elephant in the room that none of us “dream seekers” really wanted to face. And to be honest, film school didn’t prepare us for.
What was it? That Hollywood didn’t care about our education.
Not one bit.
I realized my time in film school simply didn’t matter in the film industry. I’ll never forget calling studios hoping to land an assistant editor position. The receptionist at Fox said, “You realize we only hire award winning editors right?” No…not really.
I learned a lot in film school, but there was a problem. An elephant in the room that we just didn’t see coming.
With no jobs on the horizon, I was forced to work in retail just to pay rent. Slept on an air mattress in a condo with two others guys who were also trying to “break in.”
You realize we only hire award winning editors right?
The receptionist at 20th Century Fox
This was sobering. Did film school not matter? This wasn’t how I saw things going.
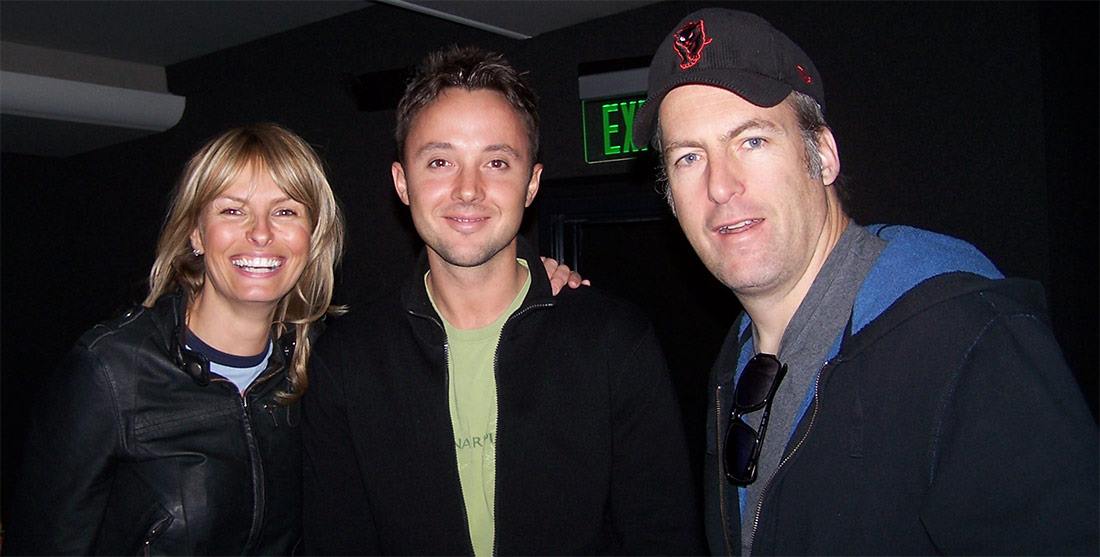
But something happened — Someone I’d met on a short film contest worked at Universal Pictures. And she got me an editorial PA job on Let’s Go To Prison, a movie directed by Bob Odenkirk.
Whoa…My Hollywood life had finally begun!
Tracey Wadmore-Smith, Kyler Boudreau and Bob Odenkirk on the set of The Brothers Solomon
So did my pricey film school education help me as a PA? Well…The best way to prepar for life as a PA is to know where all the restaurants and Coffee Beans are located in Hollywood.
Film school education not required.
Crud! So what does matter? How do you get anywhere in the film industry?
I’ll never forget when it happened. It was a typical sunny California afternoon. I was sitting at my desk in a production office off Melrose, right down the street from Paramount Pictures. I listened as Matt Berenson (producer) and Bob Odenkirk searched for an editor for their next movie, The Brother’s Solomon.
Where were they looking? IMDb.
The fog began to clear — Hollywood only cares about what you’ve done. Who you know matters too, but even with that you still need credentials on IMDb.
Interesting. I made the decision to jump into independent film in order to hold key positions and get credits on IMDb vs spending years working up the PA ladder with no guarantee of ever directing a single movie.
But there was kind of a big problem: Indie film doesn’t pay.
Sure, you land credits on IMDb, but a full time job is required to pay rent, buy food and…oh yeah, pay off school loans.
Film school taught me a lot about filmmaking. It didn’t prepare me for the reality of life after school in the entertainment industry. And this devours the careers of so many people who move to LA to follow their dreams!
The first thing any aspiring director must do after graduation is begin writing and directing movies. But those who dump $30-60K on their education typically don’t have any resources left to pay rent, let buy gear and start shooting.
Film school taught me a lot about filmmaking, but it didn’t prepare me for the reality of life in the entertainment industry.
So what’s the answer — Does film school matter?
I think film school is definitely important, but the system is messed up. The entertainment industry is overloaded with people trying to make a living. Studios are guarded citadels, with scores of hopefuls waiting outside the castle walls hoping for their chance to break in.
Hundreds of people are working for free on any given week just to gain credits on IMDb. And if you won’t work for free? Then get out of the way because there are 100 people in line behind you who will.
Am I trying to say it’s impossible? NO WAY. If you want to make movies, nothing can stop you.
Nothing.
But if you don’t approach it right, you could end up as yet another statistic.
You know, that cool person who moved to LA from Ohio to follow their dreams only to crash and burn and move back home at the age of 38.
If you’re serious about making movies, then you need to learn the craft quickly without draining the bank account. And you’ve gotta learn it the right way so you don’t waste time doing it wrong.
And this is precisely what Write & Direct offers aspiring filmmakers.
Write & Direct is hands on, cohesive training on the craft of filmmaking.
Students begin in development and move through every phase of making a movie. They complete their first film during training — A film that can be submitted to film festivals, and even put on IMDb!
Filling in as 2nd AC on my film RECKONING shooting in the mountains of Western North Carolina.
I’m a current filmmaker who lives in the trenches of independent film.
It’s one of the most rewarding things you’ll ever do! But it’s hard work, and you have to put in the time to get anywhere. And most of all, you have to truly learn the craft. Too many filmmakers make movies before they even understand the conventions of story telling.
But that’s not gonna be you.
I can teach you things you won’t learn in film school. Things that took me years to learn after graduation. The Write & Direct training could literally shave years off your pursuit of a filmmaking career. And my training is backed with a 100% money back guarantee.
It’s time for you to begin.
Instead of spending $60K on film school, learn the craft and use your money to buy gear and pay rent while you truly make the magic happen!
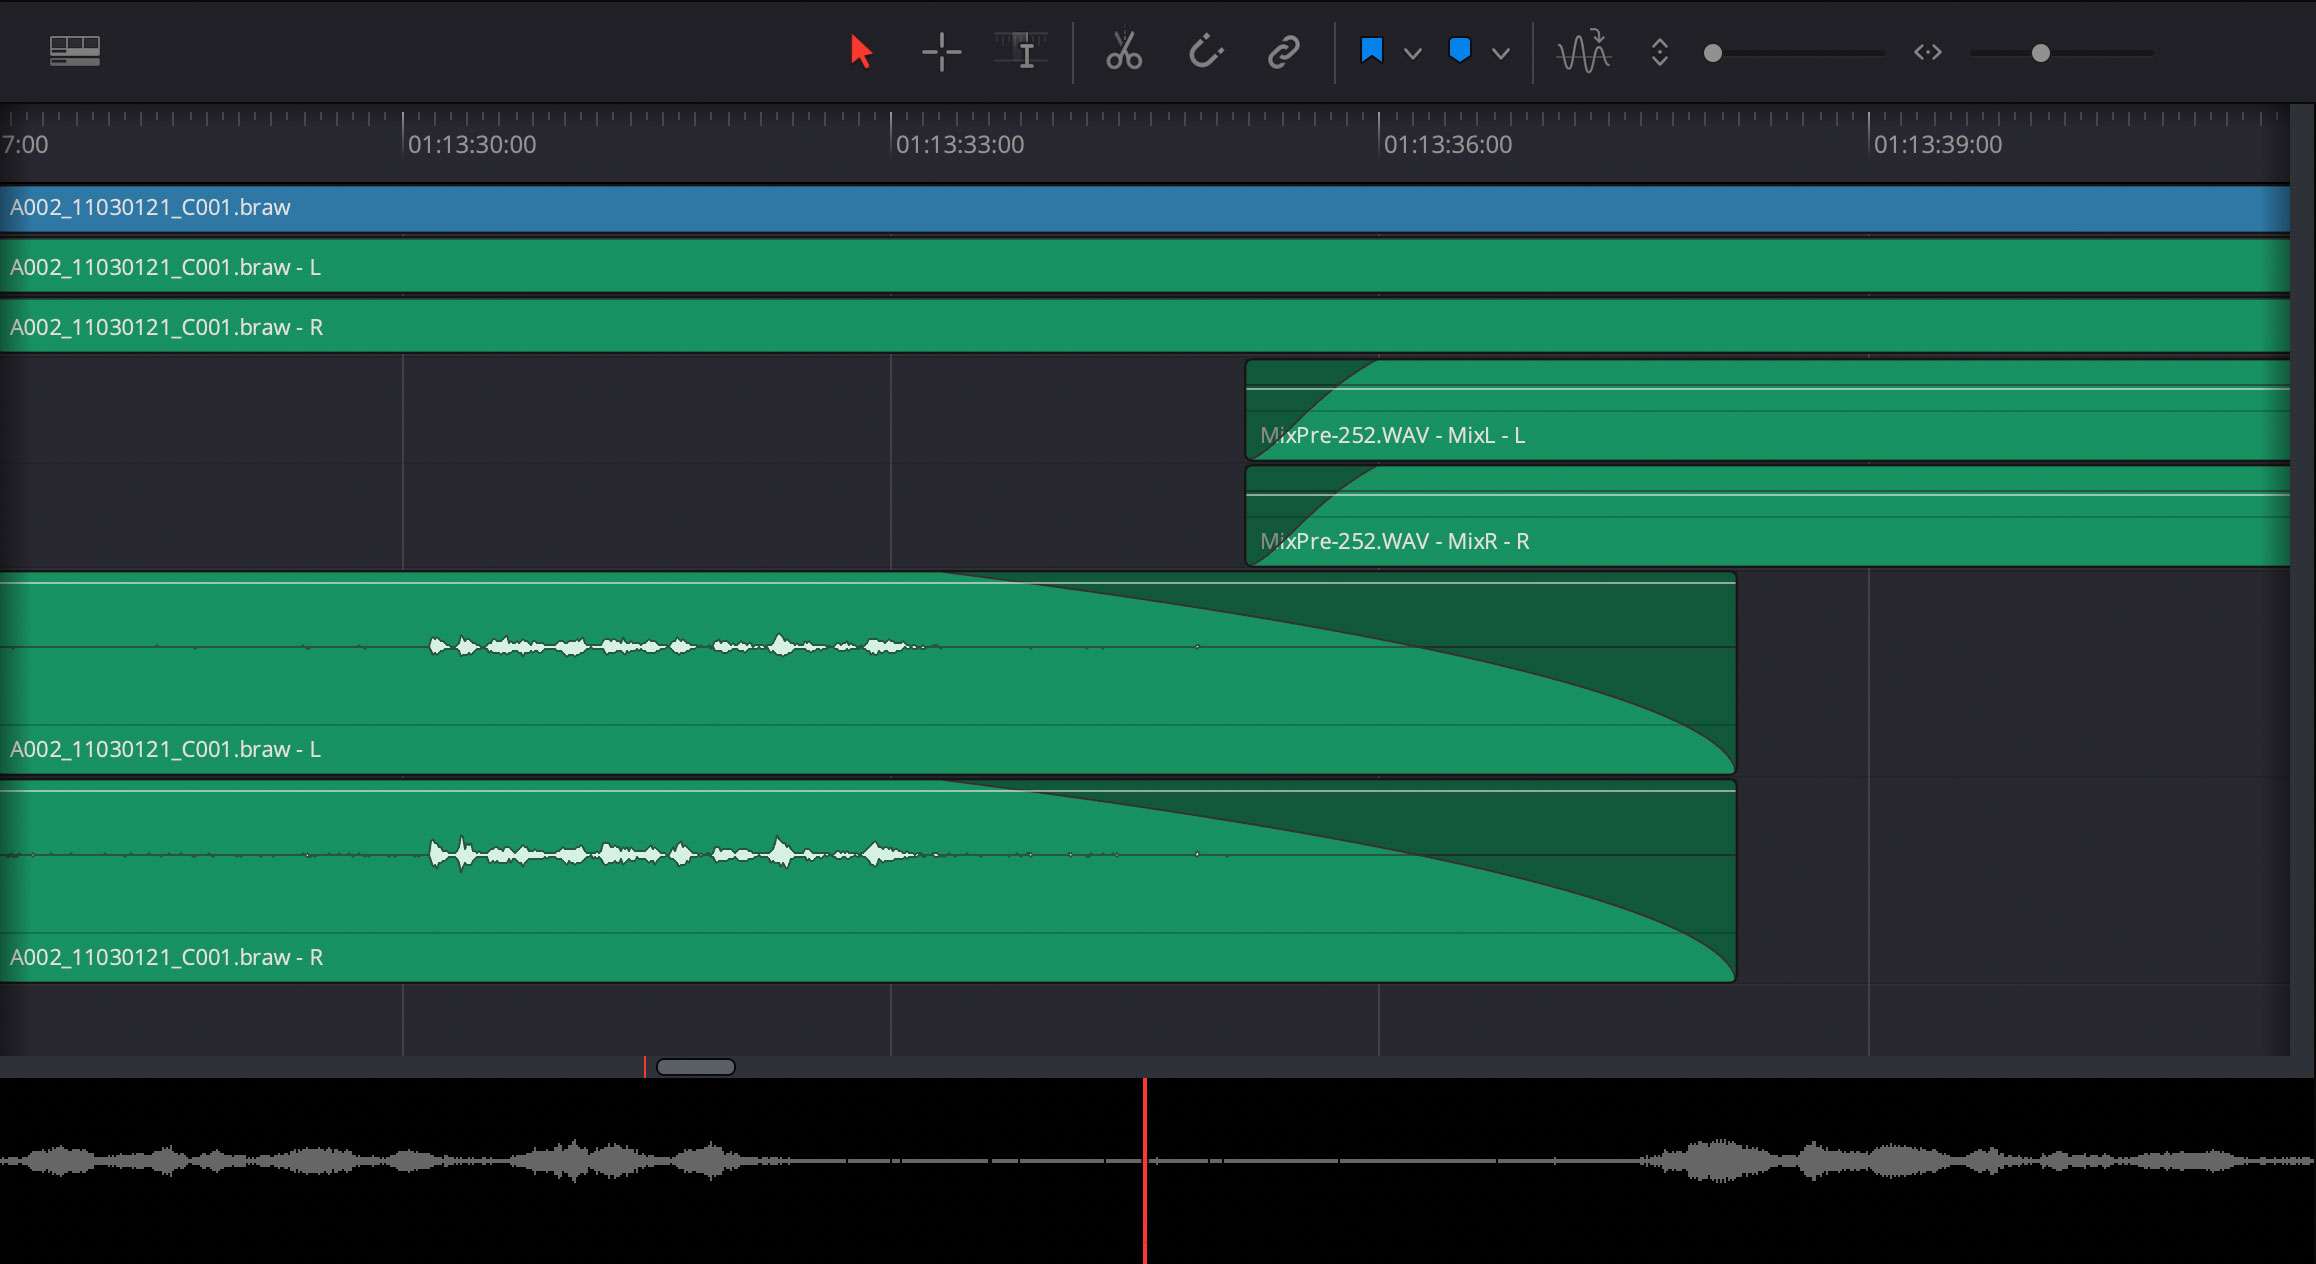
This tutorial is written for DaVinci Resolve Studio 17. Adding audio fades are extremely easy and highly flexible in DaVinci Fairlight and Resolve, but not 100% intuitive. So allow us to clear the flog! With an open project, click over to the DaVinci Fairlight edit page (the music notes icon on the bottom of Resolve).
1) Add Initial Fade in Fairlight
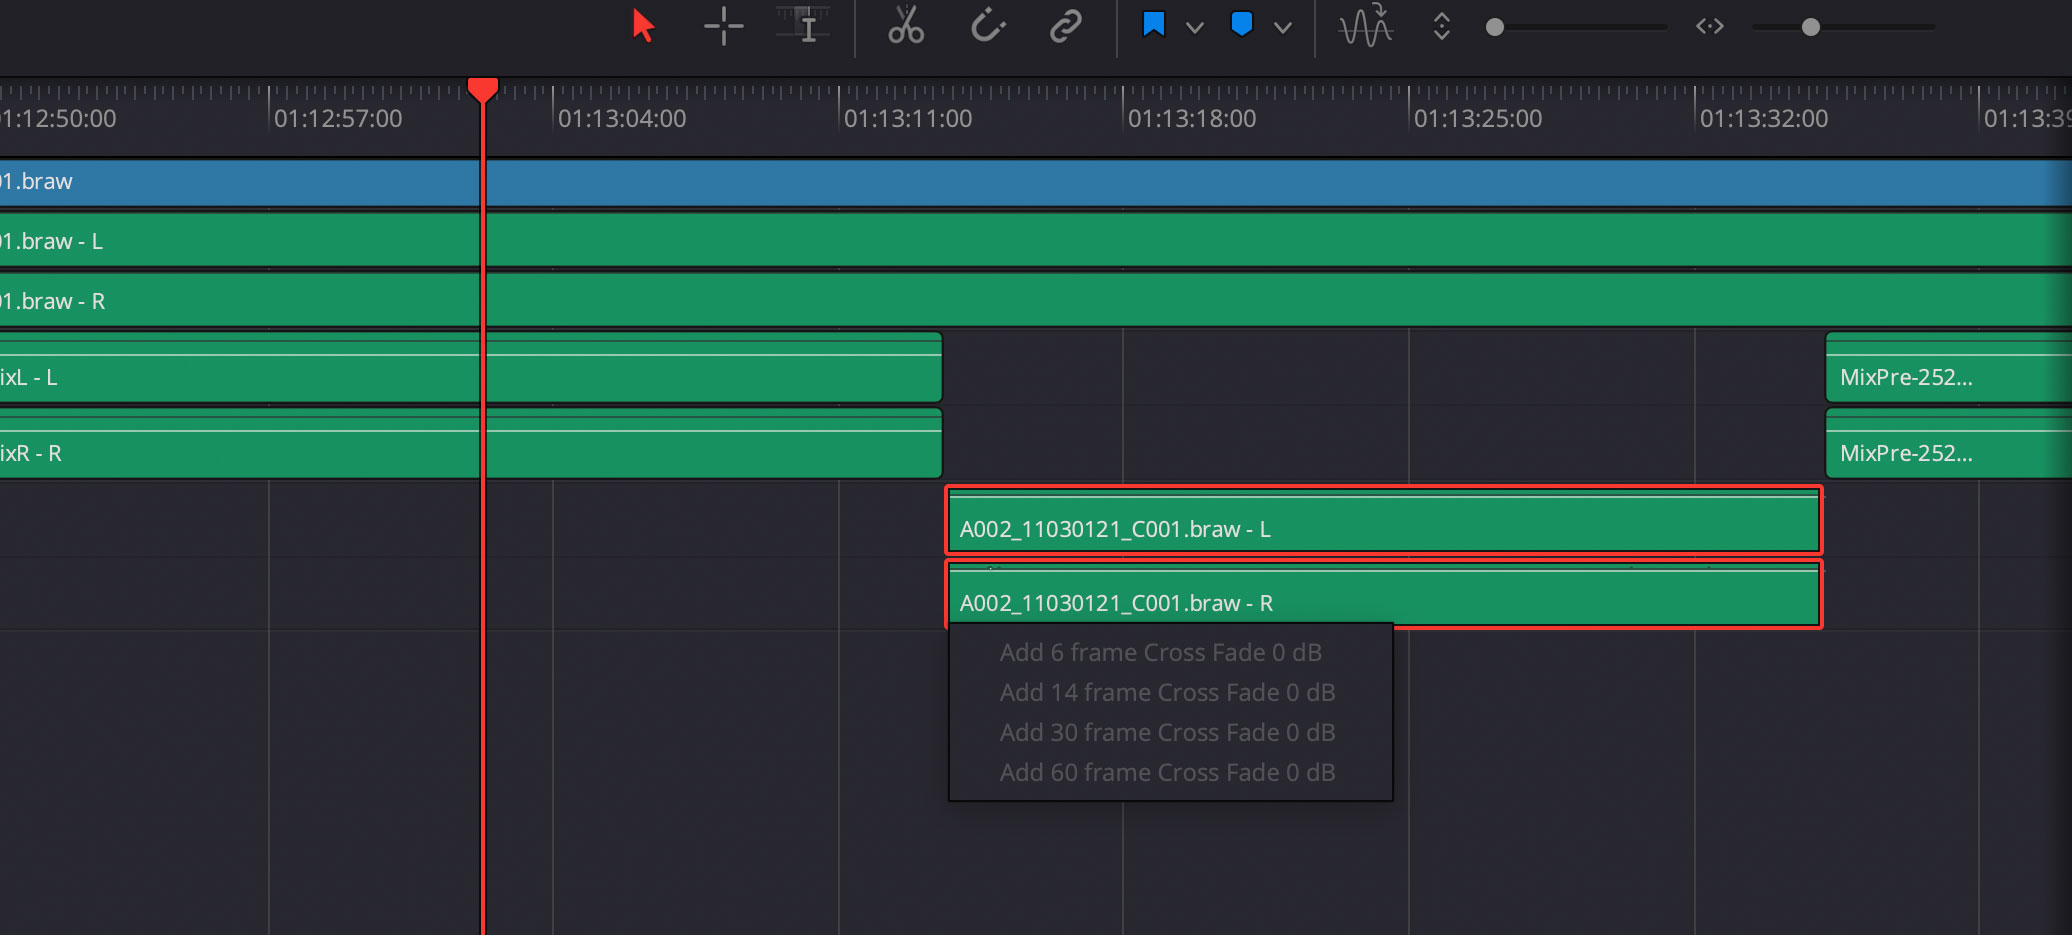
If you right-click any edit point on your audio track, you’ll be presented with various cross fade options. Just pick one as you can adjust the exact frame count easily after adding. If your edit point has adjacent audio, it will add a cross fade. If the audio clip is isolated on another track, it will add the fade to the beginning (or end) depending on where you right-clicked on the clip.
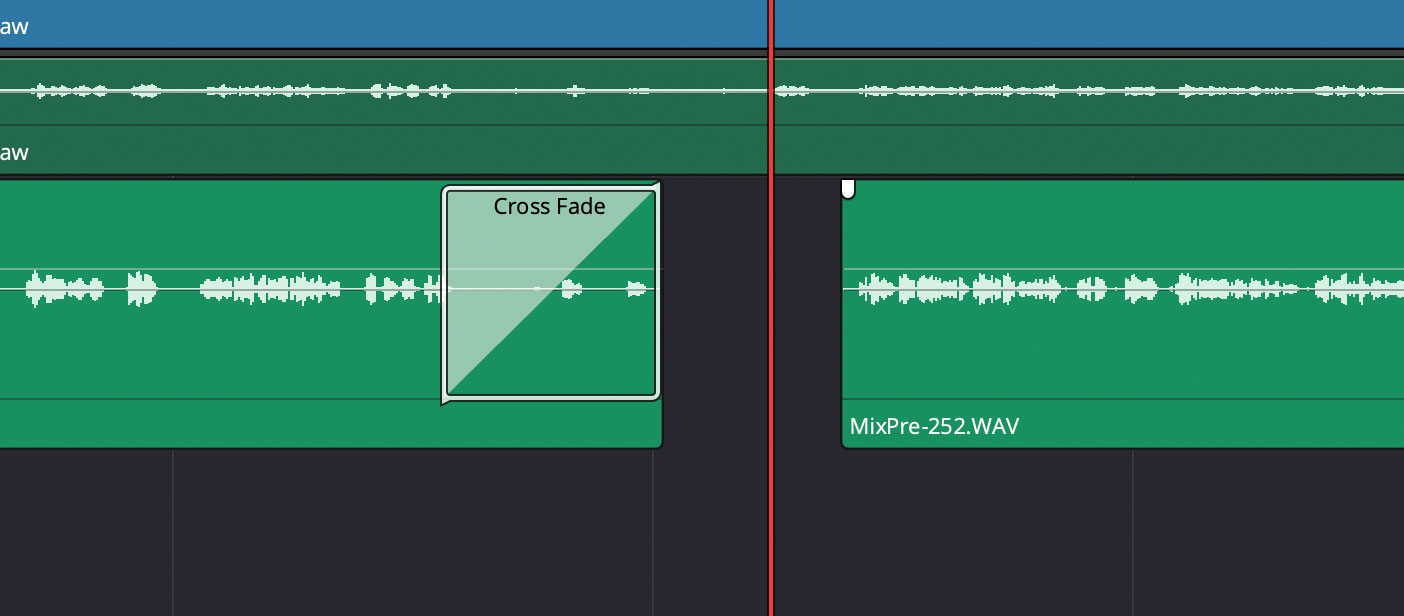
Alternatively, and even easier, you can simply click the white indicator on the top left or right of any audio clip and drag it over to introduce a fade. This works for both audio and video tracks.
Right-click on an edit point to choose a certain frame count fade.
2) Adjust Track Height for Fairlight Tools
To access additional tools in Fairlight you’ll need to adjust the height of your audio track. Each track has an information/settings box on the left of the track. Move your cursor to the bottom of this area for the audio track you’re working with. When your cursor turns into a double arrow, click and drag to change the height of the track.
3) Adjust Fade Length
Now you can easily adjust the length and style of your audio fade using the white marker on the top of your track. Simply click and drag to shorten or extend the audio fade. You can also use the center dot on the fade to adjust the style of the audio fade.
4) Add Fade Using DaVinci Resolve Edit Page
You can also work with fades on the edit page. Simply right-click or drag the white indicator as in Fairlight. You can also add them via the Effects palette, although this takes longer. First make sure the effects palette is open by clicking the Effects icon on the top right of DaVinci Resolve. Next, in the lower right effects palette, click on Toolbox. Here you can access various cross fades. Simply drag them onto your timeline in the desired spot.
You can use the Effects Toolbox in DaVinci Resolve to add cross fades on the Edit Page.
The fades added via the Edit or Fairlight pages are accessible in each area. Personally, I like to keep all of my audio editing in Fairlight so everything is consistent. You also cannot control the type of fade on the edit page as you can within Fairlight.
Rubberbanding Audio in DaVinci Resolve
Another powerful method of manipulating audio is via audio keyframes. You might hear people call it “rubberbanding.” If you hear that term, they’re talking about adding keyframes to a clip of audio in the timeline. To add an audio keyframe in DaVinci Resolve or Fairlight simply option + click (alt + click in Windows) on the gain line of your audio clip. Be careful to click on the gain line otherwise it will not give you the key frame.
You can add audio keyframes by Option + Click on the gain line in DaVinci Resolve Studio 17
You can also use the Inspector to add a key frame from the DaVinci Resolve edit page, but the keyboard method is much faster.
And there you have it! Again, crazy simple but with Resolve Studio 17 freshly installed and everything at defaults, not always intuitive. If you’d like to learn more simply check out other articles or visit the Write & Direct YouTube channel. For comprehensive training on writing and directing films, enroll in Write & Direct today!
If you’re like me, you’ve spent a lot of time working in various non linear editing systems. They each have their own way of doing things. The first thing I do on a new NLE is familiarize myself with how to do the common tasks I need to do in order to edit quickly. Few things are used more than inserting media into the timeline!
The fastest way to place a clip in the timeline is to visit the Cut Page and drag the clip from a bin down to the timeline. However this is impractical most of the time.
Let’s look at some of the most common methods you’ll use from the Edit Page:
How to Smart Insert Footage
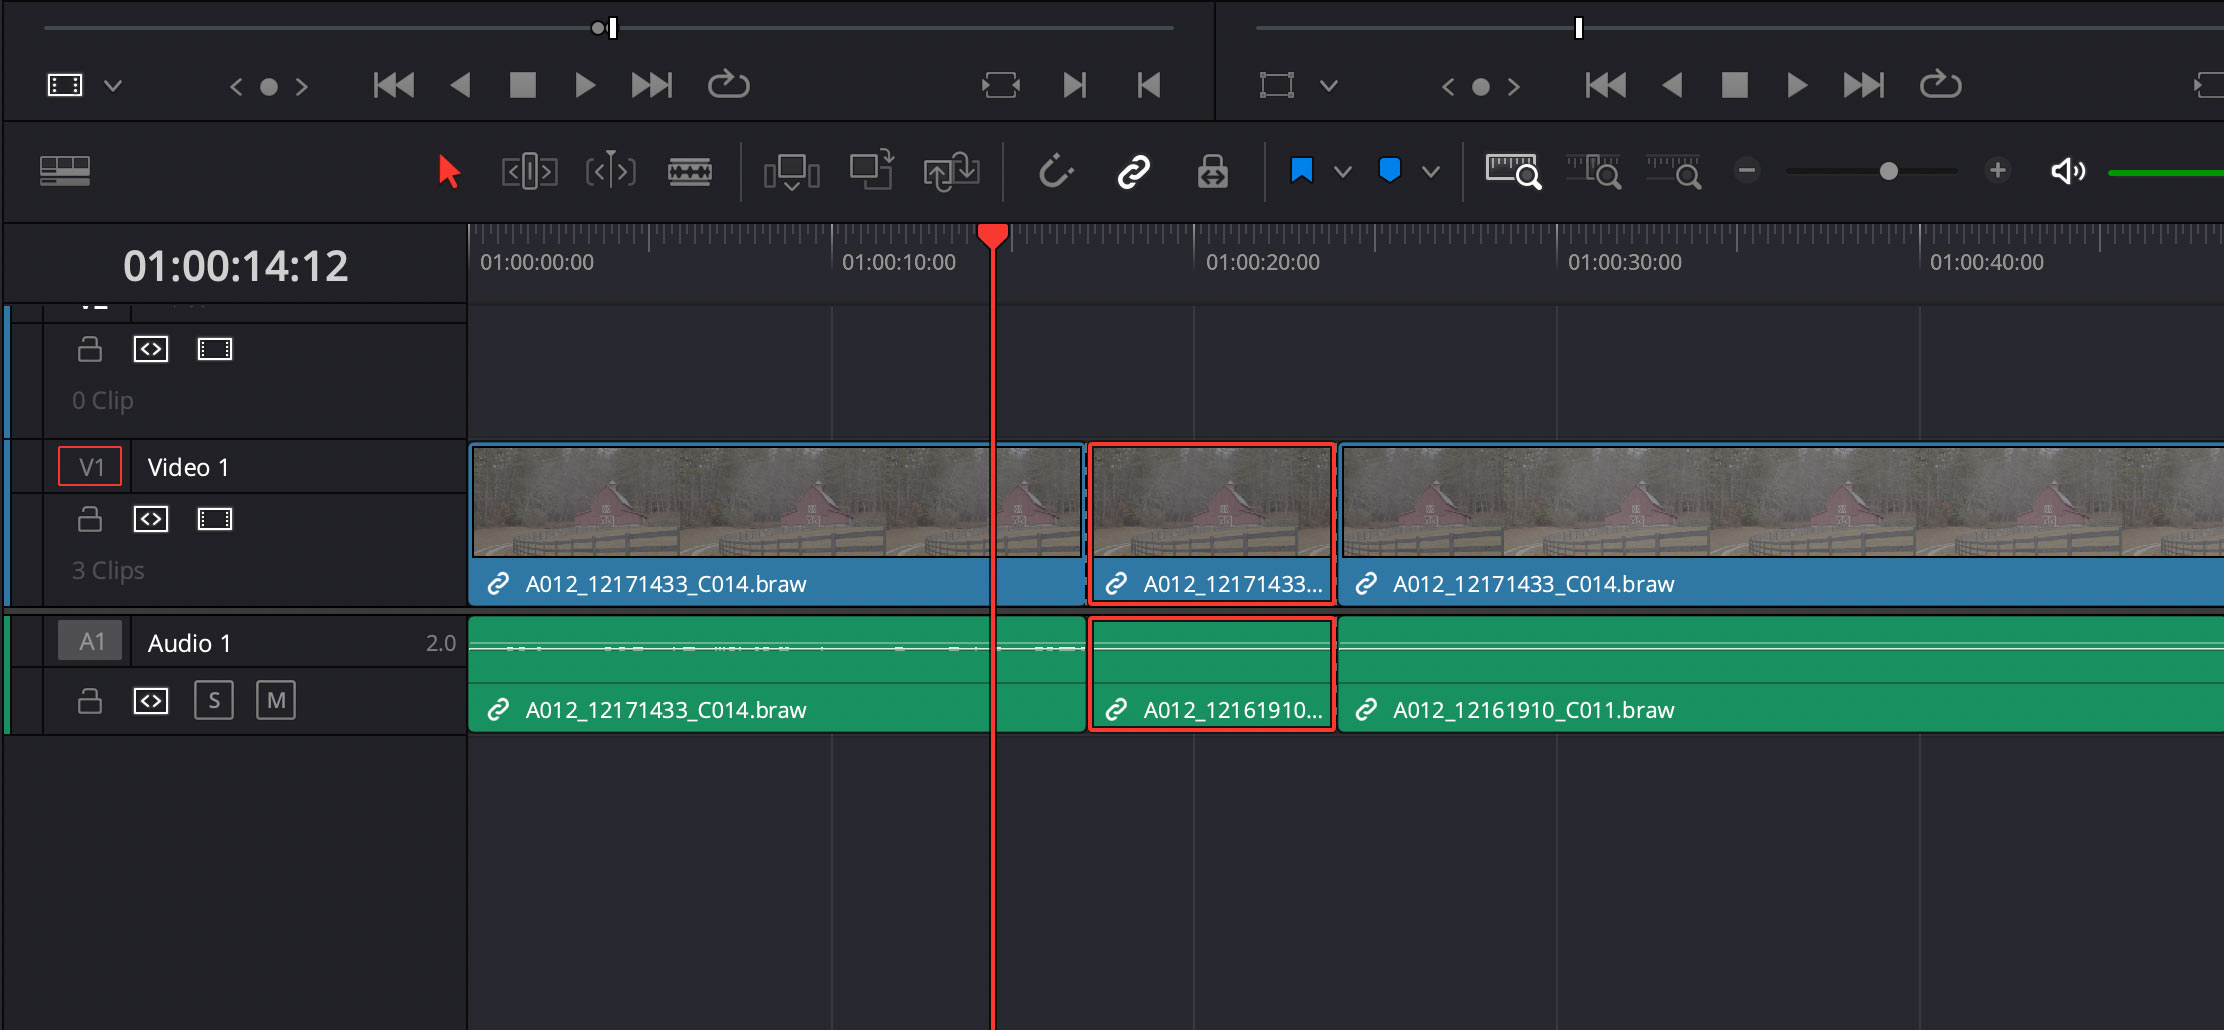
When you have a working timeline full of existing clips, sound FX and other items, you can’t just drags clips in. A common way to get a new clip into the timeline is to insert it. DaVinci Resolve calls this a ‘smart insert’ as it will push everything down the timeline to make room for the new clip.
Using smart insert will keep everything in sync on your timeline as all tracks will be pushed down to make room for the new clip.
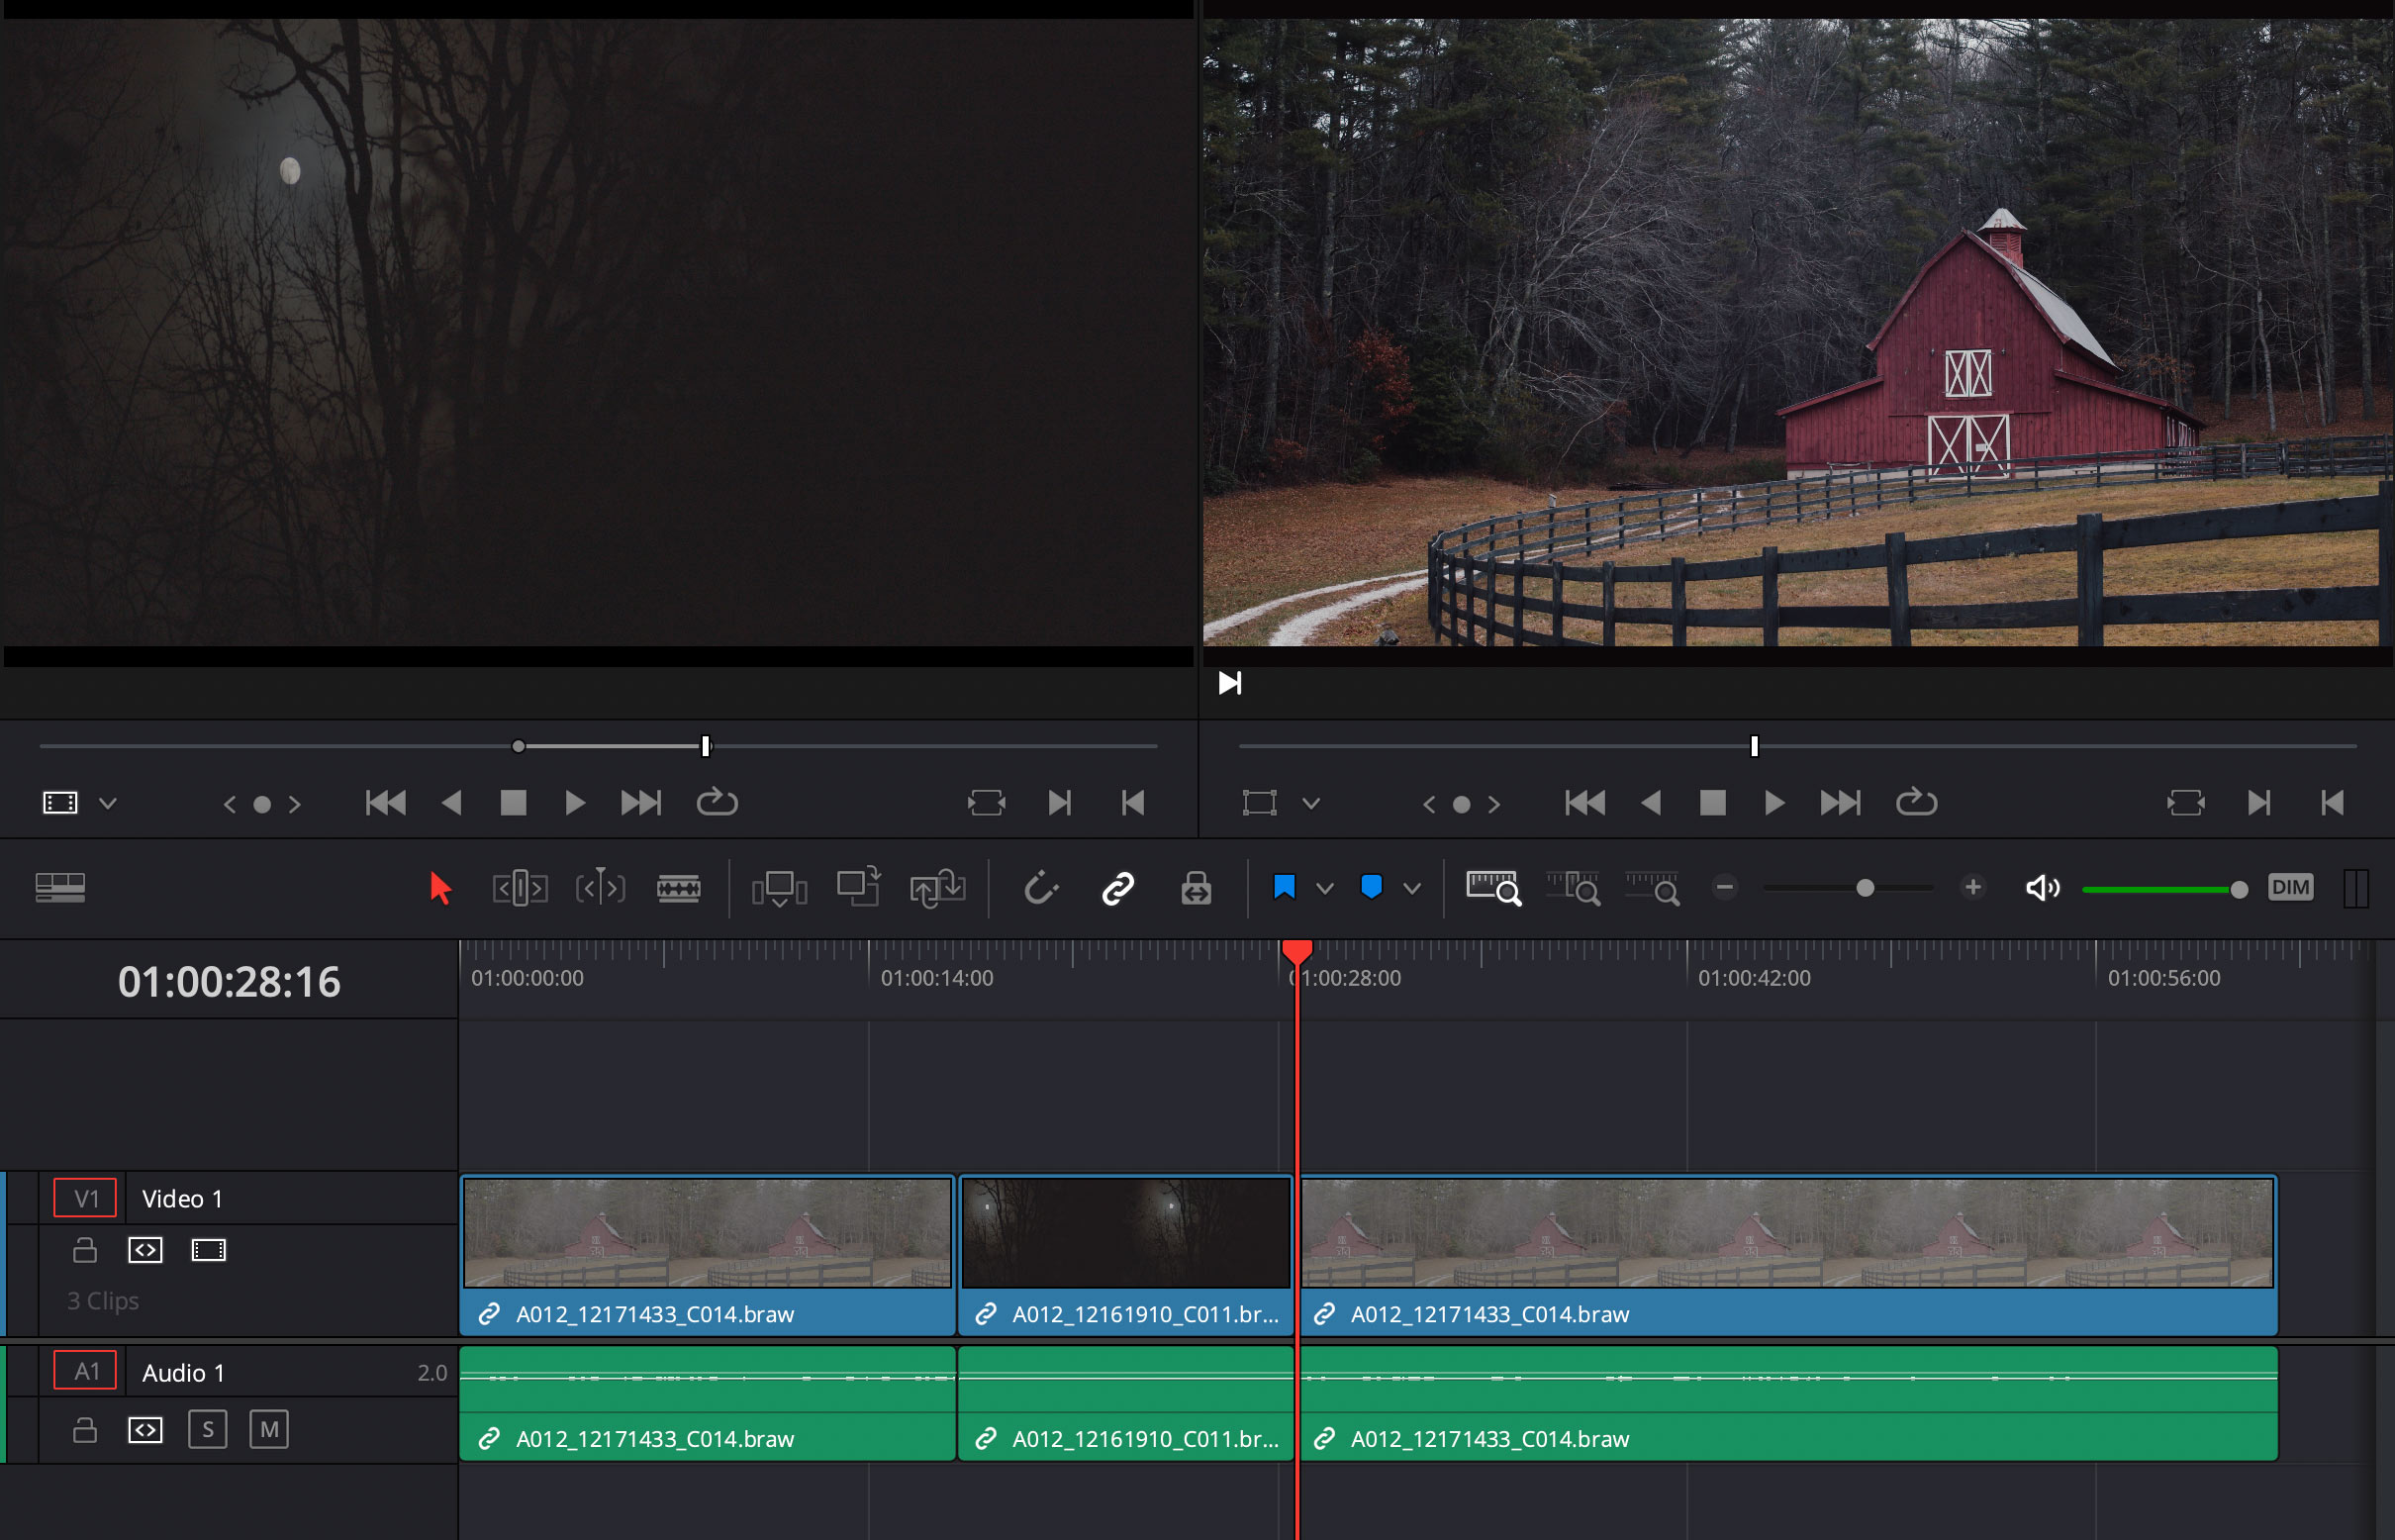
First, make sure the right video and audio tracks on your timeline are active (red box). Next mark an in and out in the source clip (I and O). Then position your playhead where you want the clip inserted and hit F9.
Using the playhead and F9 to insert footage adds the clip and pushes everything else down the timeline.
And btw, as much as I appreciate Resolve’s default mappings, I prefer my own. You can fully customize the Resolve keyboard.
How to Overwrite Footage
Instead of inserting footage, you can overwrite existing footage from your source clip. With the same in and out marks selected, hit F10 to overwrite existing material in the timeline. Instead of moving everything down to make room for the new clip, it will simply overwrite whatever is on the tracks that you have selected.
Replace Footage
The replace footage feature is similar to overwrite, but used to replace only a certain area on the timeline. If you select an in on your source clip and then position the playhead over a section and hit F11, DaVinci Resolve will overwrite timeline footage either between to edit points on the timeline, or between a marked in and out.
Fit to Fill
Another option similar to replace is Fit to Fill. If you have two edit marks and you’re inserting source material that is shorter than the desired section on the timeline, you can use Fit to Fill to fill the entire space by slowing down the source clip. Obviously this only works in certain situations. Use Shift + F11 to insert source material as Fit to Fill.
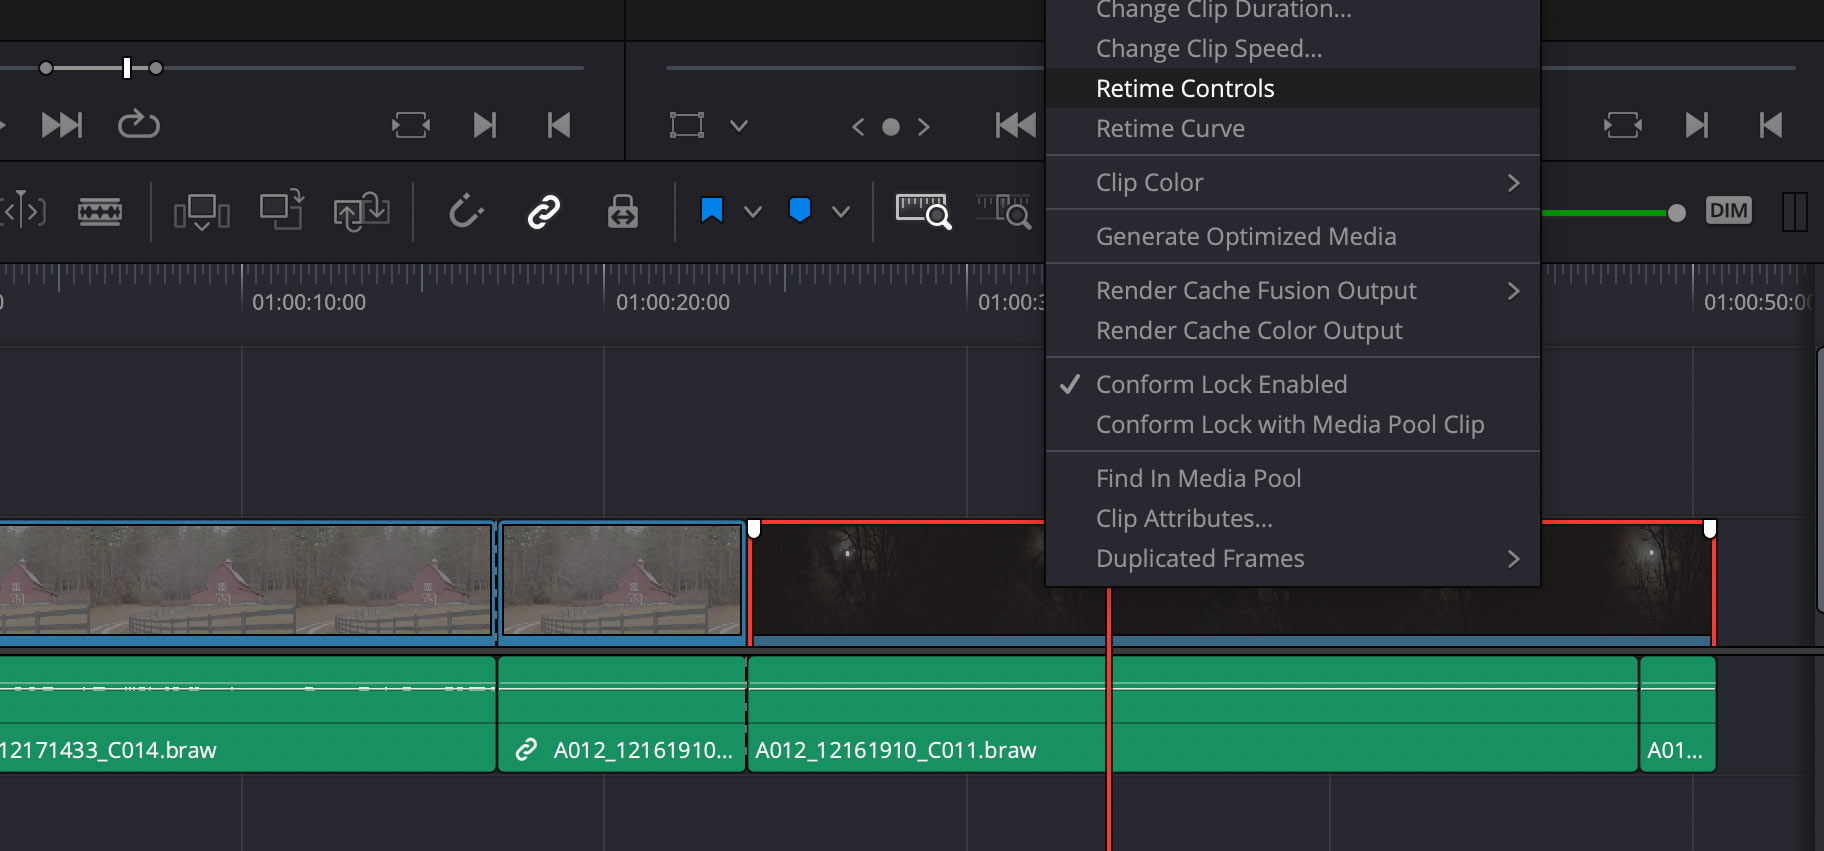
Once you’ve inserted the source material if you right-click on the section in the timeline and choose Retime Controls you can see detailed information on how much the clip was slowed down, etc.
Tip: To access all of these tools when dragging a clip into the timeline, simply drag the clip from your bin to the right, over the timeline monitor window. Various insert options will show up on the right.
Delete Selected
If you select a clip in the timeline, or mark an in and out in the timeline and then hit the ‘delete’ key on your keyboard, DaVinci Resolve will lift the material from the timeline and leave a gap where it used to be.
Ripple Delete
Using the same scenario for delete selected, ripple delete will remove the material from the timeline and also remove any remaining gaps. Every track in the timeline will be kept in sync with a ripple delete.
Using the delete selected tool will leave a gap in the timeline as the content is simply lifted out.
DaVinci Resolve Ripple Overwrite
The ripple overwrite tool is like combining normal overwrite with ripple delete. It overwrites existing content, but if the clip is longer or shorter, the timeline is either extended or the remaining gap is removed. Use Shift + F10 on the keyboard for Resolve’s ripple overwrite.
These are not the only ways to add media to the timeline in DaVinci Resolve, but these are my favorites! And I love that you can map all of them to shortcut keys on the keyboard.
Coming from a decade of using Avid Media Composer, I’m shocked at the tools available in DaVinci Resolve at such an affordable price point. I will always love Avid, but Resolve is making it possible for new filmmakers to tell their stories without the price tag of other solutions.
A LUT can be installed on both your camera and post production software like DaVinci Resolve Studio. LUT stands for “lookup table” and it is basically a predetermined computation used for color grading.
Example: Let's say you cut scenes from a controlled set with proper lighting and exposure. Once you color grade, you can create a LUT that allows you to rapidly apply the color grading to all of the footage.
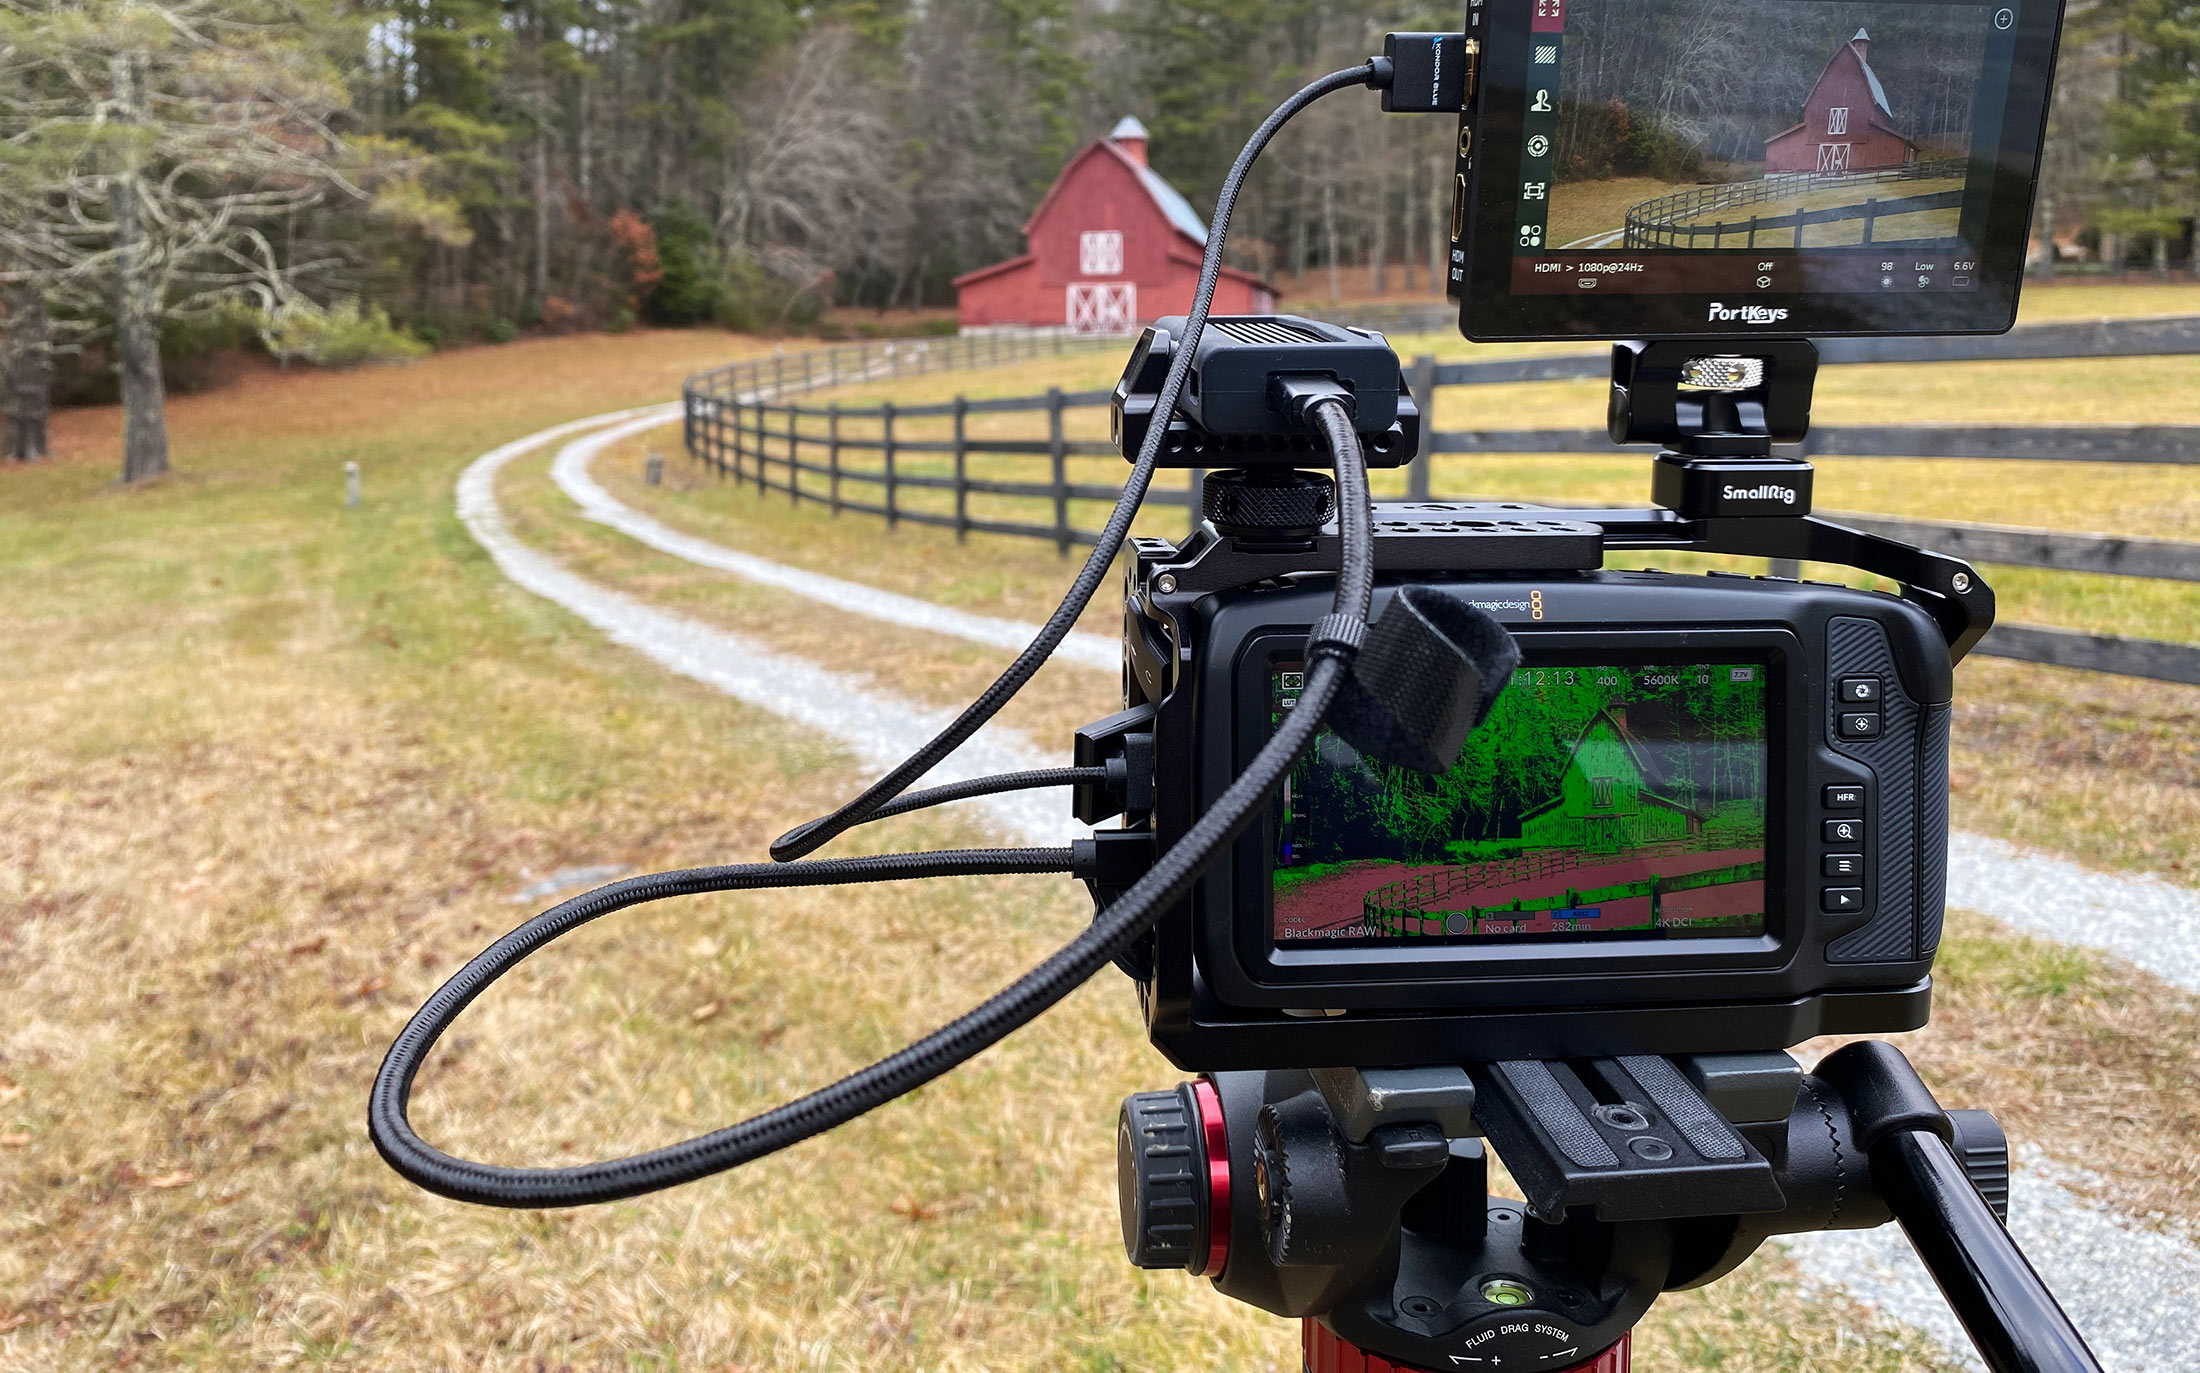
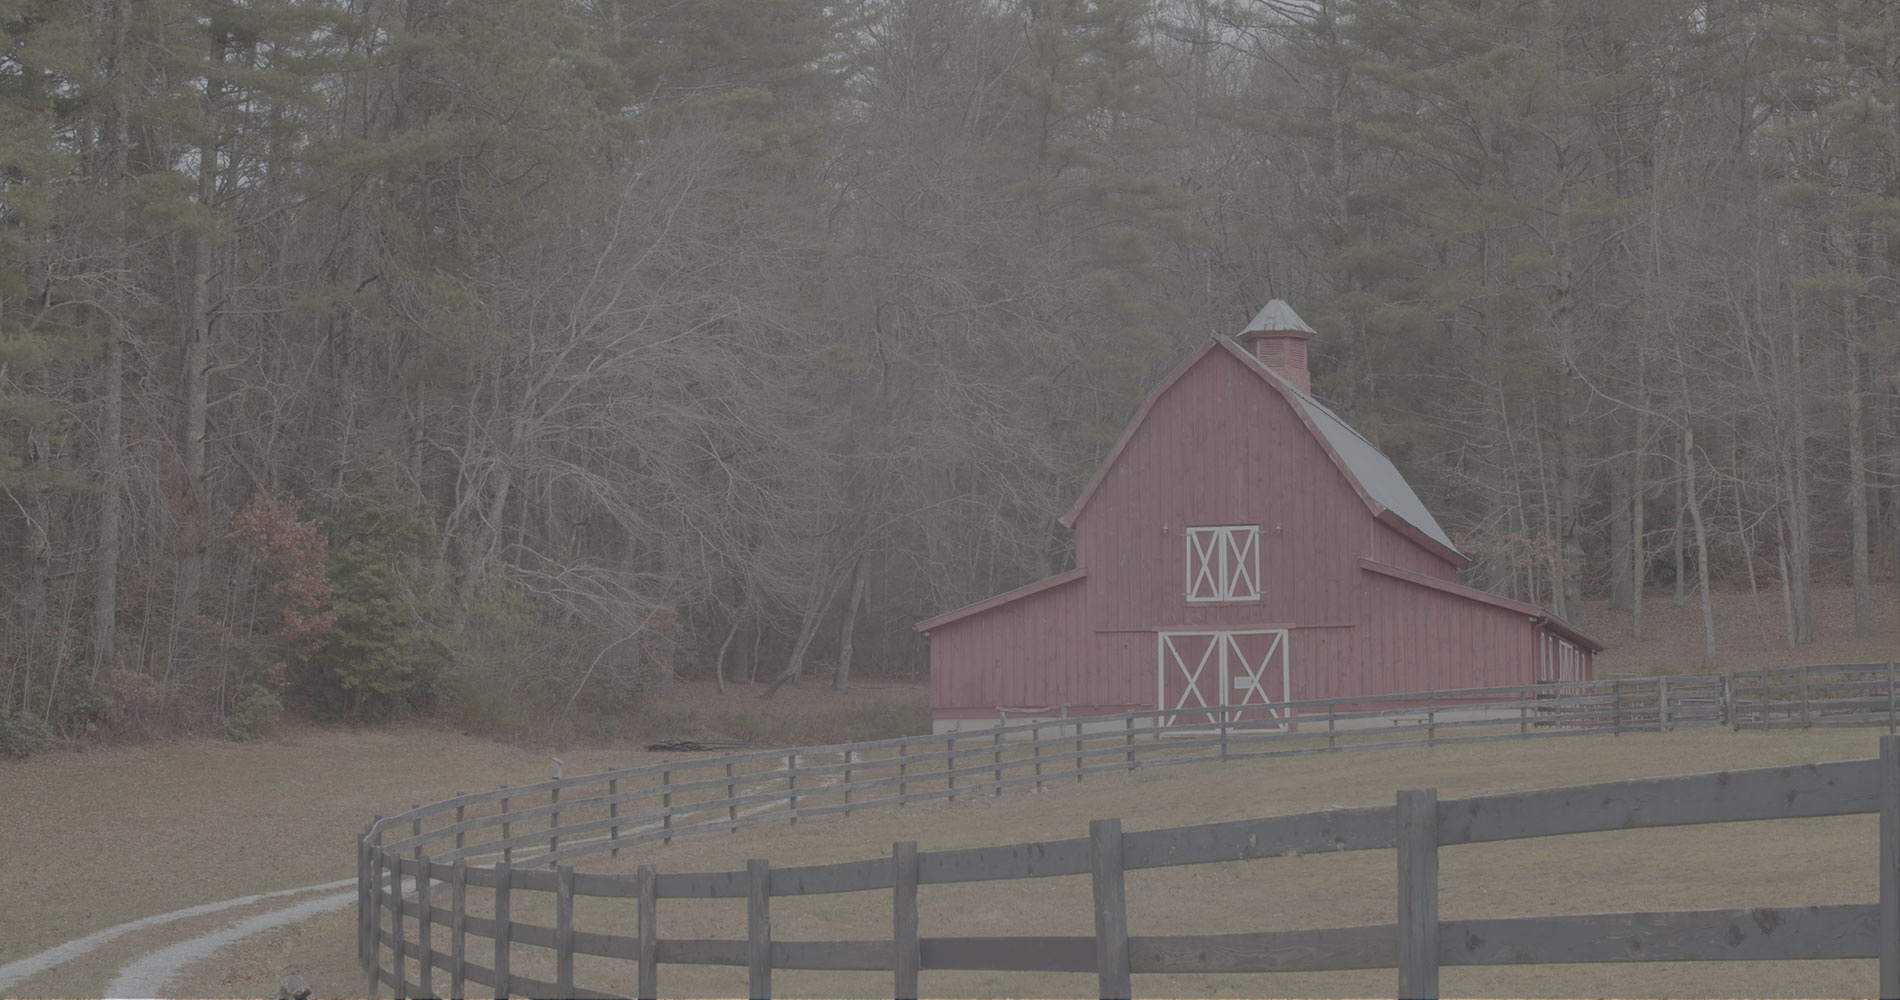
Here’s a shot from the Black Magic Pocket Cinema 4K using the Meike 35mm lens. The camera was set to shoot BRAW which is essentially log. So all of the information is there, but no grading has been performed.
BRAW footage from the BMPCC4K without any color correction applied.
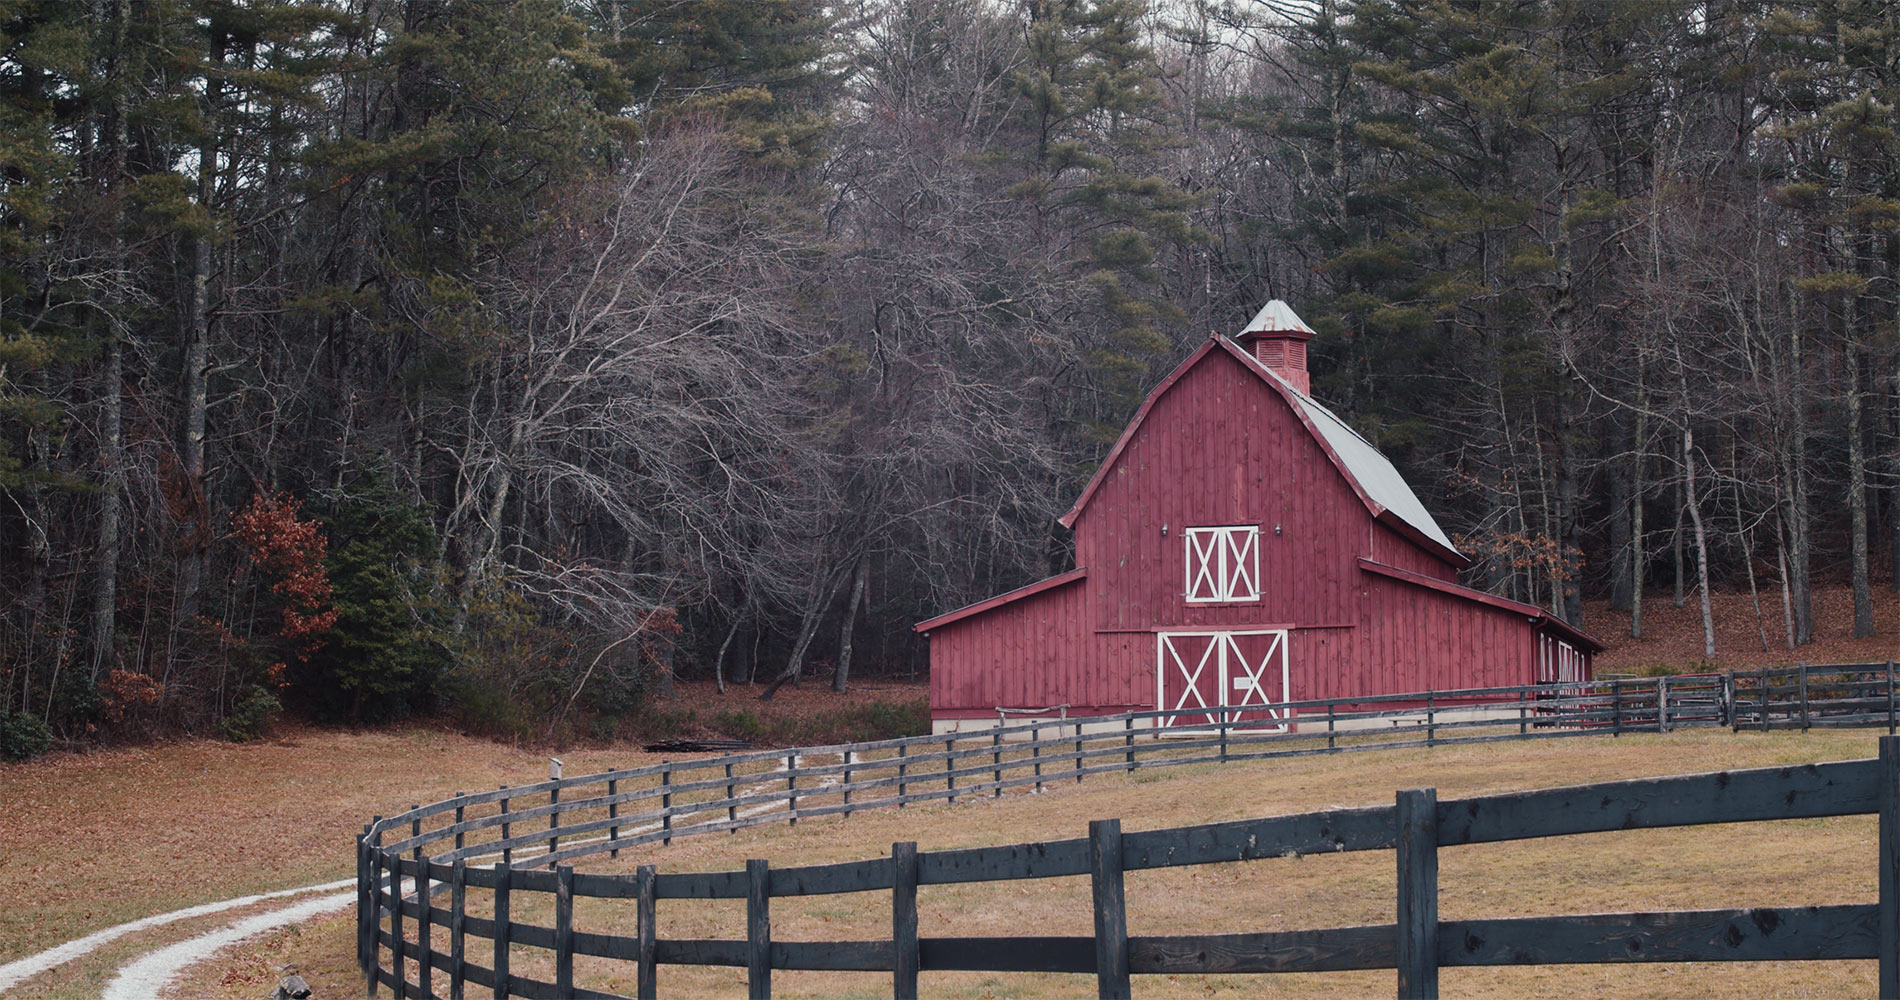
Next we’ll install a LUTs package in DaVinci Resolve from Roman Hense that will quickly transform the look of the image. We’re using Roman’s S21-Natural Soft LUT below.
The same BRAW image with a LUT applied from Roman Hense’s S21 LUT package
You can install LUTs on both cameras and an NLE. But I would never bake a LUT into your camera footage. However they are highly useful for monitoring on set so you can tell what the footage is going to look like after you’ve color corrected in post.
How To Install LUTs in DaVinci Resolve 17
This assumes you have a LUTs package ready to install. LUTs for Resolve will be .cube files. Once you have the files do the following:
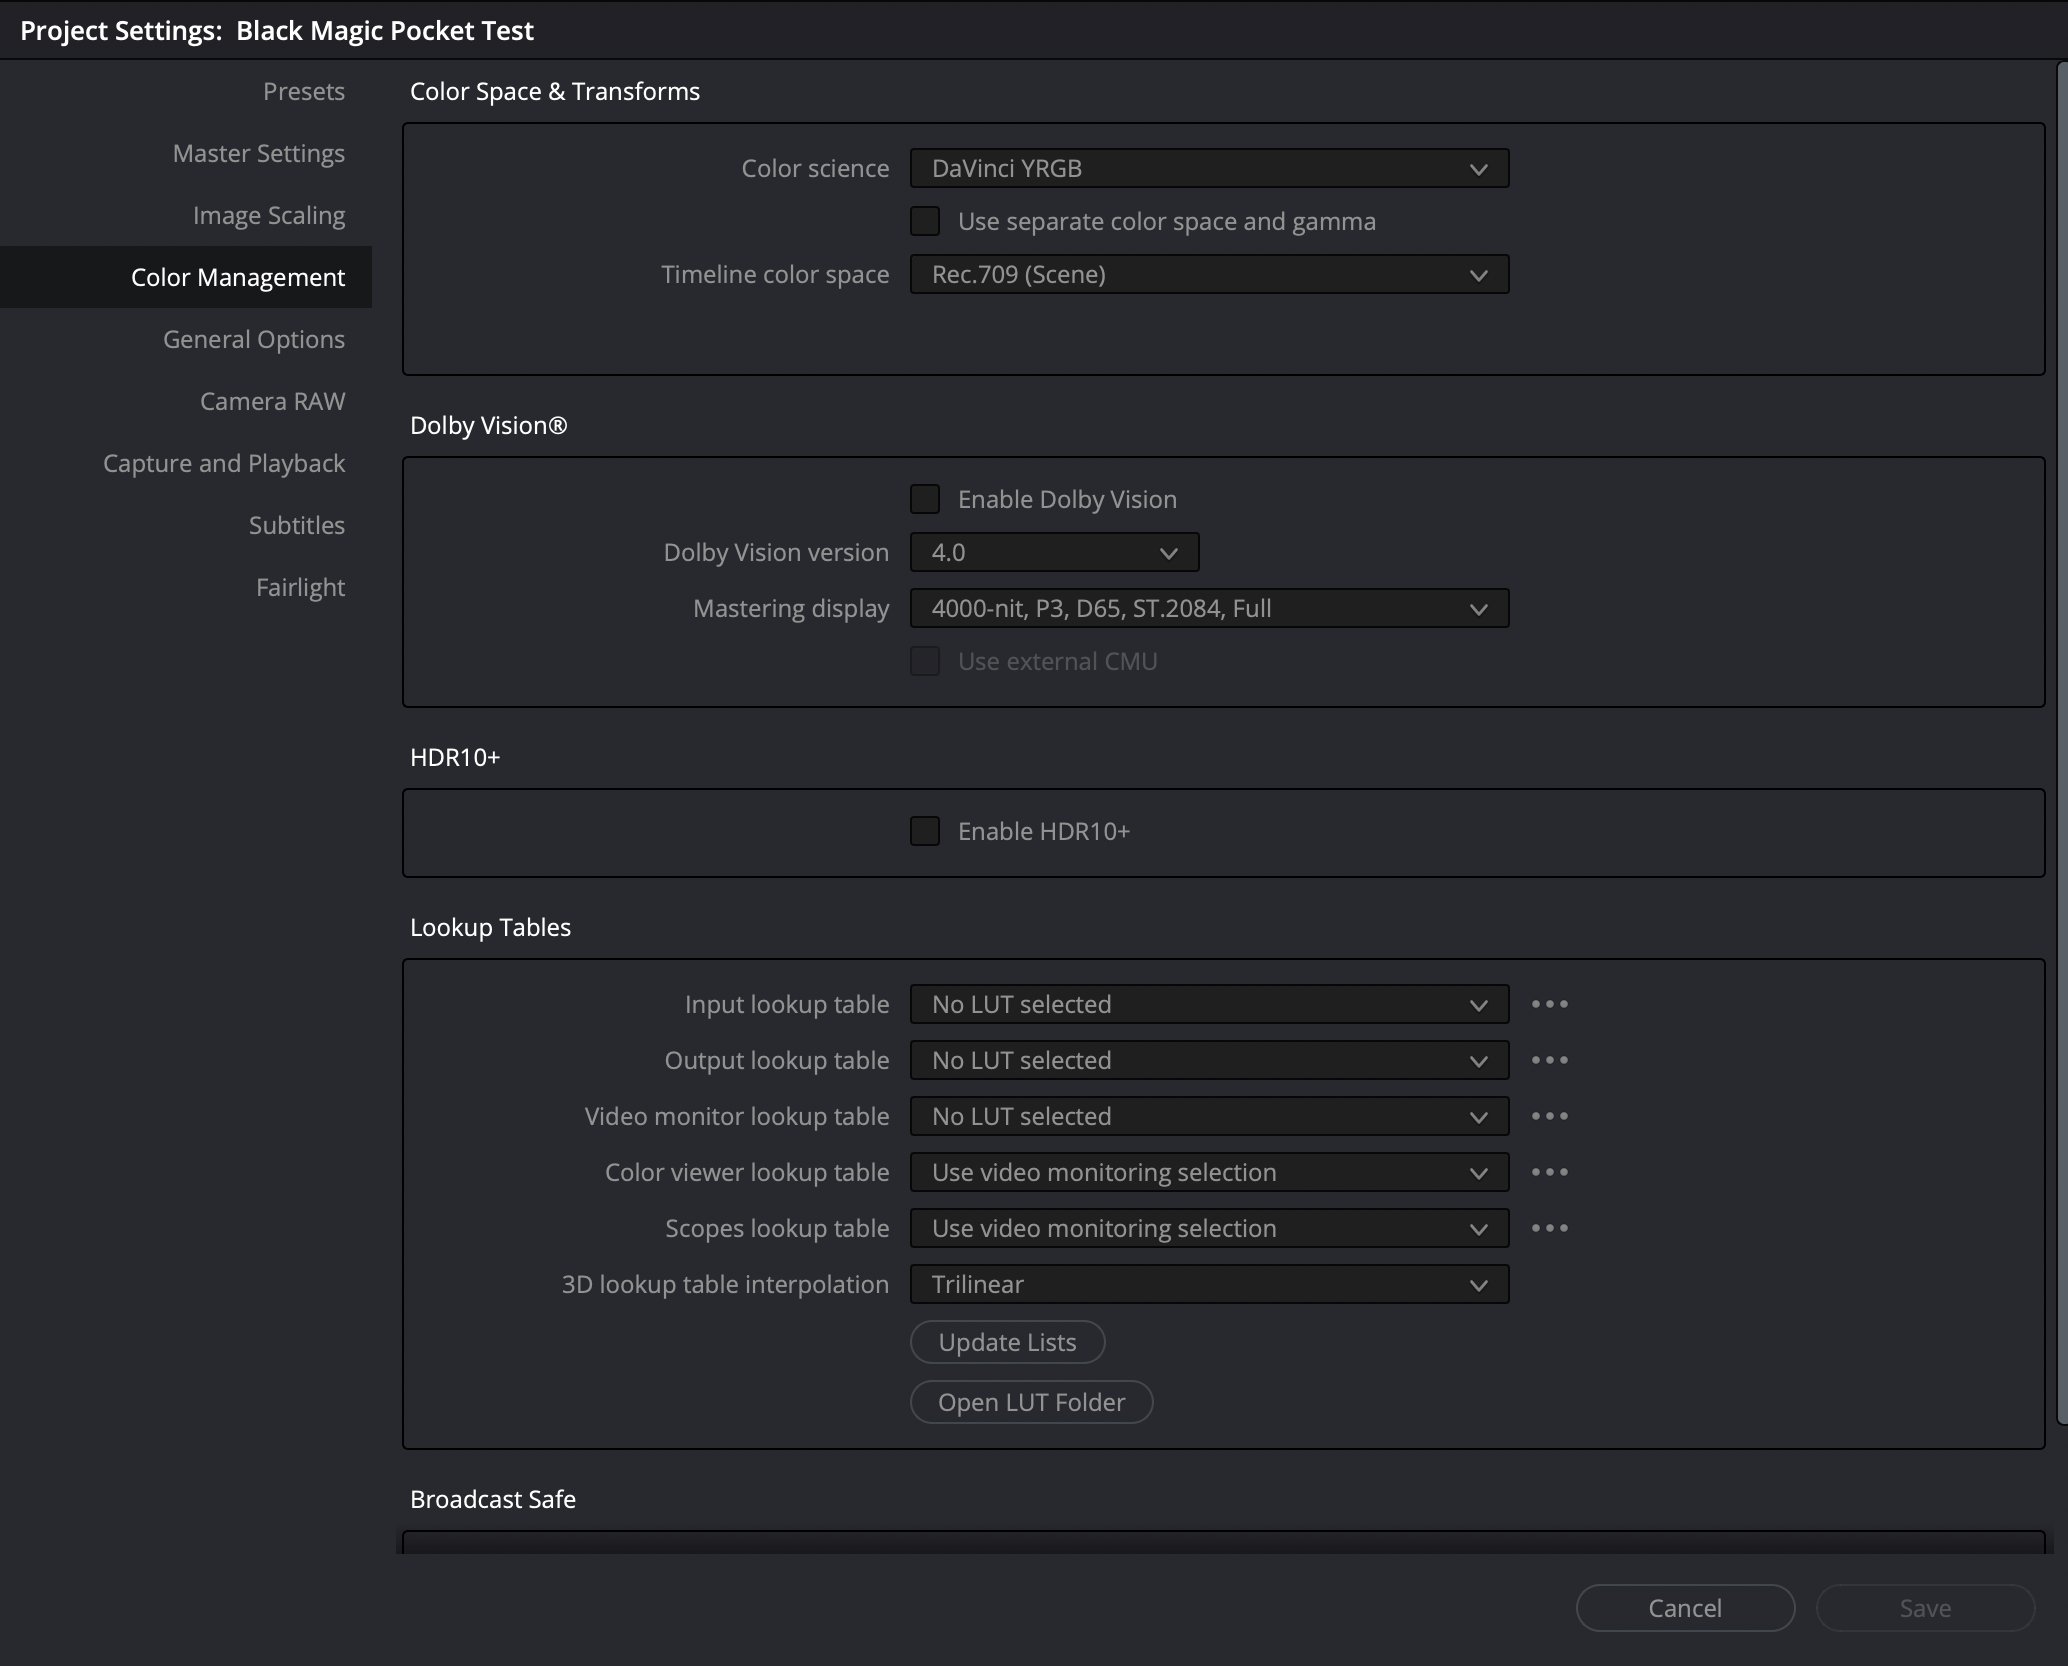
1. Click the gear icon on the bottom right of Resolve.
2. Next choose Color Management and you’ll be presented with the following options:
The settings that display after you click the gear icon in Resolve.
3. Click on Open LUT Folder and copy your .cube files into folder that opens up.
It's best to keep a LUTs packaged inside a folder. Move your .cube files into a folder, name it whatever makes sense to you and then drag and drop that folder in.
4. Click the Update Lists button.
5. For monitoring in DaVinci Resolve select a LUT from the Video Monitor Lookup Table dropdown.
How to Install LUTs on the Black Magic Pocket Cinema Camera
As I already mentioned, don’t bake a LUT into your footage while shooting. However if you’d like to install a LUTs packed on your camera for monitoring, that can help a lot on set. You’ll need to copy the LUTs files onto an external SSD drive (or SD/CFast card) and have this connected to the camera.
Click the settings button to access the main menu.
Select LUTS on the top right of the touch screen
Select the double arrow on the bottom of the touch screen
Choose IMPORT
Now if you have an external monitor like the PortKeys LH5, you can view your footage on set with the LUT applied while recording in BRAW.
The S21 LUTs package used above from Roman Hense.
Where to Purchase LUTs Packages
There are many places you can purchase a LUTs package for your camera and/or Resolve. One that I’ve used is the S21 package from Roman Hense. Purchase it on Etsy.
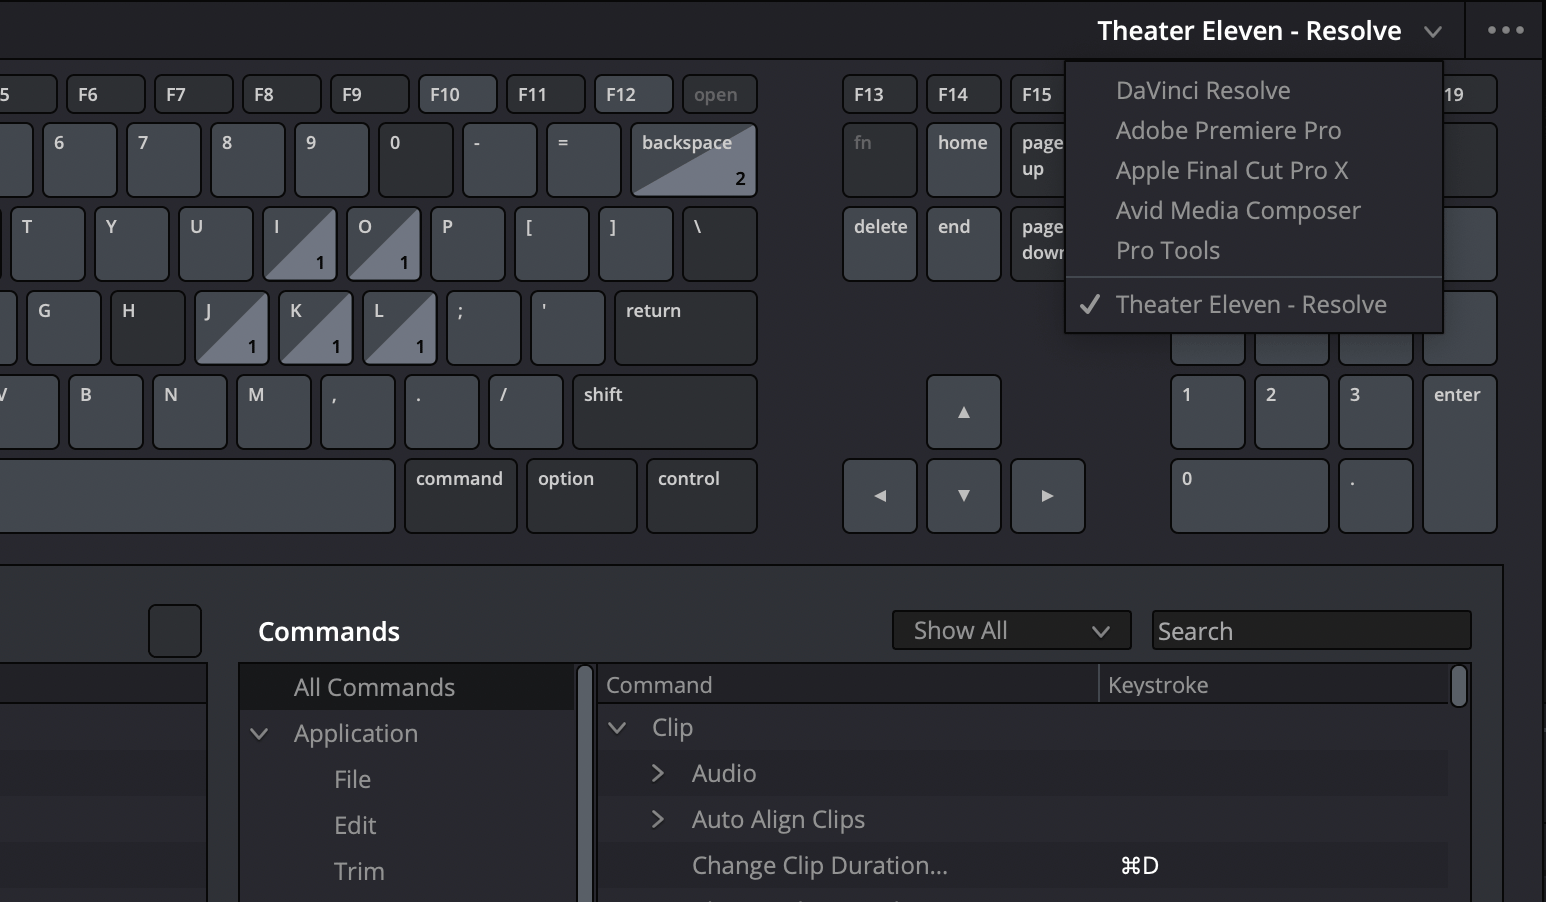
If you’re a seasoned filmmaker, you know that when it comes to rapidly manipulating a timeline, the keyboard is king. And the great news is that DaVinci Resolve has a fully customizable keyboard palette to make editing a dream.
Mapping Commands
Let’s first look at mapping three simple commands to specific keys on the keyboard: Mark In, Mark Out, Clear In and Out.
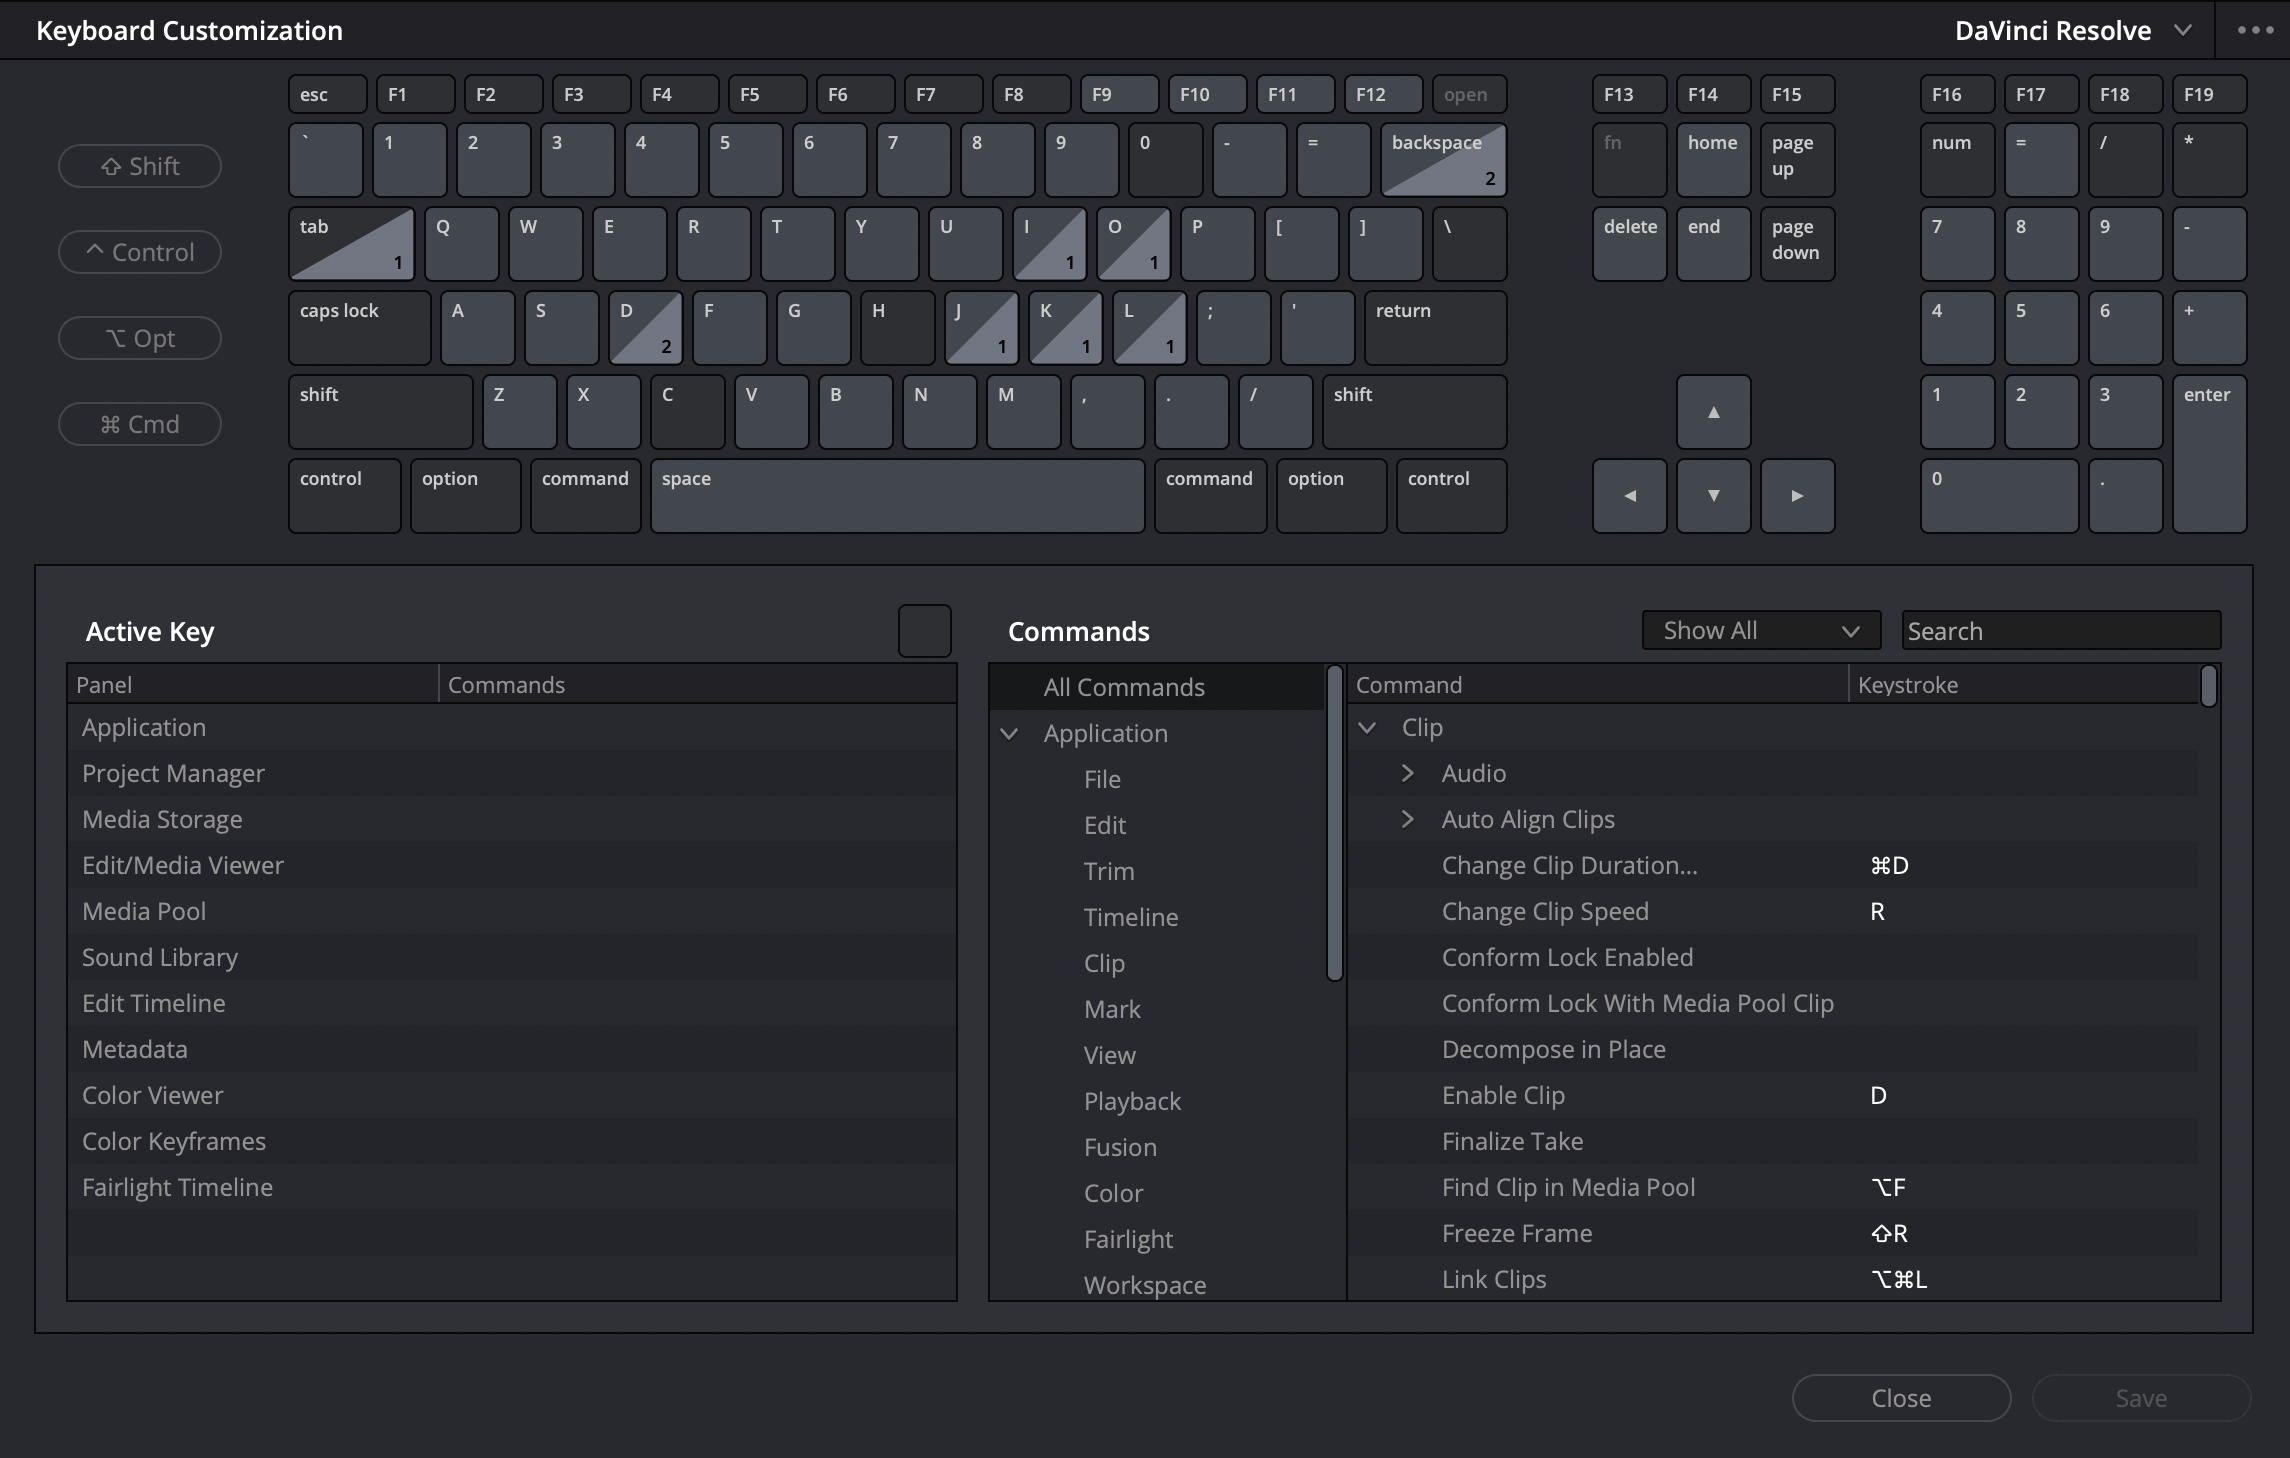
Click DaVinci Resolve in the top left and select Keyboard Customization. You can also hit Option + Command + K on the keyboard to get to the same spot.
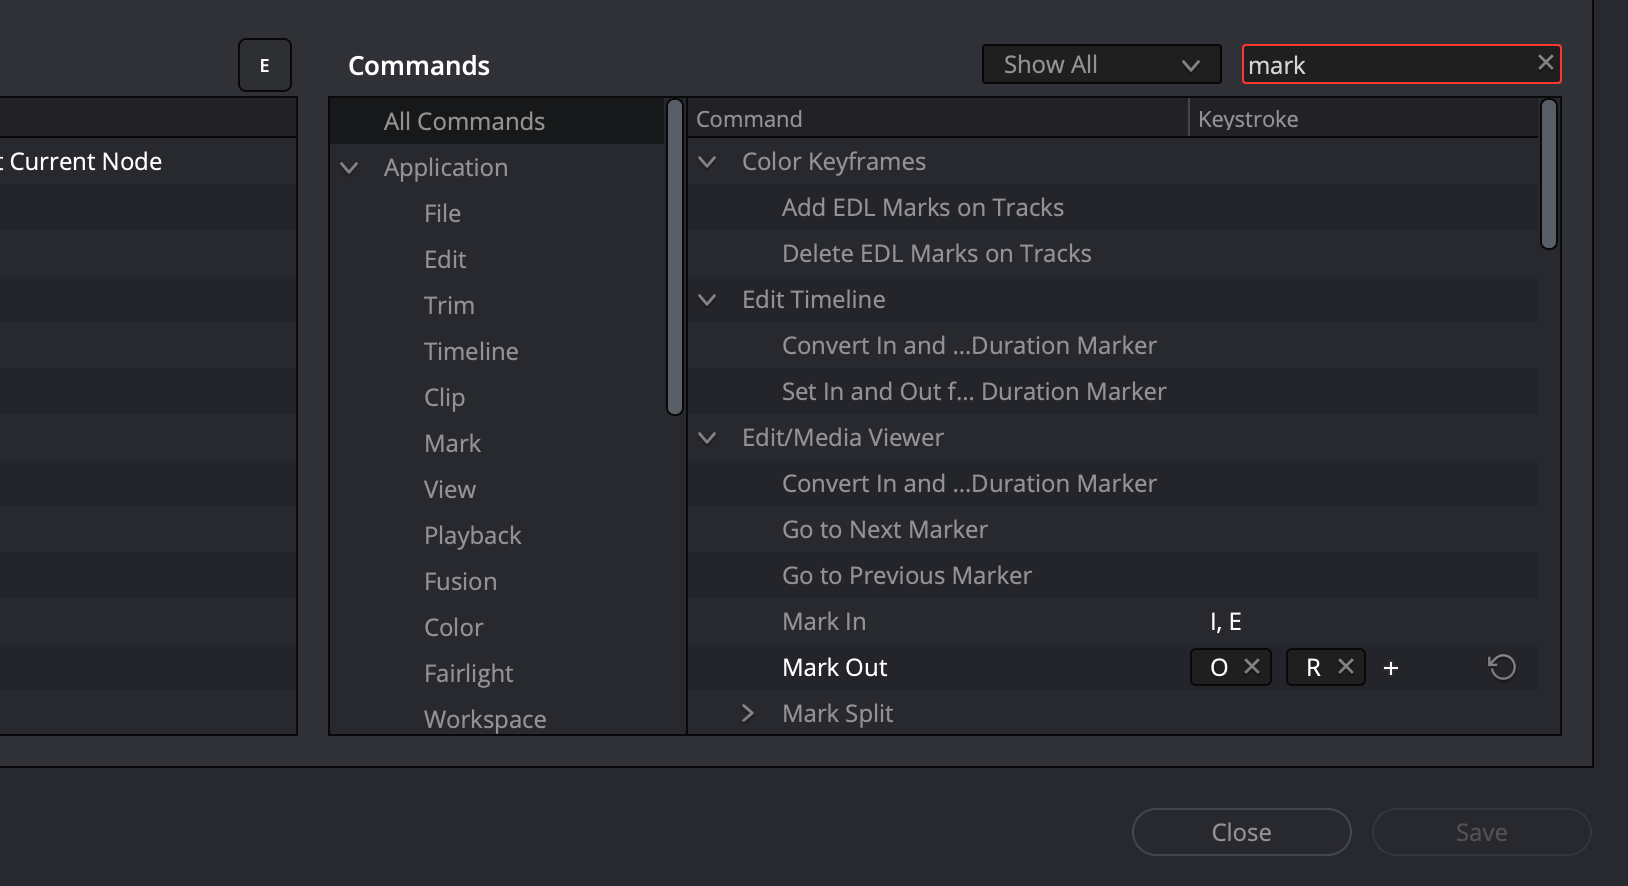
Select All Commands in the Commands column. Type “mark” in the right hand search box.
Locate Mark In and Mark Out.
The keyboard command palette allows you to create shortcuts for menu commands for faster editing.
The keyboard palette will display any current mappings or shortcuts that are setup in Resolve. You can remove these by clicking on the “x” by the shortcut, and you can add your own by clicking the plus sign.
Click the “+”
Type in the keyboard command you’d like to use
Click Save.
Enter a custom name to save your keyboard mappings.
Replace Existing Keyboard Mappings
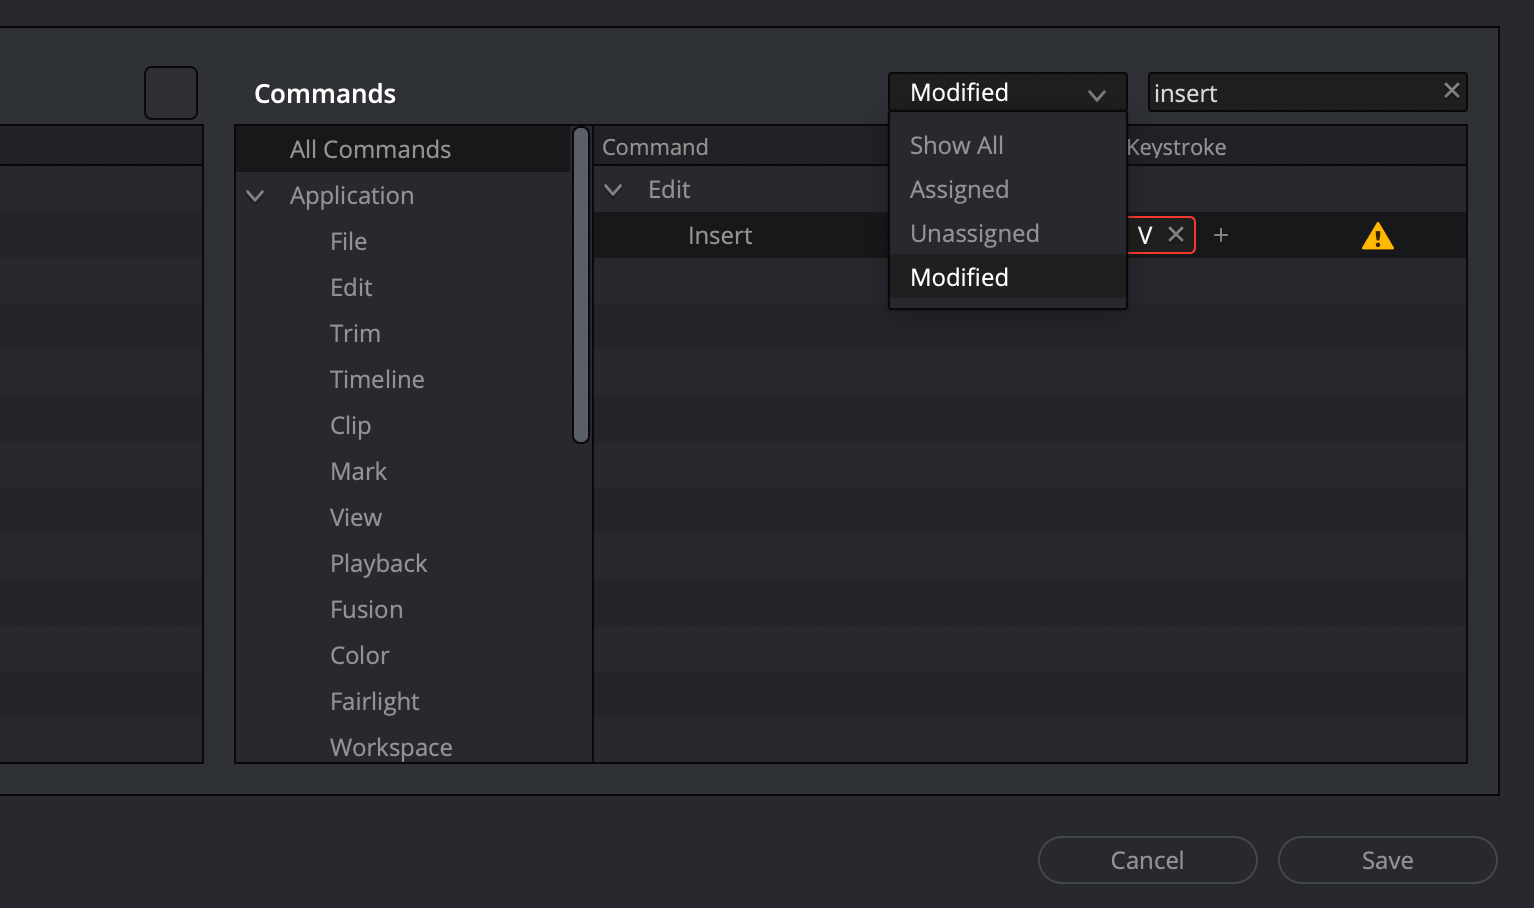
If you try to assign a keyboard shortcut or mapping to a key that is already mapped to another task for the same area of the Resolve application, you’ll receiving a warning.
If you try to assign a mapping to a key that is already in use, you will receive a warning.
DaVinci Resolve will allow you to save the mapping, but it will not work. You must manually remove the one you don’t need. This is done by clicking the “x” next to the mapping.
View Current Mappings
To see active mappings for any specific key or key combination, simply click the key (or keys) on the keyboard palette which will highlight them in red. DaVinci Resolve will then display the current tasks assigned. To remove a mapping, click on it under the Active Key column, and then on the right either change or remove the assignment.
Multiple tasks can be assigned to the same key for different areas of the DaVinci Resolve application such as the Edit Page vs Fairlight, etc.
View the unsaved changes by selecting ‘Modified’ from the dropdown menu.
View Modified Mappings
If you’re in the process of mapping your keyboard, you can view the current mappings by selecting modified from the dropdown menu in the Commands column area. This will display all of the mappings you’ve changed but haven’t saved yet.
Import, Export and Common NLE Presets
When you open the keyboard palette, the top right displays the keyboard preset in use. The default is of course DaVinci Resolve. When you make changes and click save, Resolve will prompt you to name the mappings as a custom preset. This will then be the active preset even if you close and re-open Resolve, or change projects.
The dropdown at the top right of the keyboard palette allows you to select a custom or default preset.
You can also also start by choosing custom default mappings from other non linear editing systems like Avid Media Composer, Final Cut Pro or Adobe Premiere. And finally, you can click the three dots to import or export a keyboard preset.
The keyboard command palette in Resolve allows you to create an ideal editing workspace that is portable to any DaVinci Resolve editing workstation!