How to Install LUTs in DaVinci Resolve & the Pocket Cinema Camera

A LUT can be installed on both your camera and post production software like DaVinci Resolve Studio. LUT stands for “lookup table” and it is basically a predetermined computation used for color grading.

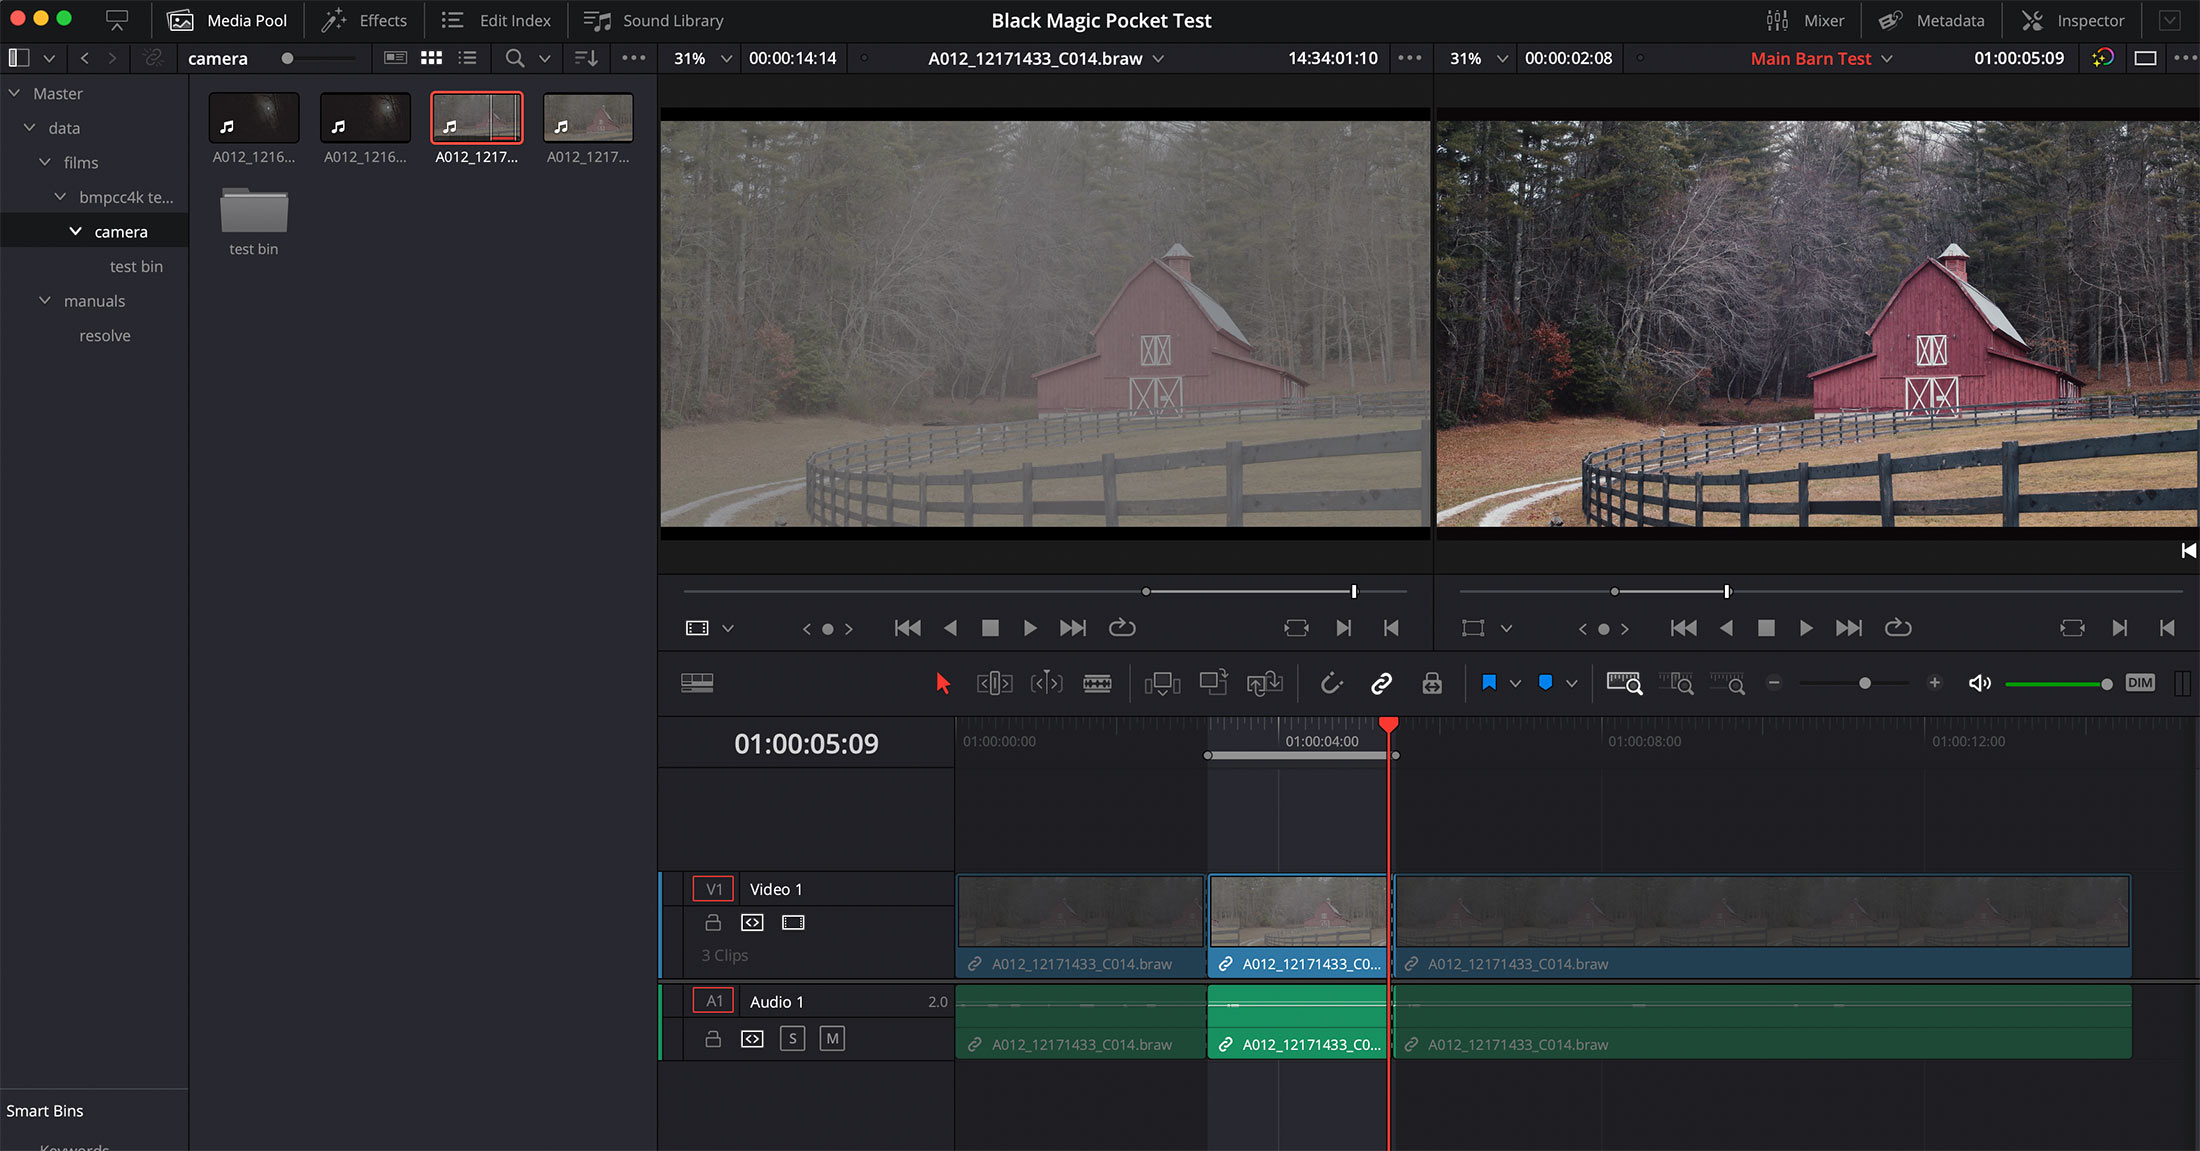
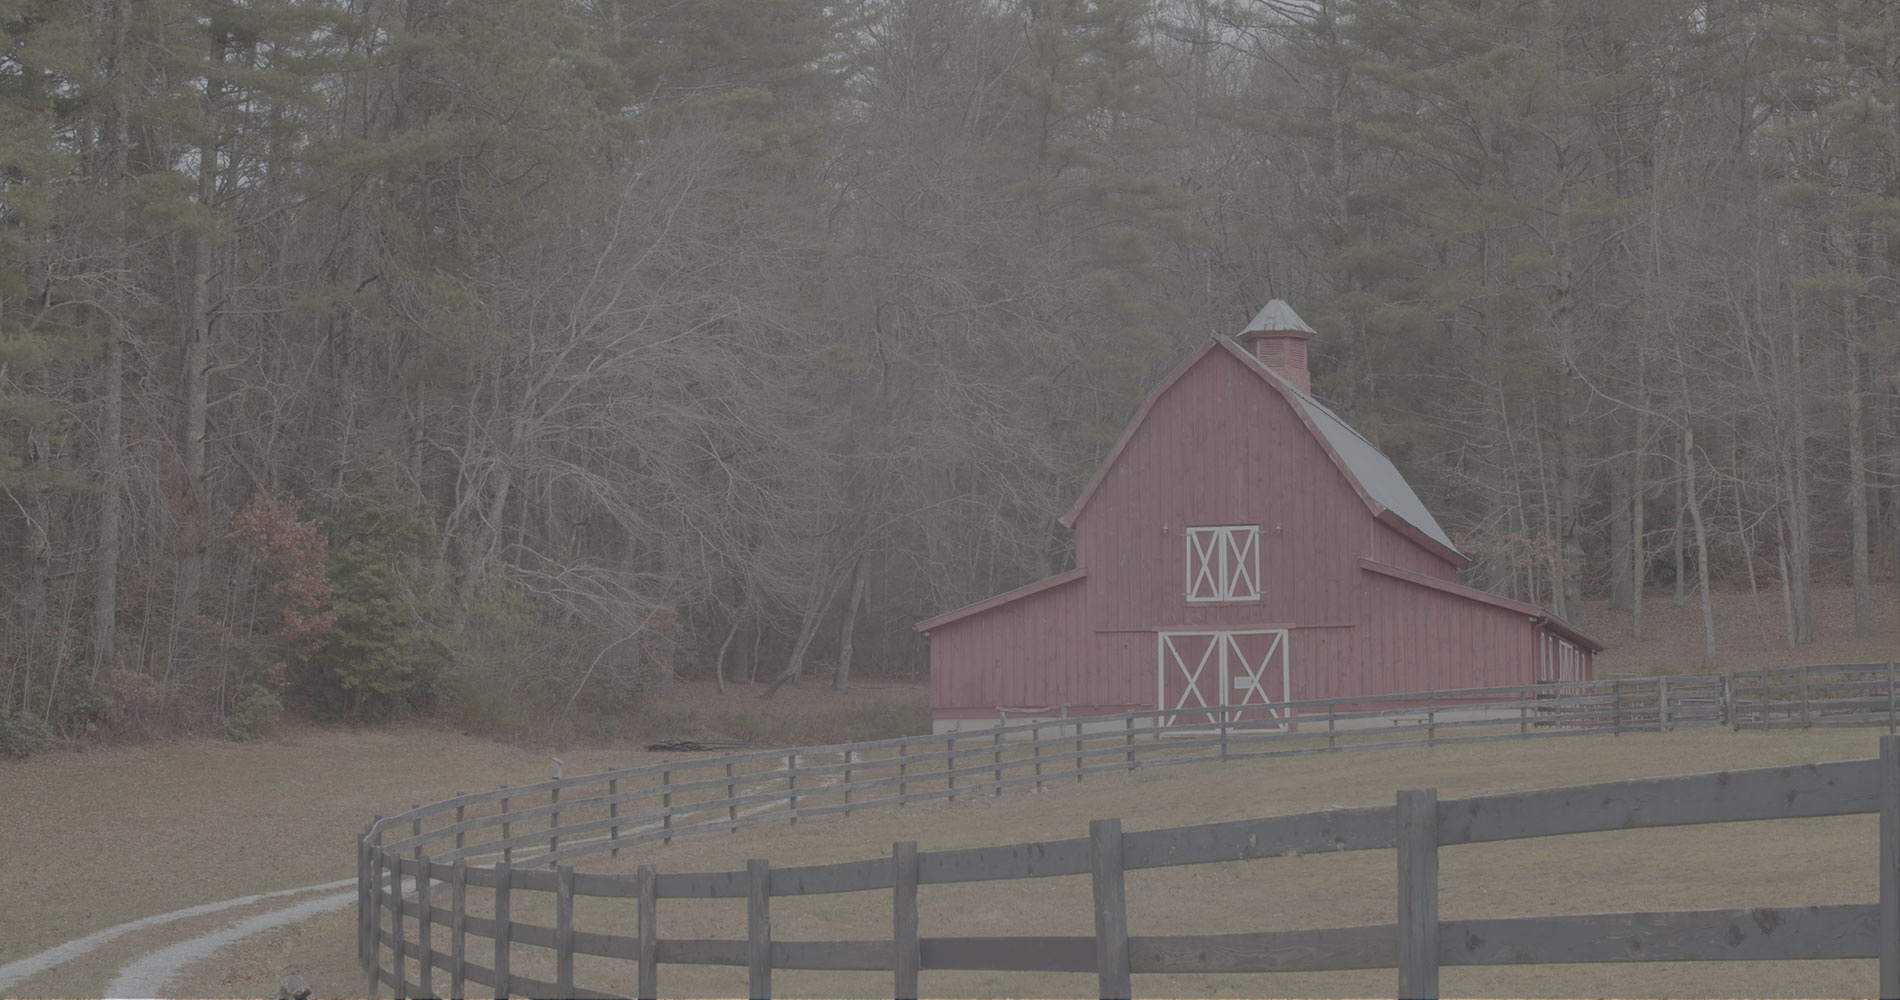
Example: Let's say you cut scenes from a controlled set with proper lighting and exposure. Once you color grade, you can create a LUT that allows you to rapidly apply the color grading to all of the footage.

Here’s a shot from the Black Magic Pocket Cinema 4K using the Meike 35mm lens. The camera was set to shoot BRAW which is essentially log. So all of the information is there, but no grading has been performed.

BRAW footage from the BMPCC4K without any color correction applied.

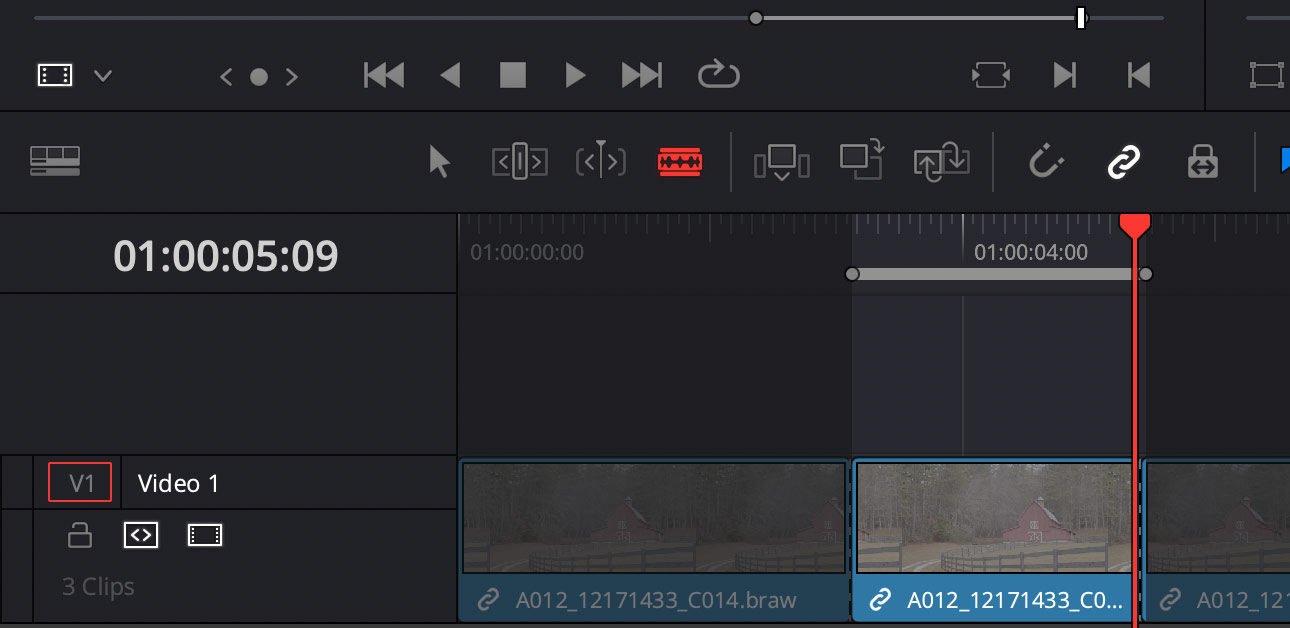
Next we’ll install a LUTs package in DaVinci Resolve from Roman Hense that will quickly transform the look of the image. We’re using Roman’s S21-Natural Soft LUT below.

The same BRAW image with a LUT applied from Roman Hense’s S21 LUT package

You can install LUTs on both cameras and an NLE. But I would never bake a LUT into your camera footage. However they are highly useful for monitoring on set so you can tell what the footage is going to look like after you’ve color corrected in post.

How To Install LUTs in DaVinci Resolve 17

This assumes you have a LUTs package ready to install. LUTs for Resolve will be .cube files. Once you have the files do the following:

1. Click the gear icon on the bottom right of Resolve.

2. Next choose Color Management and you’ll be presented with the following options:

The settings that display after you click the gear icon in Resolve.

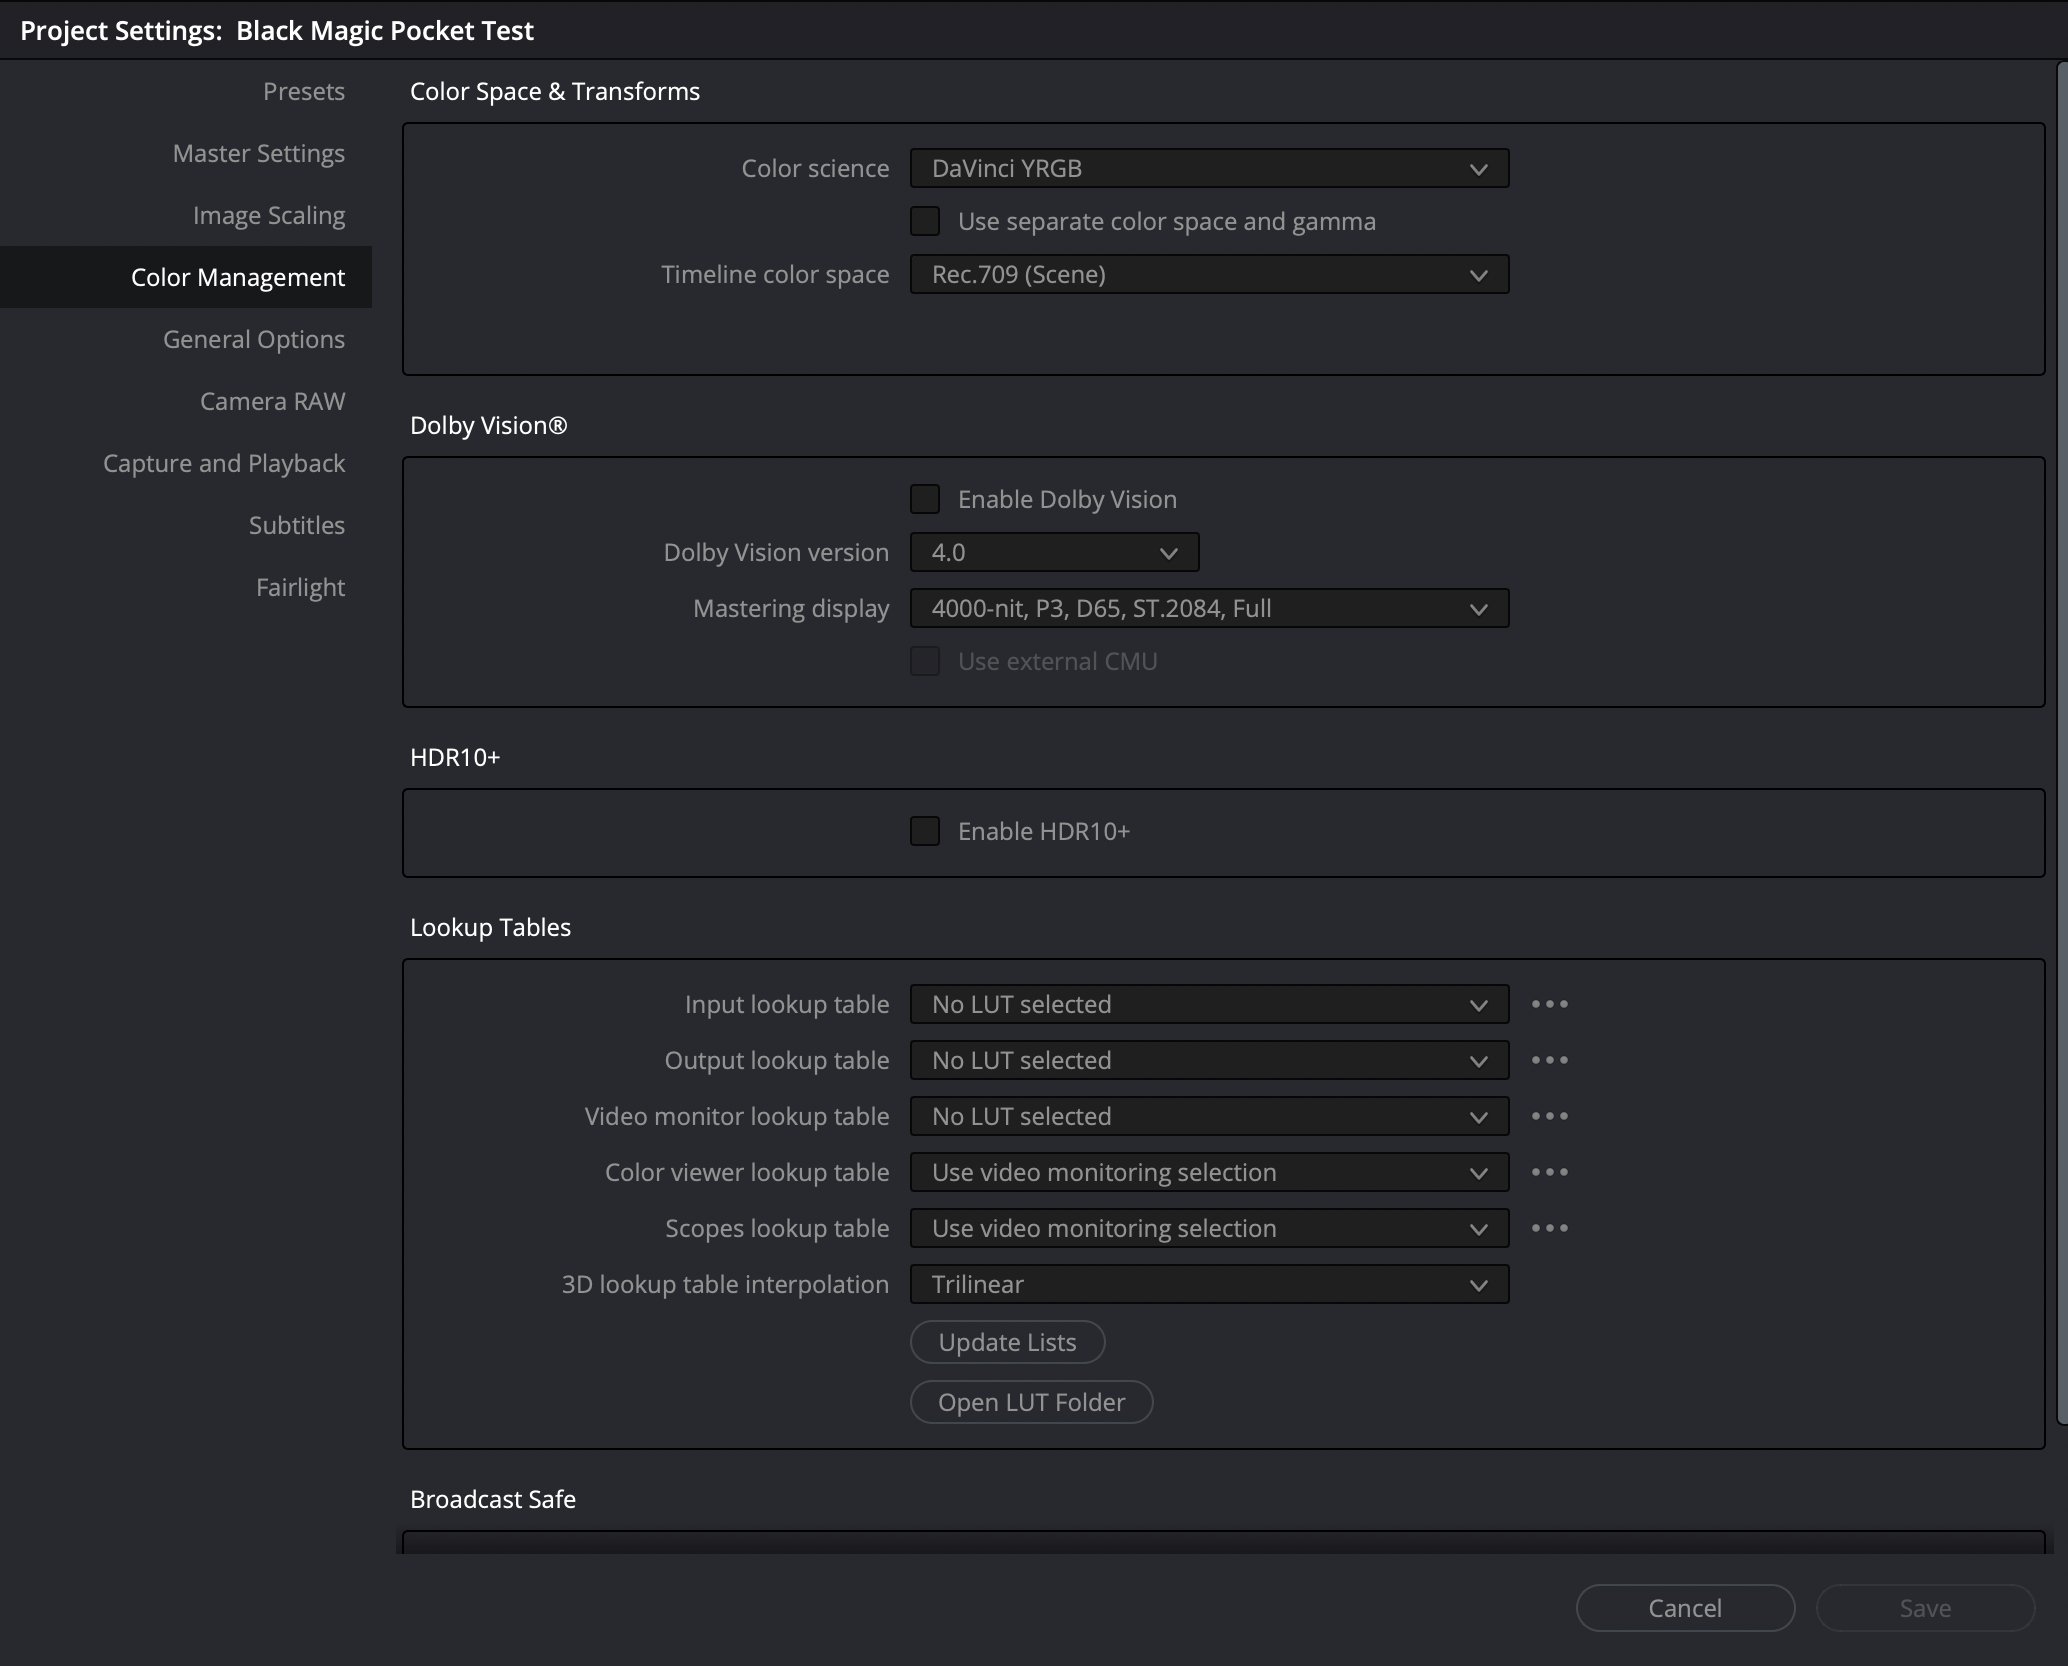
3. Click on Open LUT Folder and copy your .cube files into folder that opens up.

It's best to keep a LUTs packaged inside a folder. Move your .cube files into a folder, name it whatever makes sense to you and then drag and drop that folder in.

4. Click the Update Lists button.

5. For monitoring in DaVinci Resolve select a LUT from the Video Monitor Lookup Table dropdown.

How to Install LUTs on the Black Magic Pocket Cinema Camera

As I already mentioned, don’t bake a LUT into your footage while shooting. However if you’d like to install a LUTs packed on your camera for monitoring, that can help a lot on set. You’ll need to copy the LUTs files onto an external SSD drive (or SD/CFast card) and have this connected to the camera.

  1. Click the settings button to access the main menu.
  2. Select LUTS on the top right of the touch screen
  3. Select the double arrow on the bottom of the touch screen
  4. Choose IMPORT

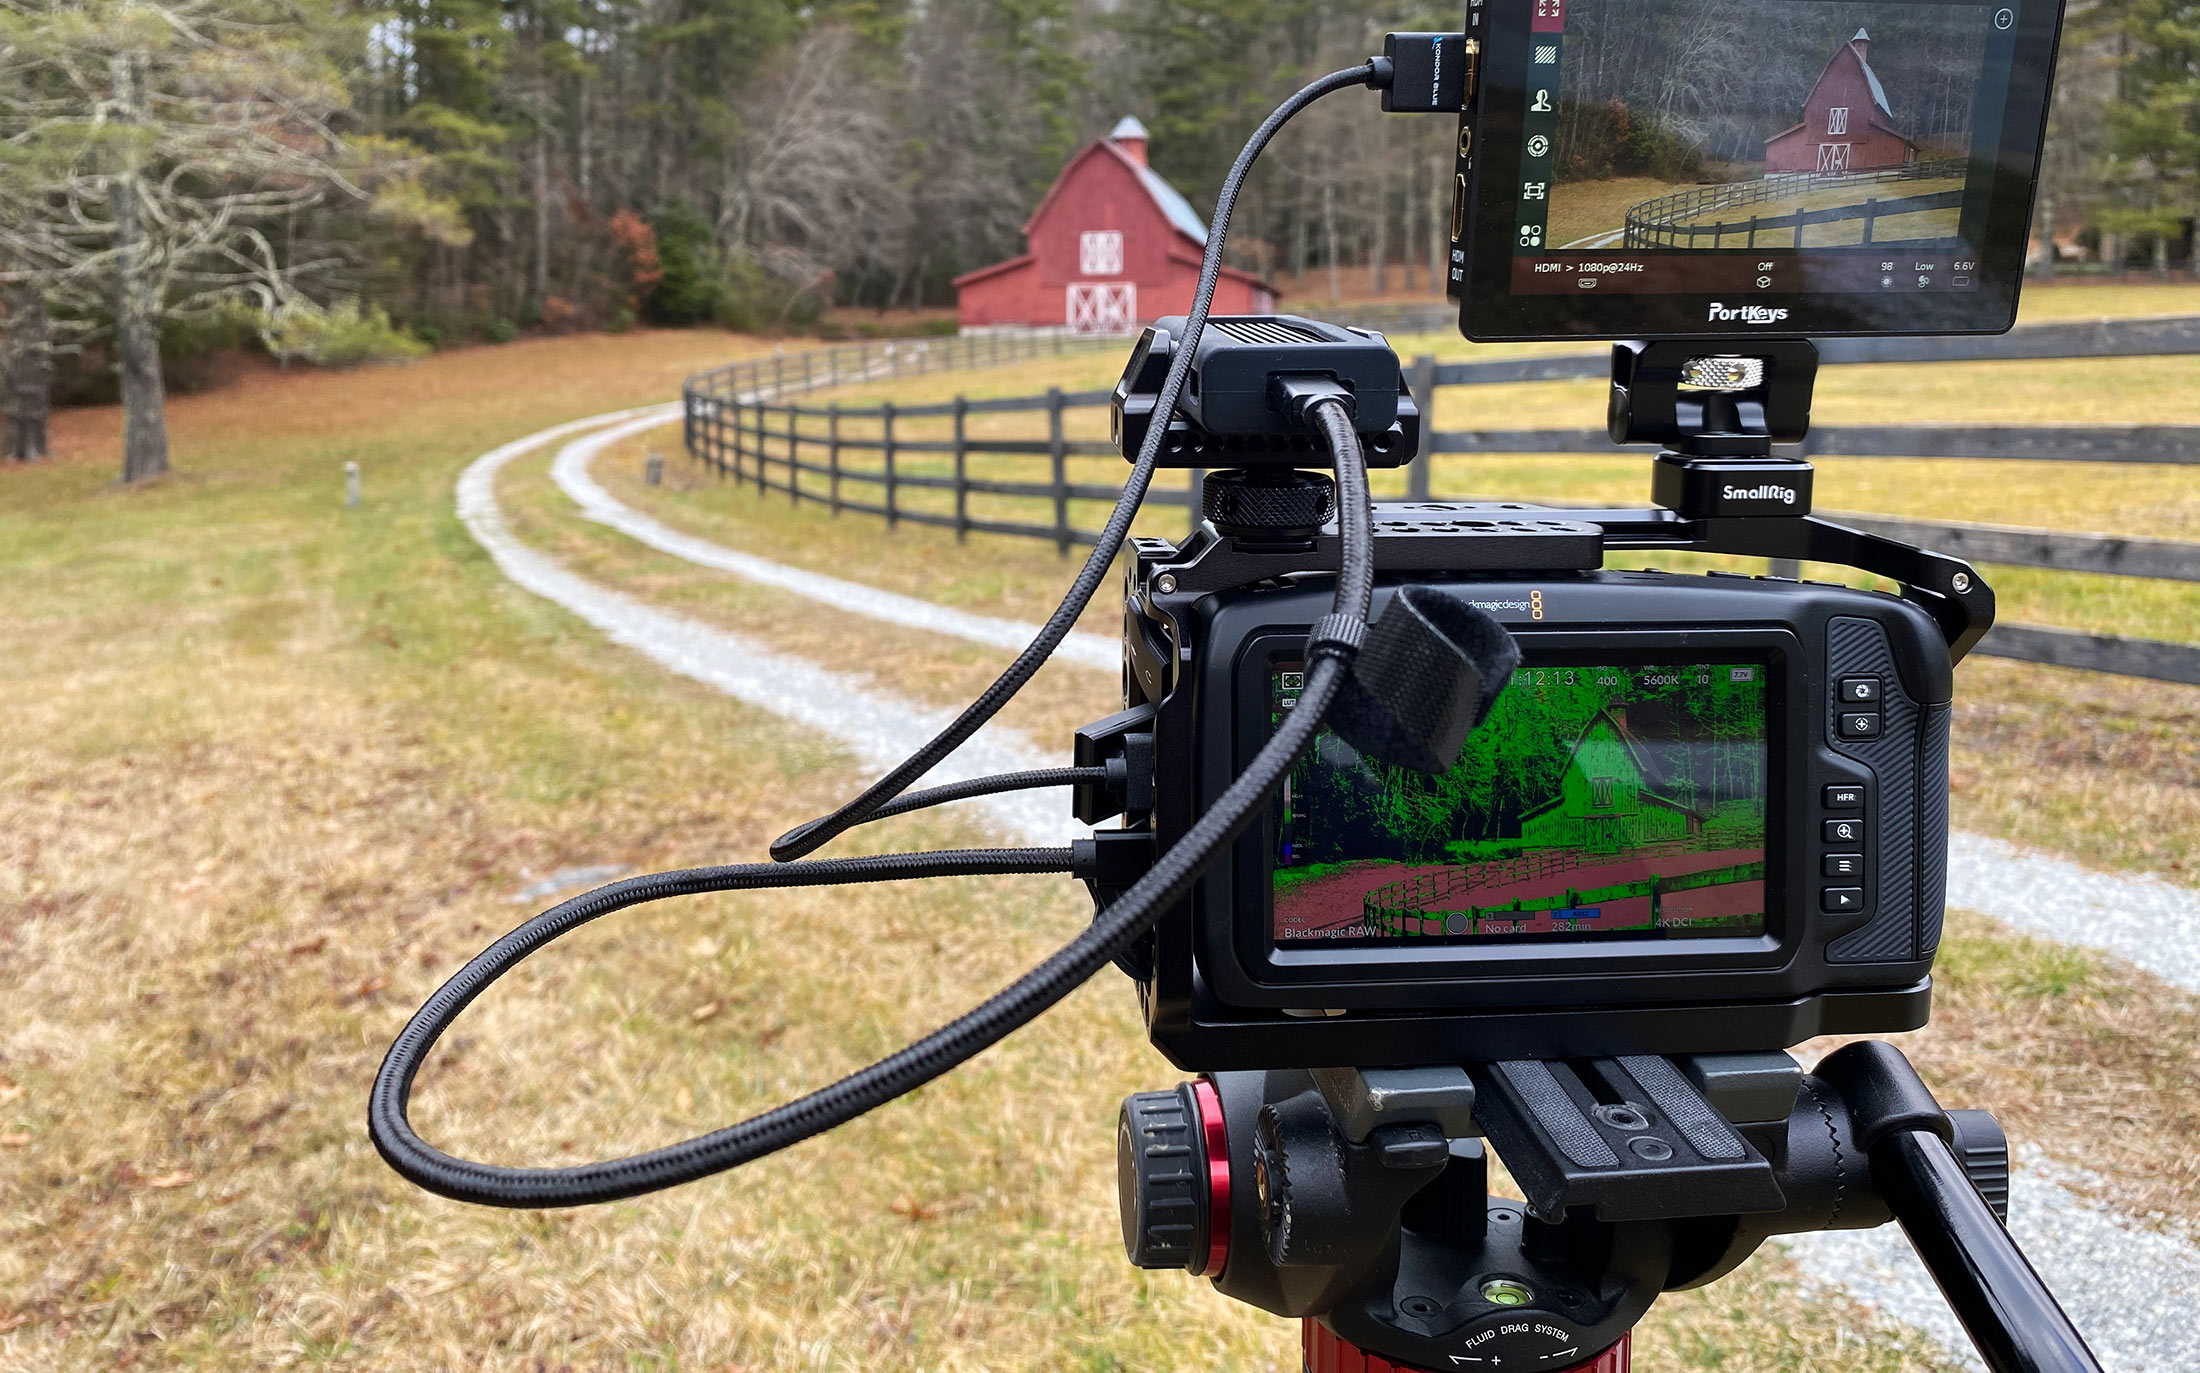
Now if you have an external monitor like the PortKeys LH5, you can view your footage on set with the LUT applied while recording in BRAW.

The S21 LUTs package used above from Roman Hense.

Where to Purchase LUTs Packages

There are many places you can purchase a LUTs package for your camera and/or Resolve. One that I’ve used is the S21 package from Roman Hense. Purchase it on Etsy.

How to Change Keyboard Shortcuts in DaVinci Resolve

If you’re a seasoned filmmaker, you know that when it comes to rapidly manipulating a timeline, the keyboard is king. And the great news is that DaVinci Resolve has a fully customizable keyboard palette to make editing a dream.

Mapping Commands

Let’s first look at mapping three simple commands to specific keys on the keyboard: Mark In, Mark Out, Clear In and Out.

  1. Click DaVinci Resolve in the top left and select Keyboard Customization. You can also hit Option + Command + K on the keyboard to get to the same spot.
  2. Select All Commands in the Commands column. Type “mark” in the right hand search box.
  3. Locate Mark In and Mark Out.
The keyboard command palette allows you to create shortcuts for menu commands for faster editing.

The keyboard palette will display any current mappings or shortcuts that are setup in Resolve. You can remove these by clicking on the “x” by the shortcut, and you can add your own by clicking the plus sign.

  1. Click the “+”
  2. Type in the keyboard command you’d like to use
  3. Click Save.
  4. Enter a custom name to save your keyboard mappings.

Replace Existing Keyboard Mappings

If you try to assign a keyboard shortcut or mapping to a key that is already mapped to another task for the same area of the Resolve application, you’ll receiving a warning.

If you try to assign a mapping to a key that is already in use, you will receive a warning.

DaVinci Resolve will allow you to save the mapping, but it will not work. You must manually remove the one you don’t need. This is done by clicking the “x” next to the mapping.

View Current Mappings

To see active mappings for any specific key or key combination, simply click the key (or keys) on the keyboard palette which will highlight them in red. DaVinci Resolve will then display the current tasks assigned. To remove a mapping, click on it under the Active Key column, and then on the right either change or remove the assignment.

Multiple tasks can be assigned to the same key for different areas of the DaVinci Resolve application such as the Edit Page vs Fairlight, etc.
View the unsaved changes by selecting ‘Modified’ from the dropdown menu.

View Modified Mappings

If you’re in the process of mapping your keyboard, you can view the current mappings by selecting modified from the dropdown menu in the Commands column area. This will display all of the mappings you’ve changed but haven’t saved yet.

Import, Export and Common NLE Presets

When you open the keyboard palette, the top right displays the keyboard preset in use. The default is of course DaVinci Resolve. When you make changes and click save, Resolve will prompt you to name the mappings as a custom preset. This will then be the active preset even if you close and re-open Resolve, or change projects.

The dropdown at the top right of the keyboard palette allows you to select a custom or default preset.

You can also also start by choosing custom default mappings from other non linear editing systems like Avid Media Composer, Final Cut Pro or Adobe Premiere. And finally, you can click the three dots to import or export a keyboard preset.

The keyboard command palette in Resolve allows you to create an ideal editing workspace that is portable to any DaVinci Resolve editing workstation!

How to Split Clips in DaVinci Resolve

If you’re a filmmaker who cuts your own films, a common task using your NLE is to add edit marks in the timeline. In the world of DaVinci Resolve this is called ‘Splitting Clips’ or using the Blade Tool.

Split a Single Clip (Edit Page)

To quickly add an edit in DaVinci Resolve use the Blade tool. I’m assuming you already have media imported into Resolve and a timeline created with at least one clip. From the Edit Page in Resolve:

  1. Click the blade icon to activate it (top left of timeline)
  2. Hover over a clip in the timeline. Your mouse pointer will turn into a razor. Simply click to split the clip.
Enable the Razor or Blade Tool in DaVinci Resolve by clicking the icon over the timeline.
To disable the blade tool once enabled, simply hit "A" on your keyboard and it will deactivate.

Split Using Menu & Keyboard

If you’d rather use the menu or the keyboard, from the Edit page:

  1. Move your playhead to where you want to split the clip and go to Timeline > Razor to add an edit at the playhead.
  2. Hit Command B (blade tool or razor)
  3. Hit Command \ (split clip)

Rejoin Split Clips

Sometimes you need to remove an edit mark. The great news is that it’s easy to do:

  1. Position your playhead at the edit mark
  2. Go to Timeline > Join Clips or Option \

Remove Section After Splitting a Clip

A handy way to speed up cutting in Resolve is to use the split clip combined with the play head position to remove a complete section of a clip.

Cut down on your clicks by using Command + Shift + Bracket to perform faster edits.
  1. Use the Razor (Blade) Tool to make an edit
  2. Position the Playhead
  3. Hit Command + Shift + Open Bracket to remove from the edit to the playhead
  4. Hit Command + Shift + Closed Bracket to remove from the playhead to the next edit

Split Clip from the Clip Page

And yet another way to add an edit on your timeline is from the DaVinci Resolve Clip Page. Once on the clip page (second icon bottom of screen) position the playhead and then Control + Click on the very top. Then click the scissor icon to split the clip.

You may be wondering what the difference is between Razor, Blade and Split Clip. From everything I’ve seen, there essentially is no difference. They will all cut through multiple tracks at once. If you edit with the blade tool, you can still use the rejoin clip option from the menu.

Also, if you like to cut fast, mapping your own keys will make using the Blade tool even faster.