Pay out globally and facilitate multi-party payments
Platform
Let customers accept payments within your platform
Our Mission
To train aspiring filmmakers in the craft from development through post production so students are not reliant on others to push their film careers forward. We do this without the financial weight of traditional film school and our training is backed by a guarantee that is unmatched in the film education space!
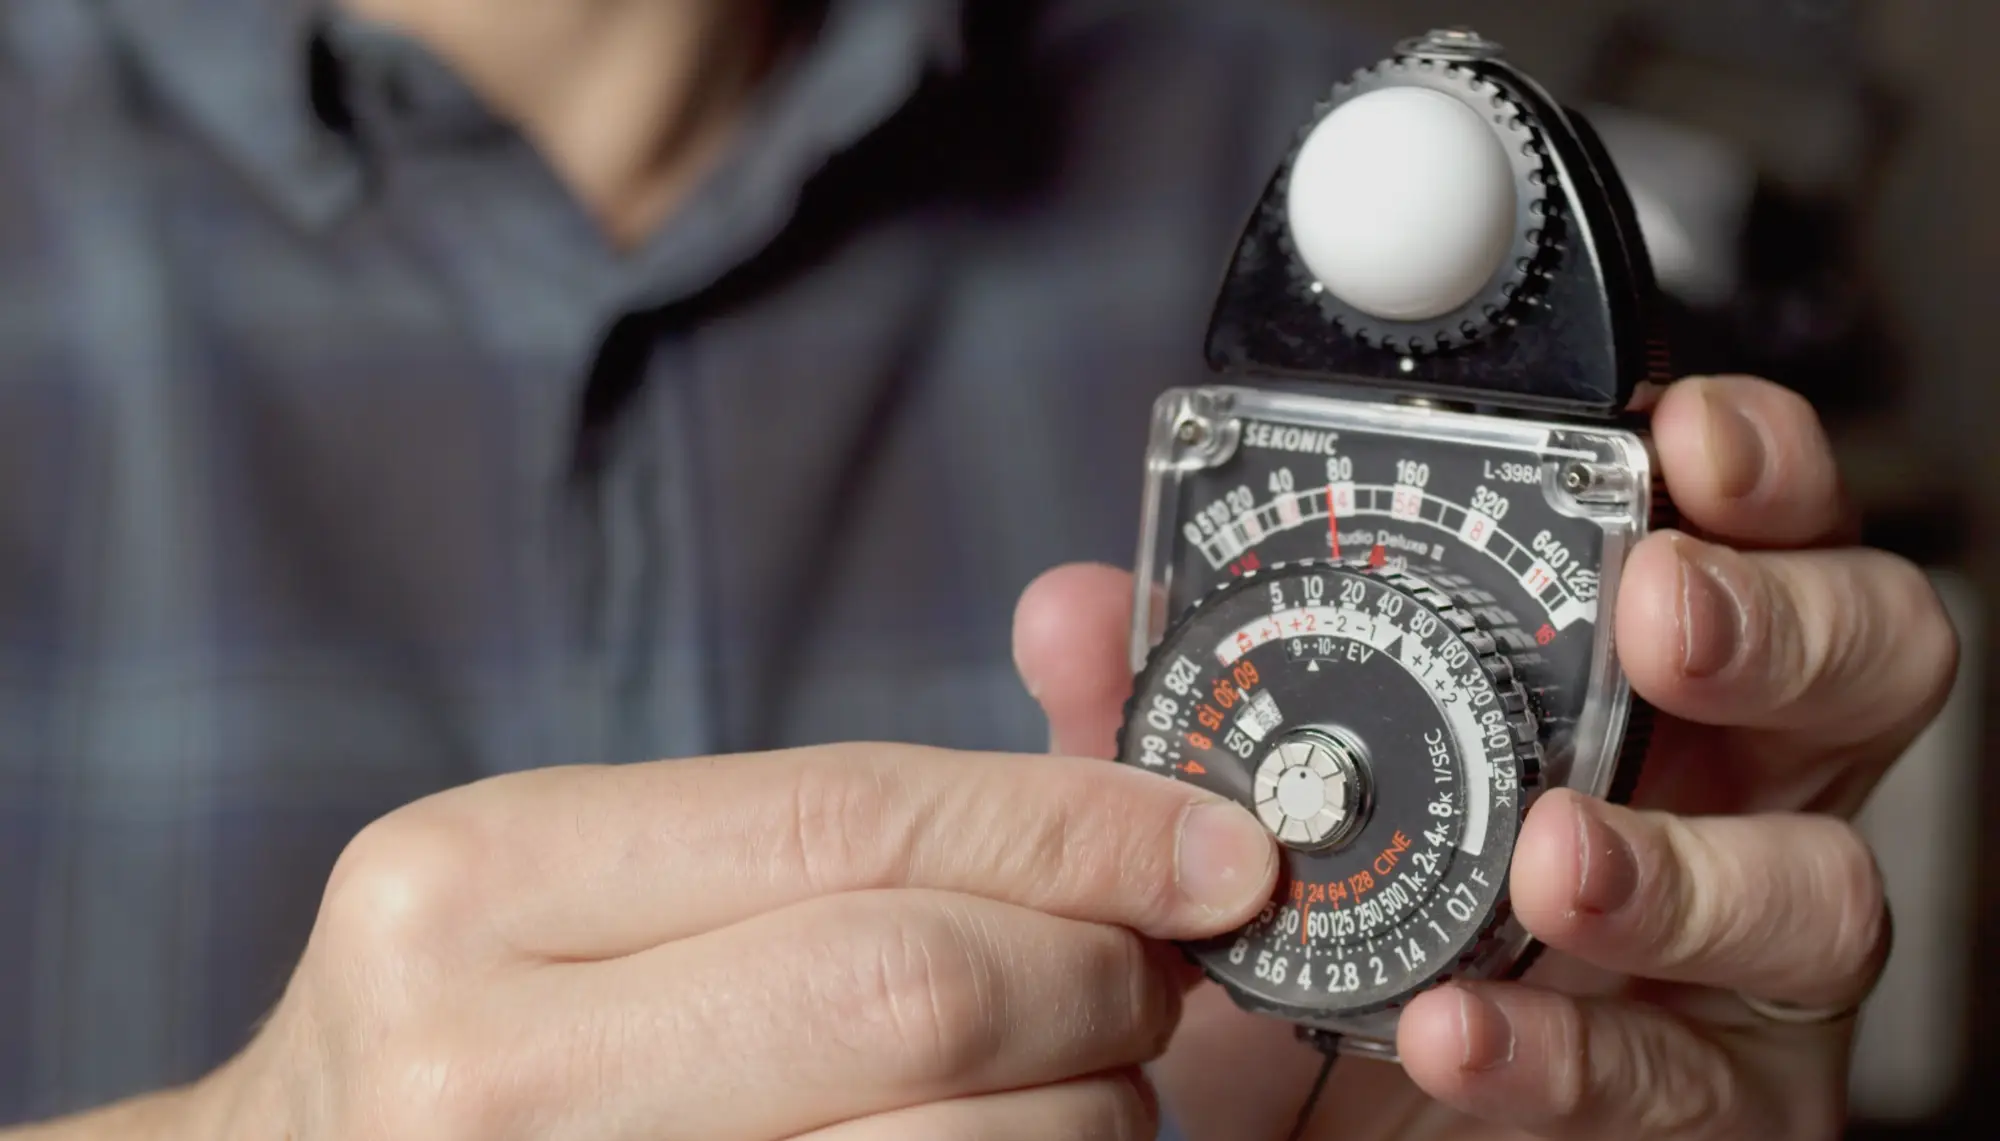
An incident light meter measure light falling on a subject. You set your ISO, take a measurement and based on your frame rate it will tell you what your aperture should be. The Sekonic L-398A assumes a 180 degree shutter for filmmaking. This post walks you through how to use this light meter step by step.
There are various types of light meters. Analog and digital. Incident and spot. For this lesson we’ll take a look at the tried and true Sekonic L-398A. It’s an analog incident light meter. No batteries. Bullet proof. An incident light meter measures light by taking a reading of the light hitting it (vs a spot meter).
So let’s imagine you’re on set. You’ve used lights to set the required mood, to entertain your audience, to lead them down the emotional journey you have for them. You’ve created depth. You’ve anchored everything on motivated lights. And you’re standing there with a Sekonic L-398A and your cinema camera—here’s what you would do:
1) Set Your Camera ISO
Remember, ISO is *typically* not an exposure tool. It can be, but it’s really what we expose to. See the exposure layers article to learn more on this. For now, unless you have a specific reason not to, you need to have your digital camera set to native ISO. For most Blackmagic Design cameras this would be ISO 400.
And with that, the first thing you do on the light meter is tell it the ISO you’re running at. The light meter needs to know our foundation exposure layer. There’s a little rough spot on the clear dial that will allow you to adjust the ISO.
*Note—this also assumes a 180° shutter setting.
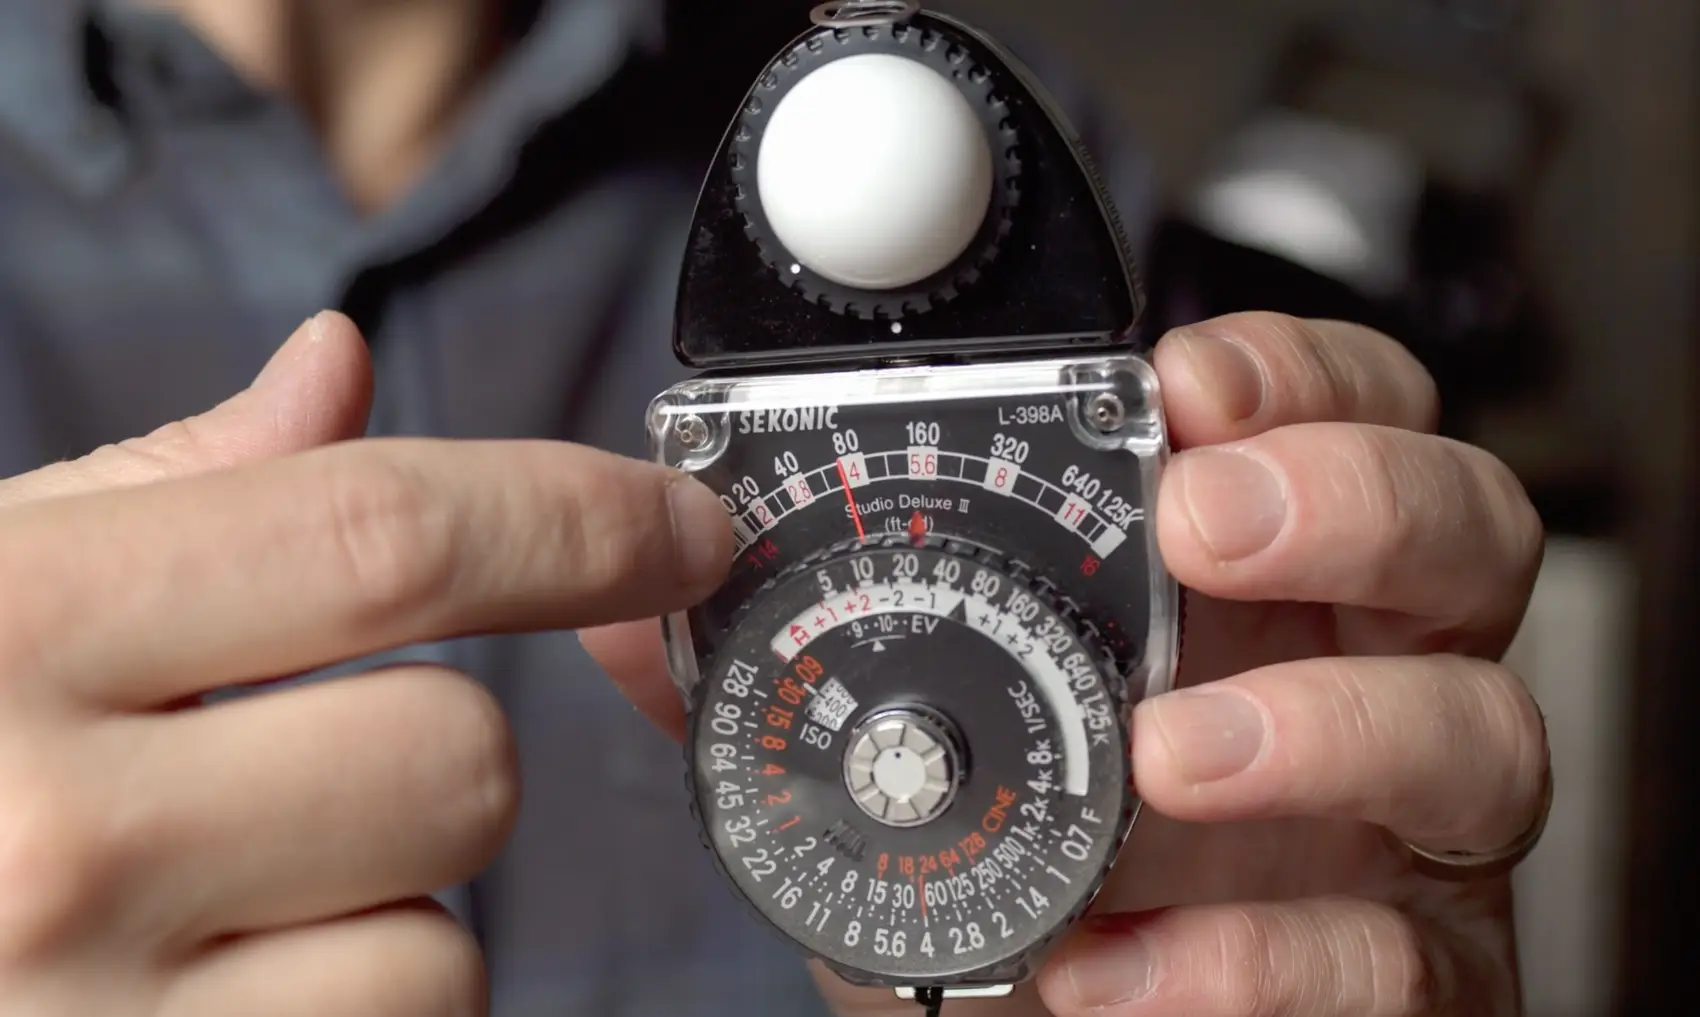
2) Take A Light Reading
Next up, we take a light reading which is done via the center silver button. Tip: There are two settings for this button. If you push it down and move the light meter around and the wand continues to go back and forth with lighting changes, this isn’t the setting you want.
Push the button down and turn it to the left. When you let go it should pop up a little higher. Now when you take a light reading, it will hold the reading vs continuing to adjust.
With that set, hold the light meter in front of your talent’s face (or where they will be) and point the lumisphere (white globe) at the camera lens. NOT at your key light. Push the button. The white number where the wand stops is the foot candles reading.
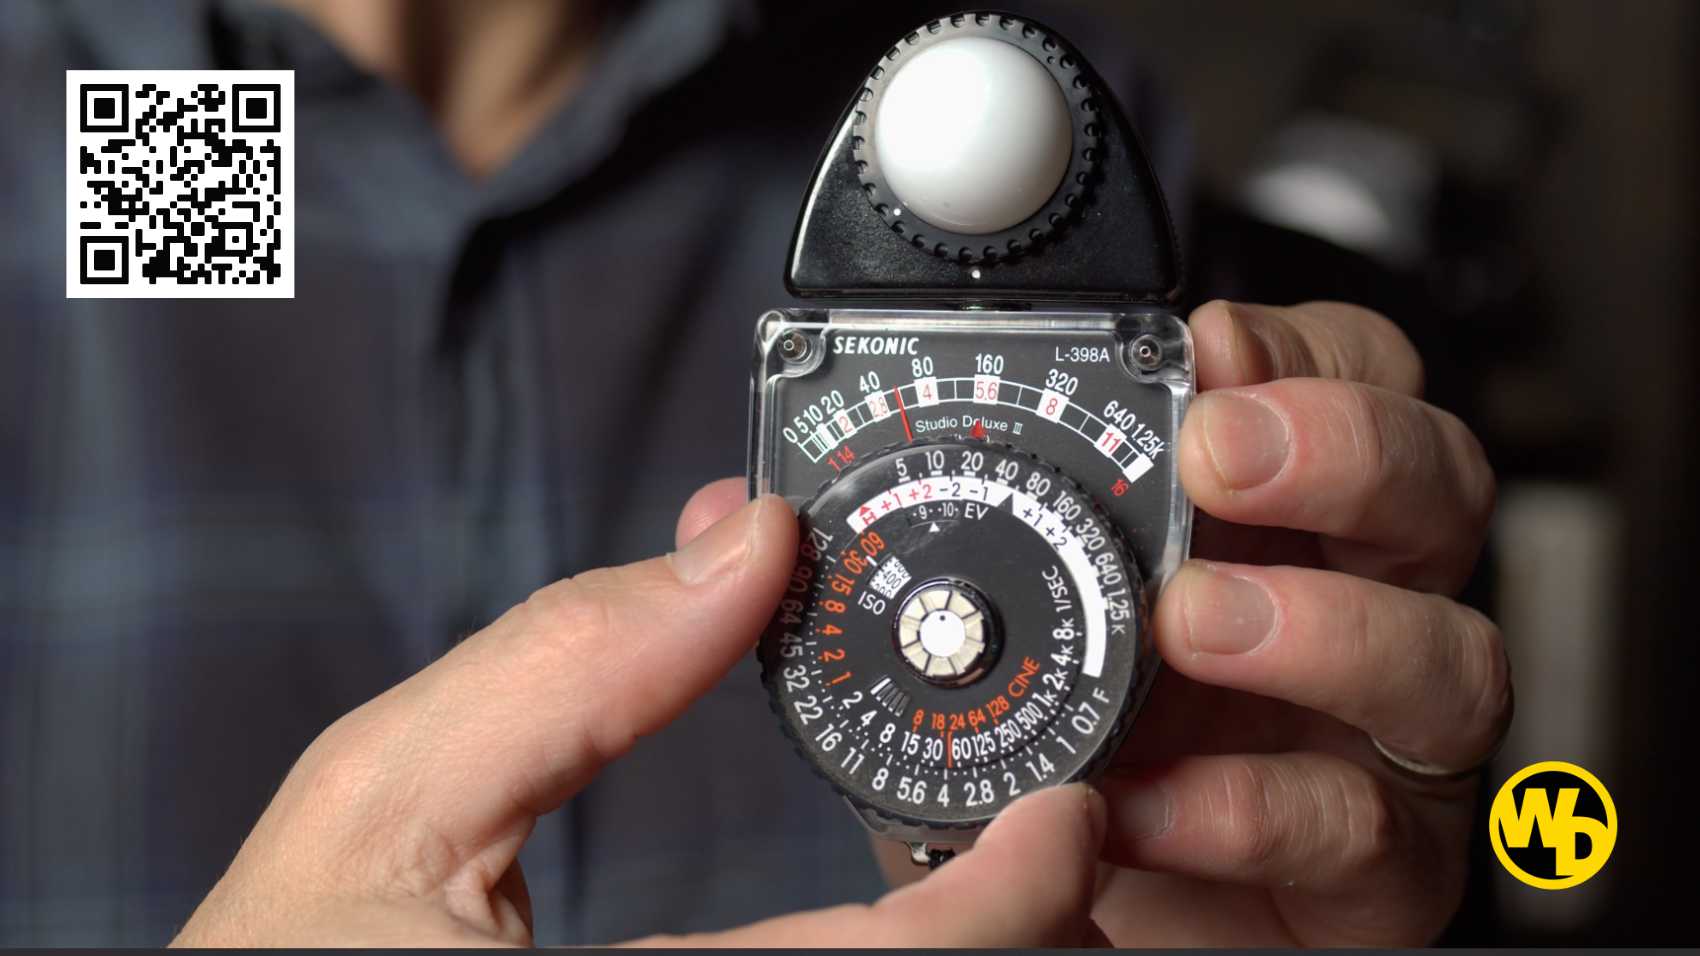
3) Match Foot Candle & Determine Aperture
Take more than one reading to ensure accuracy. Now let’s say the little wand stopped at 60 foot candles—foot candles is a way to measure the intensity of the light. Next you need to move the entire dial (vs the inner dial when setting ISO) and place the black arrow at 60, or whatever foot candle rating you measured.
Once you’ve done that look towards the bottom of the dial. You’ll see frame rates identified in an orange font (a bold line goes from 24 as we’re often shooting at this frame rate for narrative film). Assuming 24 frames, follow the line down to the numbers at the very bottom. This is what your F-Stop should be on the camera. So for our example of 60 foot candles and 24 frames we’re just under an F-Stop of 4. Cool right? But there’s more…
4) Camera Aperture Requirements
What if you’re in a situation where you can’t change aperture? Maybe you want a shallow depth of field or you have multiple actors moving around in the shot which would require an aperture of at least 5.6 at a minimum. What would you do?
Change the top exposure layer, which is LIGHT.
For this example, if we needed to be at an aperture of 2 then we would what? Decrease our key light and take readings until the F-Stop setting on the light meter hits 2. If we required a deeper depth of field, we would need to increase our key light until the F-Stop setting on the light meter reflected this.
Make sense? And of course after adjusting the key light, adjust other corresponding lights to keep the look you had before. And then take a final reading on your Sekonic to ensure the additional lighting changes didn’t put you too far over.
5) How To Use The Sekonic L-398A Outside
If you’re outside (even on a cloudy day) it will be too bright to use the light meter like we just did. You need to remove the small metal filter from the back of the Sekonic L-398A and insert this near the top of the lumisphere.
The card is called a “high card” and it will allow you to use the light meter with accuracy outside. Now with that in, you’ll want to set your ISO as we did above and then take a reading with the lumisphere pointed at the camera lens.
This time instead of looking at the white number, look at the orange number. And then instead of using the black arrow to match the reading, use the orange arrow. Once the orange number reading and the orange arrow correspond, drop below as before for the right aperture setting for your camera.
What if it tells you to go to an F-Stop of 20? When you’re dealing with too much light. The easiest solution is to add an ND filter to your lens. ND filters are like sun glasses for your camera. They come in various makes and models. We personally use a variable ND filter from Polar Pro. *Tip: Whenever you purchase filters, get them at a large size like 82mm. Then use brass step up rings to use these filters on any of your lenses.
In summary, we’ve really enjoyed the Sekonic L-398A. It operates in all types of weather. It’s accurate and should always be in your camera case even if you’re using a digital and/or spot meter. Because when electronics fail or batteries die, your Sekonic analog light meter will save the day.
Video Version:
Do You Want To Direct?
We guide emerging filmmakers around the pitfalls of conventional film school. We teach you the craft and prepare you for what's next. All backed by the finest guarantee in the film education space.
Do you want to make movies?
We guide emerging filmmakers around the pitfalls of conventional film school. We empower them to master the craft and seize control of their filmmaking career.
There's nothing else quite like it. Enroll today or find out more below:


 SaaS
SaaS Manage recurring bills and subscriptions
 Marketplaces
 Platform